Table of contents
- What You’ll Need For Your Velvet Crochet Bunny
- Stitch Abbreviations Used
- Safety First: Eyes for Young Children
- Creating Your Small Velvet Crochet Bunny (30 cm)
- Creating Your Large Velvet Crochet Bunny (37 cm)
- Velvet Crochet Bunny: Hook Size & Tension Tips
- Your Questions Answered
- Bringing Your Velvet Crochet Bunny to Life
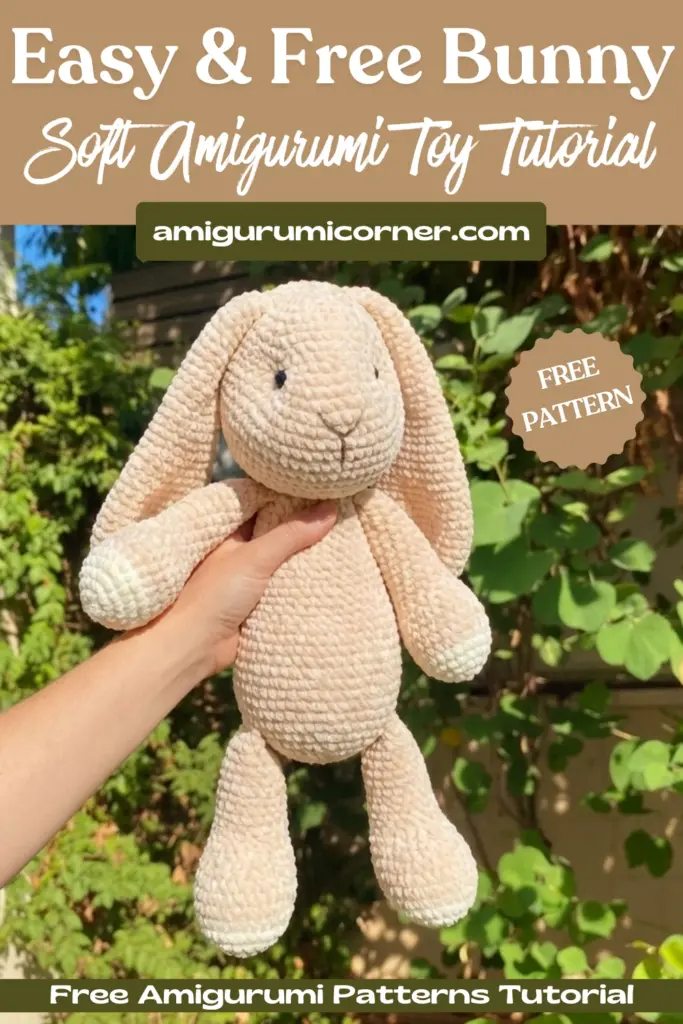
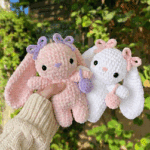
There’s something magical about working with velvet yarn the way it flows through your fingers, soft as a whisper, promising to become something truly huggable. These Velvet Crochet Bunny Friends are more than just a crochet project; they’re future companions waiting to be brought to life, each stitch an act of love that transforms luxurious Bohème Velvet into a cherished treasure.
Whether you’re crafting a sweet 30 cm bunny for a little one’s first stuffed friend or creating the larger 37 cm version to become a bedroom guardian, this pattern guides you through every step with patience and precision. The combination of plush texture and thoughtful construction creates bunnies with personality those carefully shaped eye sockets and embroidered Y-shaped noses give each one a gentle, endearing expression that’ll melt hearts instantly.
Perfect for confident intermediate crocheters ready to explore amigurumi techniques, this Velvet Crochet Bunny pattern introduces you to shaping, color changes, and expressive finishing details. The satisfaction of watching your bunny take shape, round by round, is absolutely worth every moment spent on this delightful project.
Remember it later!
Planning to try this soon? Pin it for a quick find later!
What You’ll Need For Your Velvet Crochet Bunny
For Small Bunny (30 cm):
- Colour A: 150 g Bohème Velvet (100% Polyester, 50g/70m)
- Colour B: 50 g Bohème Velvet
- 50 cm black yarn for nose and mouth
- Safety eyes: 14 mm
- Polyester filling
- Crochet hook: 3.5-4.0 mm
For Large Bunny (37 cm):
- Colour A: 200 g Bohème Velvet
- Colour B: 50 g Bohème Velvet
- 50 cm black yarn for nose and mouth
- Safety eyes: 16 mm
- Polyester filling
- Crochet hook: 3.5-4.0 mm
Gauge: 19 dc/10 cm (Small Bunny) or 17 dc/10 cm (Large Bunny)
Skill Level: Beginner
Note: The stated yarn amounts are for guidance. Your actual usage may vary based on tension and hook size.
Stitch Abbreviations Used
- st – Stitch
- mr – Magic ring
- ch – Chain stitch
- sl st – Slip stitch
- dc – Double crochet
- 2 dc inc – Increase (2 dc into 1 st)
- dc 2 tog – Decrease (2 dc worked together)
- * … * – Repeat instructions between stars for the whole round/row or number indicated after x
- (..) – Total number of stitches at end of round
Work in spiral rounds unless otherwise specified. To finish, join with a slip stitch, leave 20 cm tail, cut yarn, and pull through final stitch.
Safety First: Eyes for Young Children
Important: If you’re creating this Velvet Crochet Bunny for children aged 0-3 years, special eye mounting procedures are required for safety. The eye ends must be melted and specially stitched to prevent choking hazards.
Creating Your Small Velvet Crochet Bunny (30 cm)

Body (Colour A)
- Round 1: mr with 8 dc (8)
- Round 2: 2 dc inc (16)
- Round 3: 1 dc, 2 dc inc (24)
- Round 4: 2 dc, 2 dc inc (32)
- Round 5: 3 dc, 2 dc inc (40)
- Round 6: 4 dc, 2 dc inc (48)
- Rounds 7-10: 48 dc (48)
- Round 11: 4 dc, dc 2 tog (40)
- Rounds 12-14: 40 dc (40)
- Round 15: 3 dc, dc 2 tog (32)
- Round 16: 32 dc (32)
- Round 17: 2 dc, dc 2 tog (24)
- Rounds 18-21: 24 dc (24)
- Round 22: 1 dc, dc 2 tog (16)
- Rounds 23-25: 16 dc (16)
Add filling to the body before continuing.
Head (Colour A)
- Round 1: mr with 6 dc (6)
- Round 2: 2 dc inc (12)
- Round 3: 2 dc inc (24)
- Round 4: 24 dc (24)
- Round 5: 3 dc, 2 dc inc, 1 dc, 2 dc inc, 9 dc, 2 dc inc, 1 dc, 2 dc inc, 6 dc (28)
- Round 6: 7 dc, 2 dc inc x 2, 12 dc, 2 dc inc x 2, 5 dc (32)
- Round 7: 6 dc, 2 dc inc, 2 dc, 2 dc inc, 2 dc, 2 dc inc, 9 dc, 2 dc inc, 2 dc, 2 dc inc, 2 dc, 2 dc inc, 3 dc (38)
- Round 8: 4 dc, 2 dc inc, 2 dc, 2 dc inc, 4 dc, 2 dc inc, 2 dc, 2 dc inc, 8 dc, 2 dc inc, 8 dc, 2 dc inc, 4 dc (44)
- Round 9: 7 dc, 2 dc inc, 3 dc, 2 dc inc, 5 dc, 2 dc inc, 3 dc, 2 dc inc, 22 dc (48)
Position the safety eyes between rounds 9 and 10.
- Rounds 10-12: 48 dc (48)
- Round 13: 7 dc, dc 2 tog, 2 dc, dc 2 tog, 3 dc, dc 2 tog, 2 dc, dc 2 tog, 11 dc, dc 2 tog, 7 dc, dc 2 tog, 4 dc (42)
- Round 14: 5 dc, dc 2 tog (36)
- Round 15: 4 dc, dc 2 tog (30)
- Round 16: 3 dc, dc 2 tog (24)
- Round 17: dc 2 tog (12)
- Round 18: dc 2 tog (6)
Fill the head firmly. Cut yarn, thread through remaining stitches, pull tight, and sew closed.
Shaping the Eye Sockets
This step gives your bunny that sweet, expressive face! Insert your needle beneath the head and bring it up on the inner side of one eye. Sew over a stitch at the eye stem, then bring the needle back out beneath the head. Move to the next stitch and repeat for the other eye. Gently pull the thread to create natural indentations around the eyes these eye sockets bring so much personality! Hold the tension and tie two secure knots. This technique can be done before or after mounting the eyes.
Embroidering the Face
Using your black yarn, embroider the nose in a Y-shape. This classic detail gives your velvet crochet bunny that adorable, timeless expression.
Ears (Colour A, Make 2)
- Round 1: mr with 6 dc (6)
- Round 2: 2 dc inc (12)
- Round 3: 1 dc, 2 dc inc (18)
- Round 4: 2 dc, 2 dc inc (24)
- Round 5: 3 dc, 2 dc inc (30)
- Rounds 6-11: 30 dc (30)
- Round 12: 3 dc, dc 2 tog (24)
- Rounds 13-17: 24 dc (24)
- Round 18: 2 dc, dc 2 tog (18)
- Rounds 19-22: 18 dc (18)
- Round 23: 1 dc, dc 2 tog (12)
- Rounds 24-27: 12 dc (12)
- Round 28: 1 dc, dc 2 tog (8)
- Rounds 29-32: 8 dc (8)
Sew the ears onto the head, positioning them as shown in the reference photos. Then attach the completed head to the body.
Arms (Colours A & B, Make 2)
Start with Colour B.
- Round 1: mr with 6 dc (6)
- Round 2: 2 dc inc (12)
- Round 3: 1 dc, 2 dc inc (18)
Switch to Colour A.
- Round 4: 2 dc, 2 dc inc (24)
- Rounds 5-6: 24 dc (24)
- Round 7: 2 dc, dc 2 tog (18)
- Rounds 8-9: 18 dc (18)
- Round 10: 1 dc, dc 2 tog (12)
- Rounds 11-21: 12 dc (12)
- Round 22: dc 2 tog (6)
Add filling to the arms and sew them onto the body at the shoulders.
Legs (Colours A & B, Make 2)
Start with Colour B.
- Round 1: 5 ch, 2 dc in 2nd ch from the hook, 2 dc, 3 dc in the last ch, 2 dc on the opposite side, 1 dc in the last ch (10)
- Round 2: 2 dc inc, 3 dc, 2 dc inc x 3, 2 dc, 2 dc inc (15)
- Round 3: 2 dc inc x 2, 4 dc, 2 dc inc x 5, 3 dc, 2 dc inc (23)
Switch to Colour A.
- Rounds 4-5: 23 dc (23)
- Round 6: 1 dc in the back loop (23)
- Round 7: 10 dc, dc 2 tog x 4, 5 dc (19)
- Round 8: dc 2 tog x 2, 5 dc, dc 2 tog x 3, 4 dc (14)
- Round 9: 6 dc, dc 2 tog x 2, 4 dc (12)
- Rounds 10-22: 12 dc (12)
- Round 23: dc 2 tog (6)
Fill the legs and attach them to the body, positioning for a sweet sitting pose.
Creating Your Large Velvet Crochet Bunny (37 cm)

Body (Colour A)
- Round 1: mr with 8 dc (8)
- Round 2: 2 dc inc (16)
- Round 3: 1 dc, 2 dc inc (24)
- Round 4: 2 dc, 2 dc inc (32)
- Round 5: 3 dc, 2 dc inc (40)
- Round 6: 4 dc, 2 dc inc (48)
- Round 7: 5 dc, 2 dc inc (56)
- Round 8: 6 dc, 2 dc inc (64)
- Rounds 9-12: 64 dc (64)
- Round 13: 6 dc, dc 2 tog (56)
- Rounds 14-15: 56 dc (56)
- Round 16: 5 dc, dc 2 tog (48)
- Round 17: 48 dc (48)
- Round 18: 4 dc, dc 2 tog (40)
- Rounds 19-22: 40 dc (40)
- Round 23: 3 dc, dc 2 tog (32)
- Rounds 24-26: 32 dc (32)
- Round 27: 2 dc, dc 2 tog (24)
- Rounds 28-32: 24 dc (24)
Add filling to the body.
Head (Colour A)
- Round 1: mr with 6 dc (6)
- Round 2: 2 dc inc (12)
- Round 3: 2 dc inc (24)
- Round 4: 24 dc (24)
- Round 5: 3 dc, 2 dc inc, 1 dc, 2 dc inc, 9 dc, 2 dc inc, 1 dc, 2 dc inc, 6 dc (28)
- Round 6: 7 dc, 2 dc inc x 2, 12 dc, 2 dc inc x 2, 5 dc (32)
- Round 7: 32 dc (32)
- Round 8: 6 dc, 2 dc inc, 2 dc, 2 dc inc, 2 dc, 2 dc inc, 9 dc, 2 dc inc, 2 dc, 2 dc inc, 2 dc, 2 dc inc, 3 dc (38)
- Round 9: 4 dc, 2 dc inc, 2 dc, 2 dc inc, 4 dc, 2 dc inc, 2 dc, 2 dc inc, 8 dc, 2 dc inc, 8 dc, 2 dc inc, 4 dc (44)
- Round 10: 7 dc, 2 dc inc, 3 dc, 2 dc inc, 5 dc, 2 dc inc, 3 dc, 2 dc inc, 22 dc (48)
- Round 11: 5 dc, 2 dc inc, 3 dc, 2 dc inc, 7 dc, 2 dc inc, 3 dc, 2 dc inc, 11 dc, 2 dc inc, 9 dc, 2 dc inc, 4 dc (54)
Position the safety eyes between rounds 11 and 12.
- Round 12: 8 dc, 2 dc inc, 14 dc, 2 dc inc, 20 dc, 2 dc inc, 9 dc (57)
- Rounds 13-18: 57 dc (57)
- Round 19: 8 dc, dc 2 tog, 14 dc, dc 2 tog, 20 dc, dc 2 tog, 9 dc (54)
- Round 20: 5 dc, dc 2 tog, 3 dc, dc 2 tog, 7 dc, dc 2 tog, 3 dc, dc 2 tog, 11 dc, dc 2 tog, 9 dc, dc 2 tog, 4 dc (48)
- Round 21: 7 dc, dc 2 tog, 2 dc, dc 2 tog, 3 dc, dc 2 tog, 2 dc, dc 2 tog, 11 dc, dc 2 tog, 7 dc, dc 2 tog, 4 dc (42)
- Round 22: 5 dc, dc 2 tog (36)
- Round 23: 4 dc, dc 2 tog (30)
- Round 24: 3 dc, dc 2 tog (24)
- Round 25: dc 2 tog (12)
- Round 26: dc 2 tog (6)
Fill the head firmly. Cut yarn, thread through remaining stitches, pull tight, and sew closed.
Shape the eye sockets using the same technique described for the small bunny. Embroider the Y-shaped nose with black yarn.
Ears (Colour A, Make 2)
- Round 1: mr with 6 dc (6)
- Round 2: 2 dc inc (12)
- Round 3: 1 dc, 2 dc inc (18)
- Round 4: 2 dc, 2 dc inc (24)
- Round 5: 3 dc, 2 dc inc (30)
- Round 6: 4 dc, 2 dc inc (36)
- Round 7: 5 dc, 2 dc inc (42)
- Rounds 8-12: 42 dc (42)
- Round 13: 5 dc, dc 2 tog (36)
- Rounds 14-18: 36 dc (36)
- Round 19: 4 dc, dc 2 tog (30)
- Rounds 20-24: 30 dc (30)
- Round 25: 3 dc, dc 2 tog (24)
- Rounds 26-30: 24 dc (24)
- Round 31: 2 dc, dc 2 tog (18)
- Rounds 32-36: 18 dc (18)
- Round 37: 1 dc, dc 2 tog (12)
- Rounds 38-42: 12 dc (12)
Sew the ears onto the head as shown in the reference photos. Attach the completed head to the body.
Arms (Colours A & B, Make 2)
Start with Colour B.
- Round 1: mr with 6 dc (6)
- Round 2: 2 dc inc (12)
- Round 3: 1 dc, 2 dc inc (18)
- Round 4: 2 dc, 2 dc inc (24)
- Round 5: 3 dc, 2 dc inc (30)
Switch to Colour A.
- Round 6: 4 dc, 2 dc inc (36)
- Rounds 7-8: 36 dc (36)
- Round 9: 4 dc, dc 2 tog (30)
- Rounds 10-11: 30 dc (30)
- Round 12: 3 dc, dc 2 tog (24)
- Round 13: 24 dc (24)
- Round 14: 2 dc, dc 2 tog (18)
- Rounds 15-30: 18 dc (18)
- Round 31: 1 dc, dc 2 tog (12)
- Round 32: dc 2 tog (6)
Fill the arms and sew them onto the body.
Legs (Colours A & B, Make 2)
Start with Colour B.
- Round 1: Chain 8, 2 dc in 2nd ch from hook, 5 dc, 5 dc in the final ch, 5 dc in ch on the opposite side, 2 dc in the final ch (19)
- Round 2: 2 dc inc, 7 dc, 2 dc inc x 3, 7 dc, 2 dc inc (24)
- Round 3: 2 dc inc x 2, 8 dc, 2 dc inc x 5, 8 dc, 2 dc inc (32)
- Round 4: 2 dc inc x 3, 11 dc, 2 dc inc x 5, 12 dc, 2 dc inc (41)
Switch to Colour A.
- Rounds 5-6: 41 dc (41)
- Round 7: 1 dc in the back loop (41)
- Round 8: 18 dc, dc 2 tog x 4, 15 dc (37)
- Round 9: dc 2 tog x 2, 13 dc, dc 2 tog x 3, 14 dc (32)
- Round 10: 14 dc, dc 2 tog, 1 dc, dc 2 tog, 13 dc (30)
- Round 11: dc 2 tog, 10 dc, dc 2 tog x 3, 10 dc, dc 2 tog (25)
- Round 12: 9 dc, dc 2 tog, 3 dc, dc 2 tog, 9 dc (23)
- Rounds 13-17: 23 dc (23)
- Round 18: 6 dc, dc 2 tog, 4 dc, dc 2 tog, 5 dc, dc 2 tog, 2 dc (20)
- Rounds 19-23: 20 dc (20)
- Round 24: 7 dc, dc 2 tog, 7 dc, dc 2 tog, 2 dc (18)
- Rounds 25-27: 18 dc (18)
- Round 28: 3 dc, dc 2 tog, 8 dc, dc 2 tog, 3 dc (16)
- Round 29: 1 dc, dc 2 tog x 5, finish with 1 dc (11)
- Round 30: dc 2 tog x 5, 1 dc (6)
Fill the legs and attach them to the body.
Velvet Crochet Bunny: Hook Size & Tension Tips
Here’s something wonderful to remember: every crocheter has their own unique style! Some makers achieve perfect gauge with a 2.0 mm hook while others need a 4.0 mm hook for the same result. This isn’t about right or wrong it’s about understanding your personal tension and finding what works for you.
The recommended hook range (3.5-4.0 mm) gives you flexibility to experiment. Start with a gauge swatch to see how your stitches look with the velvet yarn. You’re aiming for a fabric tight enough that stuffing won’t show through, but not so tight that your hands tire quickly. Trust your hands and eyes they’ll guide you to the perfect hook size for your style.
Your Questions Answered
While you can substitute other yarns, velvet yarn creates that signature ultra-soft, huggable texture that makes these bunnies so special. If you choose a different yarn weight or type, your finished size and gauge will vary, so make a test swatch first. Regular worsted weight acrylic would work, but you’ll lose some of that luxurious plushness that makes velvet yarn perfect for stuffed friends.
Most intermediate crocheters complete the small bunny in 8-12 hours and the large bunny in 12-16 hours, spread over several sessions. Velvet yarn can be a bit slower to work with than smooth yarns since you need to see your stitches clearly, but the gorgeous results are absolutely worth the extra attention. Take your time and enjoy the meditative rhythm of creating something beautiful!
Use the yarn tail from each piece to whipstitch them firmly to the body, going around each attachment point at least twice for security. For even stronger connections, use the ladder stitch technique, which creates an invisible seam. If the bunny is for a young child, reinforce all attachment points with extra stitching to ensure they withstand enthusiastic hugs and play.
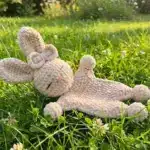
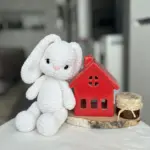
Leave the ears unstuffed! This allows them to be soft, floppy, and naturally poseable—one of the most endearing features of these bunnies. The contrast between the firmly stuffed body and head with the soft, drooping ears creates that perfect cuddly aesthetic that makes people want to pick them up immediately.
Bringing Your Velvet Crochet Bunny to Life
As you weave in that final yarn end and fluff up those floppy ears, take a moment to appreciate what you’ve created. This isn’t just a stuffed toy it’s hours of care transformed into something that will comfort, inspire joy, and perhaps become someone’s most treasured companion. The velvet softness, those sweet eye indentations, and that gentle Y-shaped nose all come together to create pure magic.
Whether your bunny finds a home on a nursery shelf, becomes a child’s bedtime guardian, or adds whimsy to your own space, you’ve made something truly special. May every stitch bring you joy, and may your finished bunny spread smiles wherever it goes!
Remember it later!
Planning to try this soon? Pin it for a quick find later!