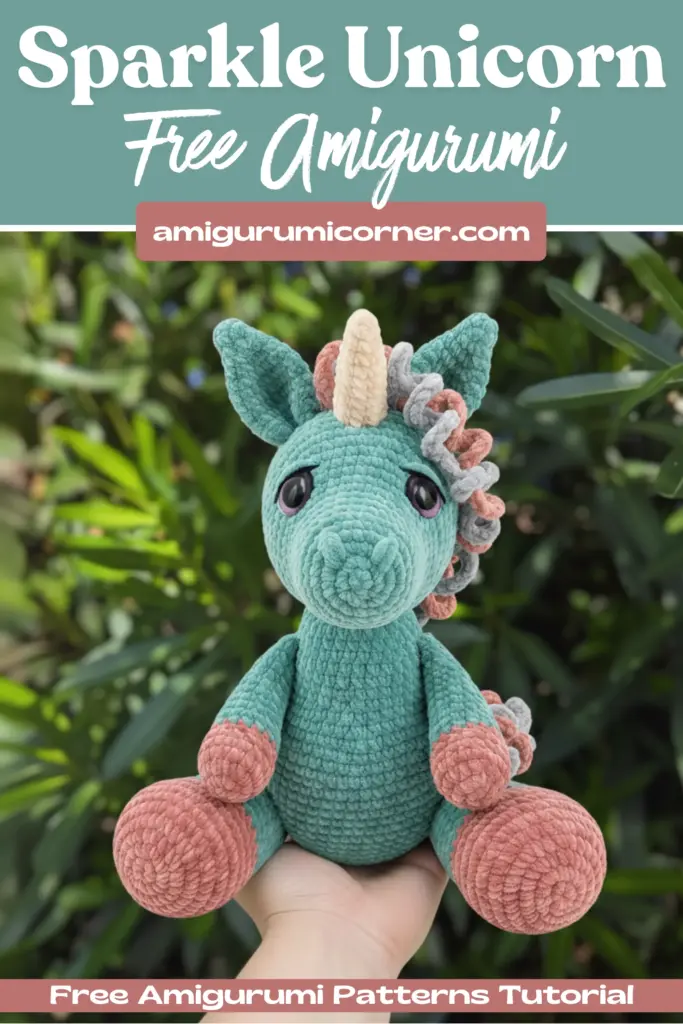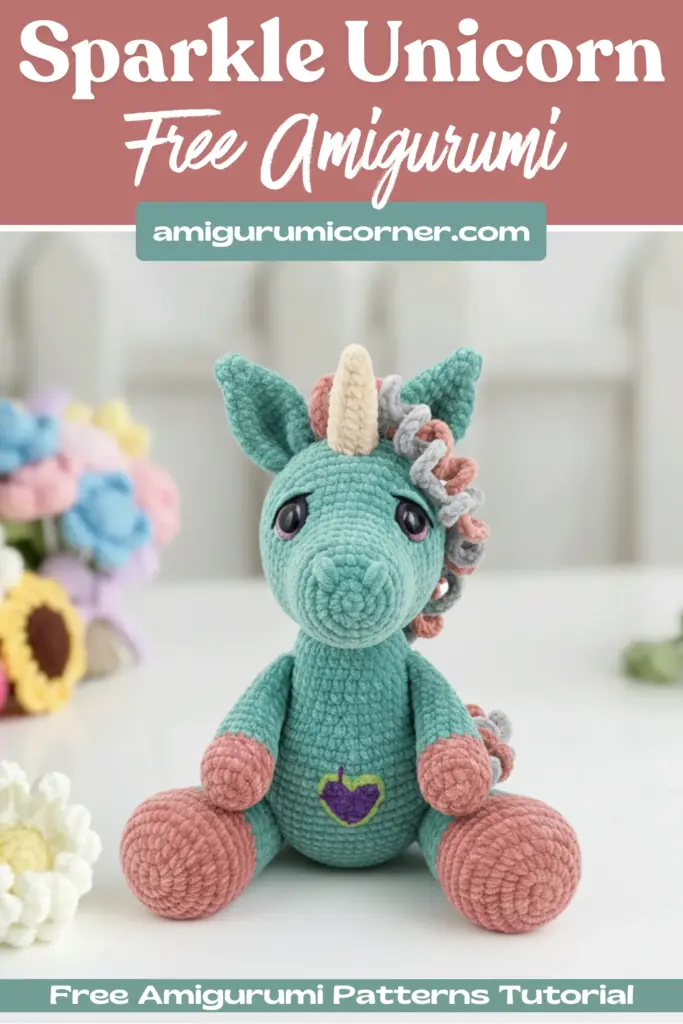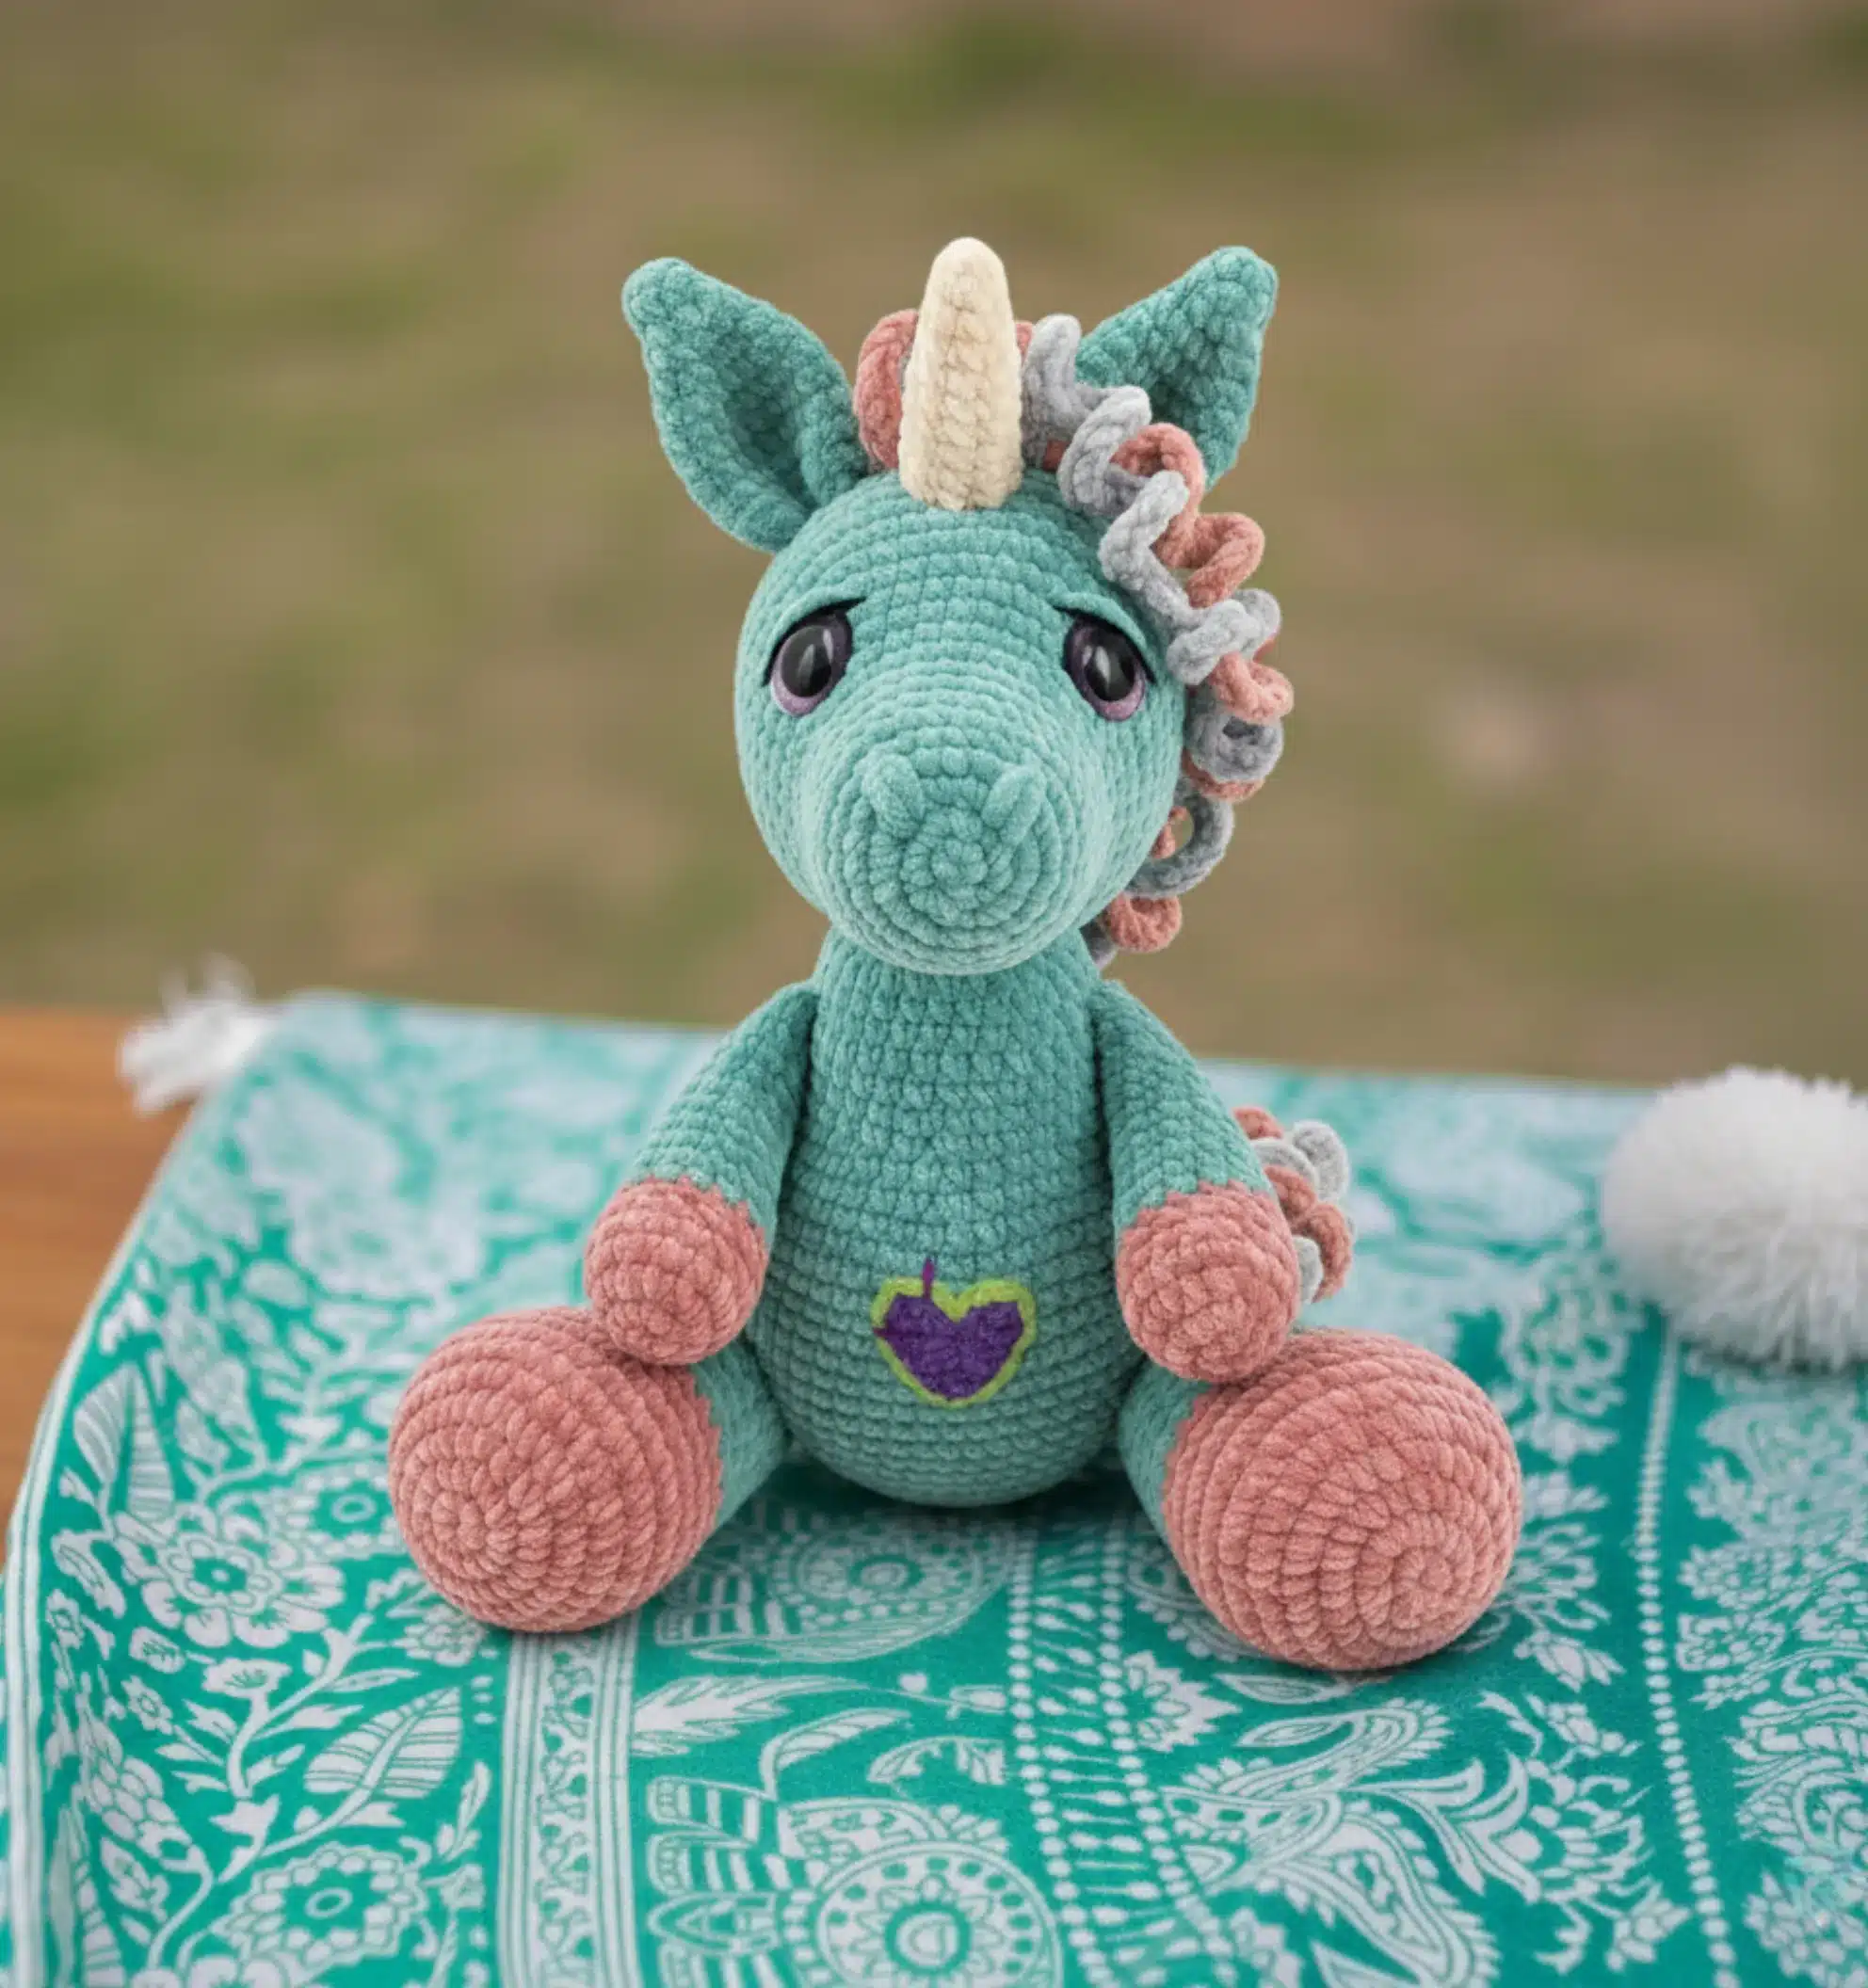
Looking for a magical crochet project that will bring joy to any unicorn lover? This comprehensive guide will walk you through creating a charming Sparkle Unicorn amigurumi, complete with a flowing mane, sweet heart detail, and whimsical features. Whether you’re crafting for yourself or creating a special gift, this pattern will guide you through every step of the process.
What You’ll Need
Before diving into this enchanting project, gather the following materials:
- Velvet Chenille yarn in Pink, Dark Pink, Purple, and White
- Black cotton yarn for embroidering details
- 4.5 mm crochet hook (or size appropriate for your yarn)
- Two safety eyes (26 mm / 1.02 inches)
- Fiberfill or polyester stuffing
- Stitch markers or contrasting yarn scraps
- Yarn needle for sewing and finishing
The finished unicorn measures approximately 13.78 inches (35 cm) tall when using the recommended materials.
Understanding the Abbreviations
To ensure clarity throughout this pattern, familiarize yourself with these common crochet terms:
- mr = magic ring (adjustable loop)
- ch = chain stitch
- sc = single crochet
- sl st = slip stitch
- inc = increase (two single crochet in same stitch)
- dec = decrease (invisible decrease method)
- bpsc = back post single crochet
- (36) = total stitch count after completing the round
Important: Work in continuous spirals without joining rounds. Use a stitch marker at the beginning of each round to keep track of your progress.

Creating the Head
The head forms the centerpiece of your unicorn, so take your time with this section.
Starting with Pink Yarn
Begin with a magic ring and work in continuous rounds:
- Round 1: 6 sc in magic ring (6)
- Round 2: 6 inc (12)
- Round 3: (sc, inc) × 6 (18)
- Round 4: (2 sc, inc) × 6 (24)
- Round 5: (7 sc, inc) × 3 (27)
Continue building the head shape through rounds 6-17, gradually increasing to 56 stitches. Between rounds 13-14, insert the safety eyes approximately 13 stitches apart. To center them perfectly, place your work on a flat surface—this helps visualize the face taking shape.
Shaping and Finishing the Head
- Rounds 18-24: Work 56 sc in each round (56)
- Round 25: Begin decreasing: (12 sc, dec) × 4 (52)
Start stuffing the head firmly at round 27, adding more fiberfill after every few rounds. Continue decreasing through round 34, finishing with 6 stitches. Close the remaining stitches with a yarn needle, tie securely, and weave in the end.
Crafting the Body
Using pink yarn, create a sturdy, well-proportioned body:
- Rounds 1-9: Increase from 6 to 54 stitches
- Rounds 10-16: Work even at 54 sc (54)
- Round 17: Begin shaping: (7 sc, dec) × 6 (48)
Continue through round 29, decreasing strategically to create the body’s natural taper. Start stuffing firmly around round 24, continuing to add fiberfill as you work. Close with a slip stitch, leaving a long tail for attaching to the head.
Making the Limbs
Arms (Make 2)
Start with dark pink yarn for the hooves:
- Rounds 1-3: Build from 7 to 21 stitches
- Rounds 4-7: Begin decreasing and shaping
Switch to pink yarn at round 8 and continue through round 18. Stuff the arms firmly, keeping a bit of softness at the top for easier positioning. Fold in half and single crochet across to close. Leave a long tail for sewing.
Legs (Make 2)
Begin with dark pink yarn:
- Rounds 1-5: Increase from 8 to 40 stitches
- Rounds 6-11: Shape the hoof and leg
Switch to pink yarn at round 12 and work through round 24. Stuff very firmly to support the unicorn’s weight. Close the remaining stitches and leave a tail for sewing.
Adding Magical Details
The Horn
Using dark pink yarn, create this iconic feature:
- Rounds 1-9: Gradually increase from 6 to 14 stitches
- Stuff firmly to maintain the horn’s distinctive spiral shape
- Sew securely to the head starting at round 16
Ears (Make 2)
With pink yarn, work rounds 1-7, increasing from 6 to 21 stitches. Switch to purple yarn for rounds 8-11. Don’t stuff the ears—instead, fold the base when sewing to create natural-looking ear curves. Position between rounds 19-20, approximately 1 stitch from the horn.
Creating the Flowing Mane
This is where your unicorn truly comes to life! Work with double yarn for extra volume and texture.
Tuft Pieces (Make 2)
- Chain 31
- Work 30 increases in second round, skipping chains
- Tie off, leaving a long tail
Long Mane Pieces (Make 6)
- Chain 41
- Work 40 increases in second round
- Tie off with tail for sewing
Short Mane Pieces (Make 3)
- Chain 31
- Work 30 increases in second round
- Use for lower head placement
Assembly Order (from horn downward):
- Two tuft pieces (31 chains)
- Six long mane pieces (41 chains)
- Three short mane pieces (31 chains)
Pin pieces in place following a straight line down the head and neck. For a cohesive look, thread yarn through all curl bases, securing them together before weaving the end into the head.

Crafting the Tail
Make 4 Pieces Total
Two pieces with 41 chains:
- Attach between rounds 7-8 of body
Two pieces with 31 chains:
- Attach between rounds 8-9 of body
Use the same technique as the mane, creating bouncy curls with double yarn.
The Sweet Heart Accent
Add a charming decorative heart using dark pink yarn:
- Create a magic ring, then chain 3
- Work 3 treble crochet, 4 double crochet
- Chain 2
- Work 4 double crochet, 3 treble crochet
- Chain 3, slip stitch to close
Position the heart anywhere you like—on the body or near the face. Use contrasting thread to add decorative stitches around the edges for a patch-like appearance.
Final Embroidered Details
Nostrils
Using pink yarn (doubled) and starting from the side of the head:
- Mark nostril positions with pins
- Pass through each nostril twice
- Exit from entry stitch, knot, and hide yarn
Eye Highlights
With white yarn, add sparkle to the eyes:
- Enter at side of head, exit at point 1
- Re-enter at point 2
- Exit from entry stitch, knot securely
Eye Definition
Use black cotton yarn to outline the eyes, following the same technique as the highlights.

Assembly and Finishing
- Attach the head to the body: Use the long tail from the body, ensuring secure stitching
- Position the legs: Place the body upright on a flat surface, pin legs in position, and sew firmly
- Attach the arms: Pin at desired angle and sew securely
- Add the horn: Center on the head, stitching in place
- Sew the ears: Fold bases for natural curves
- Attach mane pieces: Follow the order specified above
- Add the tail: Layer pieces as directed
- Position the heart: Sew with decorative stitches
- Embroider facial features: Add nostrils and eye details
Tips for Success
- Maintain consistent tension throughout your work for even stitches
- Stuff firmly but not overly tight—this maintains shape while keeping the toy soft
- Use stitch markers religiously—they prevent counting errors
- Take your time with assembly—proper positioning makes all the difference
- Double-check eye placement before inserting safety eyes permanently
Congratulations!
Your Sparkle Unicorn is complete! This magical creation showcases your crochet skills and dedication. Whether displayed proudly, gifted to someone special, or cuddled by a unicorn enthusiast, this amigurumi brings joy and whimsy wherever it goes.
The beauty of handmade toys lies in their uniqueness—each stitch carries your personal touch, making every unicorn truly one-of-a-kind. Enjoy the satisfaction of completing this enchanting project, and don’t hesitate to experiment with different color combinations to create your own magical variations!