Table of contents
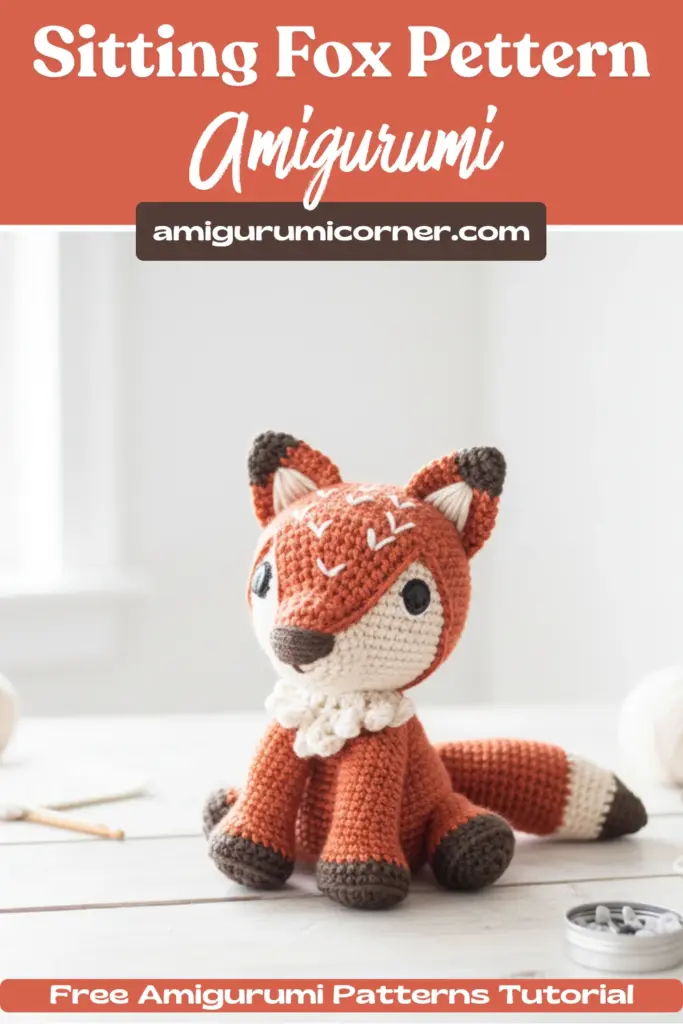
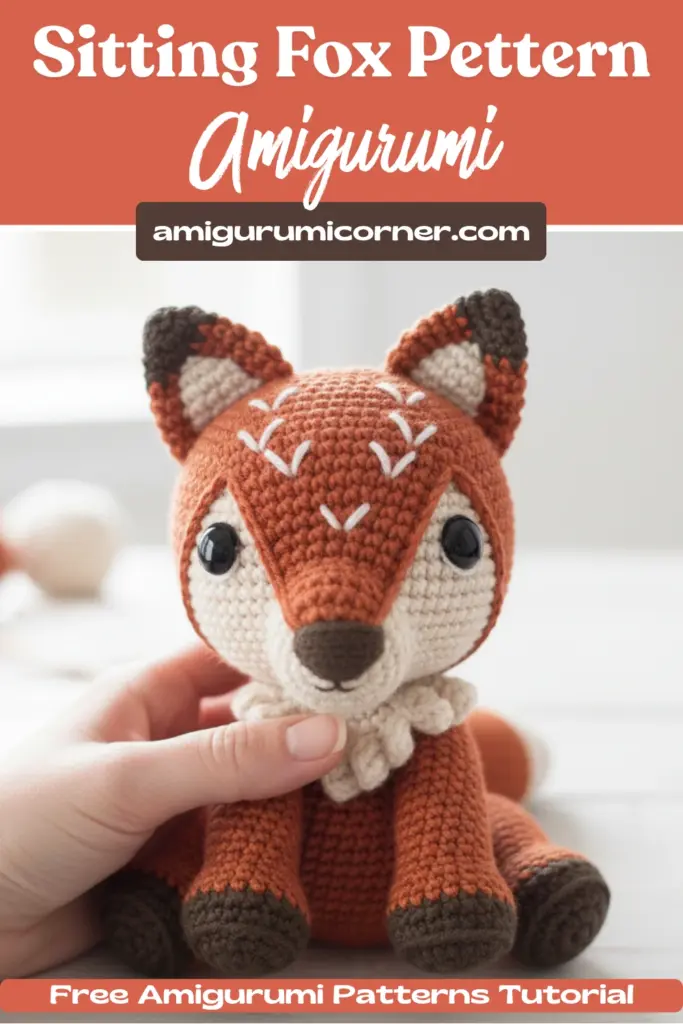
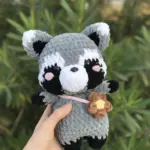
Looking to create a charming woodland friend? This sitting fox crochet pattern is perfect for amigurumi enthusiasts of all skill levels. With its vibrant Orange/Rust coat, Cream/Off-White, and sweet sitting pose, this little fox will steal your heart. Let’s dive into everything you need to bring this delightful creature to life!
Remember it later!
Planning to try this soon? Pin it for a quick find later!
Materials You’ll Need To Make Sitting Fox Crochet
Before starting your sitting fox, gather these essential materials:
- Yarn: Merino DK weight yarn in Orange/Rust, Cream/Off-White, and Dark Brown
- Small amounts: Black and white yarn for the eyes
- Hook: 3mm crochet hook
- Stuffing: Hypoallergenic polyester fiberfill
- Notions: Yarn needle, scissors, stitch markers (optional)
Finished Size
When crocheted with merino DK yarn and a 3mm hook, your finished sitting fox will measure approximately 18 cm (7 inches) tall – the perfect size for cuddling or displaying!
Important Note: This sitting fox crochet pattern uses single crochet worked with yarn under the needle.
Stitch Abbreviations
- Ch – Chain
- Sl – Slip Stitch
- Sc – Single Crochet
- Dc – Double Crochet
- Bo – Bobble Stitch (5dc)
- Bl – Back Loop
- Fl – Front Loop
- Inc – Increase
- Dec – Decrease
- Rnd – Round
- St – Stitch

Step-by-Step Instructions to Make a Sitting Fox Crochet Pattern
Crafting the Head
Start with white yarn:
- Rnd 1: 6sc in a magic ring
- Rnd 2: 6inc (Total: 12sts)
- Rnd 3: (1sc, 1inc) repeat 6 times (Total: 18sts)
- Rnd 4: (2sc, 1inc) repeat 6 times (Total: 24sts)
- Rnd 5: (3sc, 1inc) repeat 6 times (Total: 30sts)
- Rnd 6: (4sc, 1inc) repeat 6 times (Total: 36sts)
- Rnd 7: (5sc, 1inc) repeat 6 times (Total: 42sts)
- Rnd 8: (6sc, 1inc) repeat 6 times (Total: 48sts)
- Rnd 9: (7sc, 1inc) repeat 6 times (Total: 54sts)
- Rnd 10: (8sc, 1inc) repeat 6 times (Total: 60sts)
- Rnds 11-21: 60sc
- Rnd 22: (8sc, 1dec) repeat 6 times (Total: 54sts)
- Rnd 23: (7sc, 1dec) repeat 6 times (Total: 48sts)
- Rnd 24: (6sc, 1dec) repeat 6 times (Total: 42sts)
- Rnd 25: (5sc, 1dec) repeat 6 times (Total: 36sts)
- Rnd 26: (4sc, 1dec) repeat 6 times (Total: 30sts)
- Rnd 27: (3sc, 1dec) repeat 6 times (Total: 24sts)
Cut the yarn, fasten off, leaving a tail for sewing. Add stuffing material to the head.
Creating the Head Top
Switch to Orange/Rust yarn:
- Rnd 1: 6sc in a magic ring
- Rnd 2: 6inc (Total: 12sts)
- Rnd 3: (1sc, 1inc) repeat 6 times (Total: 18sts)
- Rnd 4: (2sc, 1inc) repeat 6 times (Total: 24sts)
- Rnd 5: (3sc, 1inc) repeat 6 times (Total: 30sts)
- Rnd 6: (4sc, 1inc) repeat 6 times (Total: 36sts)
- Rnd 7: (5sc, 1inc) repeat 6 times (Total: 42sts)
- Rnd 8: (6sc, 1inc) repeat 6 times (Total: 48sts)
- Rnd 9: (7sc, 1inc) repeat 6 times (Total: 54sts)
- Rnd 10: (8sc, 1inc) repeat 6 times (Total: 60sts)
- Rnds 11-21: 60sc
Cut the yarn and fasten off. Now locate the 12 center stitches (count 24 stitches from the beginning) and attach yarn to begin working in rows.
Head Top Detail
Starting from stitch 24, work in rows:
- Row 1: 12sc, chain 1, turn
- Row 2: 12sc, chain 1, turn
- Row 3: 2sc, 1dec, 4sc, 1dec, 2sc, chain 1, turn (Total: 10sts)
- Row 4: 10sc, chain 1, turn
- Row 5: 2sc, 1dec, 2sc, 1dec, 2sc, chain 1, turn (Total: 8sts)
- Row 6: 8sc, chain 1, turn
- Row 7: 2sc, 1dec, 1dec, 2sc, chain 1, turn (Total: 6sts)
- Row 8: 6sc, chain 1, turn
- Row 9: 1sc, 1dec, 1dec, 1sc, chain 1, turn (Total: 4sts)
- Row 10: 4sc, chain 1, turn
- Rows 11-14: 4sc, chain 1
- Row 15: Make 15sc on one side, 48sc around the detail, and 15sc on the other side
Cut yarn, fasten off, and leave a long tail for sewing.
Making the Ears (Make 2)
Start with brown yarn:
- Rnd 1: 6sc in a magic ring
- Rnd 2: (1inc, 2sc) repeat 2 times (Total: 8sts)
- Rnd 3: (1inc, 3sc) repeat 2 times (Total: 10sts)
- Rnd 4: (1inc, 4sc) repeat 2 times (Total: 12sts)
Change to Orange/Rust yarn:
- Rnd 5: (1inc, 5sc) repeat 2 times (Total: 14sts)
- Rnd 6: (1inc, 6sc) repeat 2 times (Total: 16sts)
Cut yarn, fasten off, leave tail for sewing. Flatten the ears.
Crocheting the Eyes (Make 2)
With black yarn:
- Rnd 1: 6sc in a magic ring
Join with slip stitch. Cut yarn, fasten off, leave tail for sewing.
Creating the Snout
With Cream/Off-White yarn:
- Rnd 1: 6sc in a magic ring
- Rnd 2: 6inc (Total: 12sts)
- Rnd 3: (1sc, 1inc) repeat 6 times (Total: 18sts)
- Rnds 4-5: 18sc
Cut yarn, fasten off, leave tail for sewing.
Assembling the Head
Follow these steps for perfect assembly:
- Insert the head detail on top of the head. Use pins to secure parts while sewing
- Sew ears onto round 13 of the head, leaving 5 stitches between them
- Sew the snout first, then sew the Orange/Rust detail on top, going all around the head
- With brown yarn, embroider lines on top of the snout
- Sew black eyes one round below the Orange/Rust detail. Add white embroidery for eye highlights and contour lines
- With Cream/Off-White yarn, embroider a V shape on the fox’s forehead
- Set the head aside and begin working on the body
Making the Tail
With Orange/Rust yarn:
- Rnd 1: 3sc in a magic ring
- Rnd 2: 3inc (Total: 6sts)
- Rnd 3: (1sc, 1inc) repeat 3 times (Total: 9sts)
- Rnd 4: (2sc, 1inc) repeat 3 times (Total: 12sts)
- Rnd 5: (3sc, 1inc) repeat 3 times (Total: 15sts)
- Rnd 6: (4sc, 1inc) repeat 3 times (Total: 18sts)
- Rnd 7: (5sc, 1inc) repeat 3 times (Total: 21sts)
- Rnd 8: (6sc, 1inc) repeat 3 times (Total: 24sts)
- Rnd 9: (7sc, 1inc) repeat 3 times (Total: 27sts)
- Rnds 10-19: 27sc
- Rnd 20: (7sc, 1dec) repeat 3 times (Total: 24sts)
- Rnds 21-22: 24sc
- Rnd 23: (6sc, 1dec) repeat 6 times (Total: 21sts)
- Rnds 24-25: 18sc
- Rnd 26: (5sc, 1dec) repeat 3 times (Total: 18sts)
- Rnds 27-28: 15sc
- Rnd 29: (4sc, 1dec) repeat 3 times (Total: 15sts)
- Rnds 30-32: 15sc (add stuffing before continuing)
- Rnd 33: Crochet edges together making 7sc
Cut yarn, leave tail for sewing.
Tail Edge Detail
With brown yarn:
- Rnd 1: 3sc in a magic ring
- Rnd 2: 3inc (Total: 6sts)
- Rnd 3: (1sc, 1inc) repeat 3 times (Total: 9sts)
- Rnd 4: (2sc, 1inc) repeat 3 times (Total: 12sts)
- Rnd 5: (3sc, 1inc) repeat 3 times (Total: 15sts)
- Rnd 6: (4sc, 1inc) repeat 3 times (Total: 18sts)
- Rnd 7: (5sc, 1inc) repeat 3 times (Total: 21sts)
- Rnd 8: (6sc, 1inc) repeat 3 times (Total: 24sts)
Change to Cream/Off-White yarn:
- Rnd 9: (7sc, 1inc) repeat 3 times (Total: 27sts)
- Rnd 10: 27sc
- Rnd 11: (3dc in same st, skip 1, 1sl) repeat 9 times
Cut yarn, leave tail for sewing. Insert detail into finished tail and sew around Cream/Off-White part.
Creating the Back Paws (Make 2)
With brown yarn:
- Rnd 1: 6sc in a magic ring
- Rnd 2: 6inc (Total: 12sts)
- Rnd 3: (1sc, 1inc) repeat 6 times (Total: 18sts)
- Rnd 4: (2sc, 1inc) repeat 6 times (Total: 24sts)
- Rnd 5: 24blsc (back loop only)
- Rnd 6: 24sc
Change to Orange/Rust yarn:
- Rnd 7: (6sc, 1dec) repeat 3 times (Total: 21sts)
- Rnd 8: (5sc, 1dec) repeat 3 times (Total: 18sts)
- Rnd 9: (4sc, 1dec) repeat 3 times (Total: 15sts)
- Rnds 10-13: 15sc
- Row 14: 6sc, chain 1, turn (start working in rows)
- Row 15: 6sc
Cut yarn, fasten off, leave tail for sewing. Add stuffing to paws.
Making the Front Paws
With brown yarn:
- Rnd 1: 6sc in a magic ring
- Rnd 2: 6inc (Total: 12sts)
- Rnd 3: (1sc, 1inc) repeat 6 times (Total: 18sts)
- Rnd 4: (2sc, 1inc) repeat 6 times (Total: 24sts)
- Rnd 5: 24blsc
- Rnd 6: 24sc
Change to Orange/Rust yarn:
- Rnd 7: (6sc, 1dec) repeat 3 times (Total: 21sts)
- Rnd 8: (5sc, 1dec) repeat 3 times (Total: 18sts)
- Rnd 9: (4sc, 1dec) repeat 3 times (Total: 15sts)
- Rnds 10-17: 15sc
On the second leg, don’t cut yarn. Chain 3 and add stuffing before continuing.
Connecting the Front Legs
Connect the two legs by inserting the chain into one stitch of the first leg:
- Rnd 20: Work 1sc in each chain, 15sc around first leg, 1sc in each chain on other side, 15sc around second leg (Total: 36sts)
- Rnds 21-22: 36sc
Cut yarn and fasten off.
Crocheting the Body
With Orange/Rust yarn:
- Rnd 1: 6sc in a magic ring
- Rnd 2: 6inc (Total: 12sts)
- Rnd 3: (1sc, 1inc) repeat 6 times (Total: 18sts)
- Rnd 4: (2sc, 1inc) repeat 6 times (Total: 24sts)
- Rnd 5: (3sc, 1inc) repeat 6 times (Total: 30sts)
- Rnd 6: (4sc, 1inc) repeat 6 times (Total: 36sts)
- Rnd 7: (5sc, 1inc) repeat 6 times (Total: 42sts)
- Rnd 8: (6sc, 1inc) repeat 6 times (Total: 48sts)
- Rnds 9-11: 48sc
- Rnd 12: (6sc, 1dec) repeat 6 times (Total: 42sts)
- Rnds 13-14: 42sc
- Rnd 15: (5sc, 1dec) repeat 6 times (Total: 36sts)
- Rnds 16-17: 36sc
- Rnd 18: (4sc, 1dec) repeat 6 times (Total: 30sts)
- Rnds 19-20: 30sc
- Rnd 21: (3sc, 1dec) repeat 6 times (Total: 24sts)
- Rnds 22-23: 24sc
Take the finished front legs and locate the 9 stitches at the back of each paw. Make 9 slip stitches to connect the legs to the body. Don’t work any stitches above these 9 slip stitches.
- Rnd 24: 42sc (15sc from body + 27sc from front paws)
- Rnds 25-26: 42sc
- Rnd 27: (6sc, 1dec) repeat 6 times (Total: 42sts)
- Rnd 28: (5sc, 1dec) repeat 6 times (Total: 36sts)
- Rnd 29: (4sc, 1dec) repeat 6 times (Total: 30sts)
- Rnd 30: (3sc, 1dec) repeat 6 times (Total: 24sts)
Cut yarn, fasten off. Add stuffing material.

Making the Chest Detail
With Cream/Off-White yarn, make 8 chains. Skip first chain:
- Rnd 1: 7sc, chain 1, turn
- Rnd 2: 7inc (Total: 14sts)
- Rnd 3: Create decorative edge by making chains of varying lengths (4, 5, 6, 7, 6, 5, 4) and working back down each chain, joining to the base row
Cut yarn, fasten off, leave tail for sewing.
Final Assembly of Your Sitting Fox Crochet Pattern
Bring your sitting fox to life:
- Use pins to position back paws in place
- Sew back paws to body starting at row 10 and finishing at row 15
- Attach the tail between the back legs
- Sew chest detail onto the 7 central stitches of the fox’s chest
- Join head to body by sewing the 24 stitches from the head together with the 24 stitches from the body
Congratulations – Your sitting fox crochet is Complete!
You’ve successfully created an adorable sitting fox amigurumi! This charming woodland creature makes a wonderful handmade gift or a delightful addition to any amigurumi collection. The combination of Orange/Rust, Cream/Off-White, and brown colors gives this fox its distinctive personality.
Whether you’re a beginner looking to expand your amigurumi skills or an experienced crocheter seeking a fun weekend project, this sitting fox pattern offers the perfect balance of challenge and enjoyment. Don’t forget to share your finished creation with the crafting community at amigurumicorner!


Remember it later!
Planning to try this soon? Pin it for a quick find later!