Table of contents
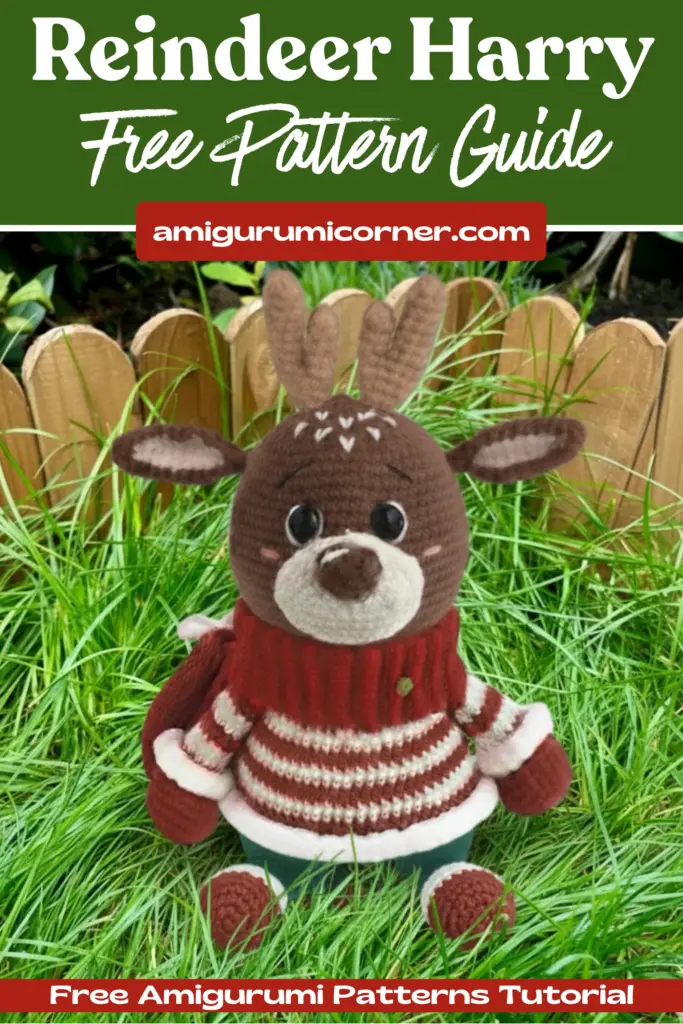
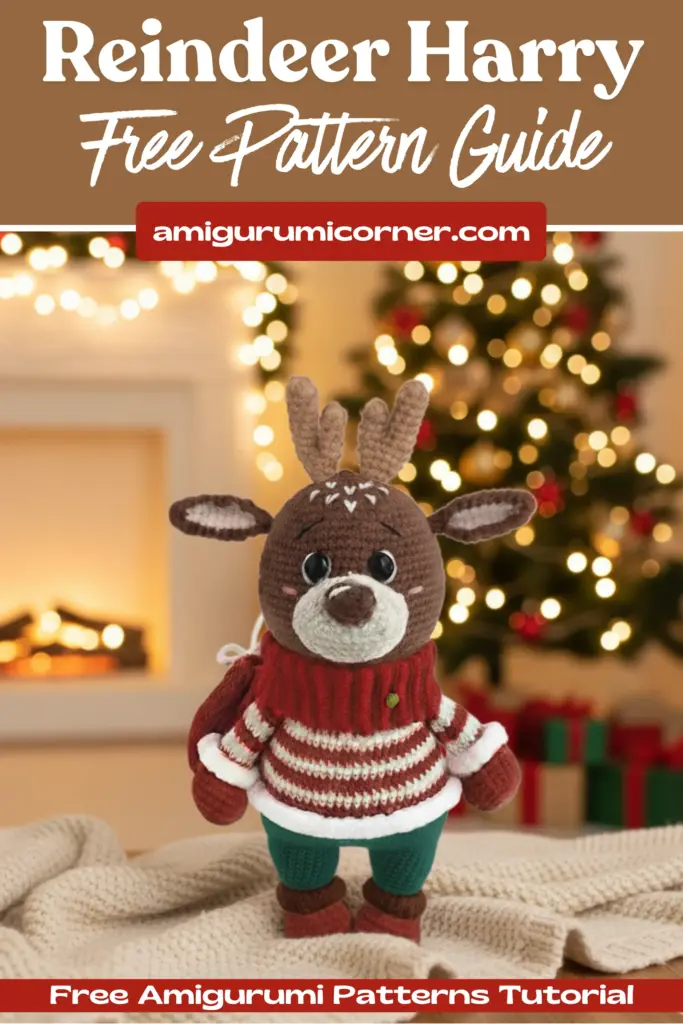
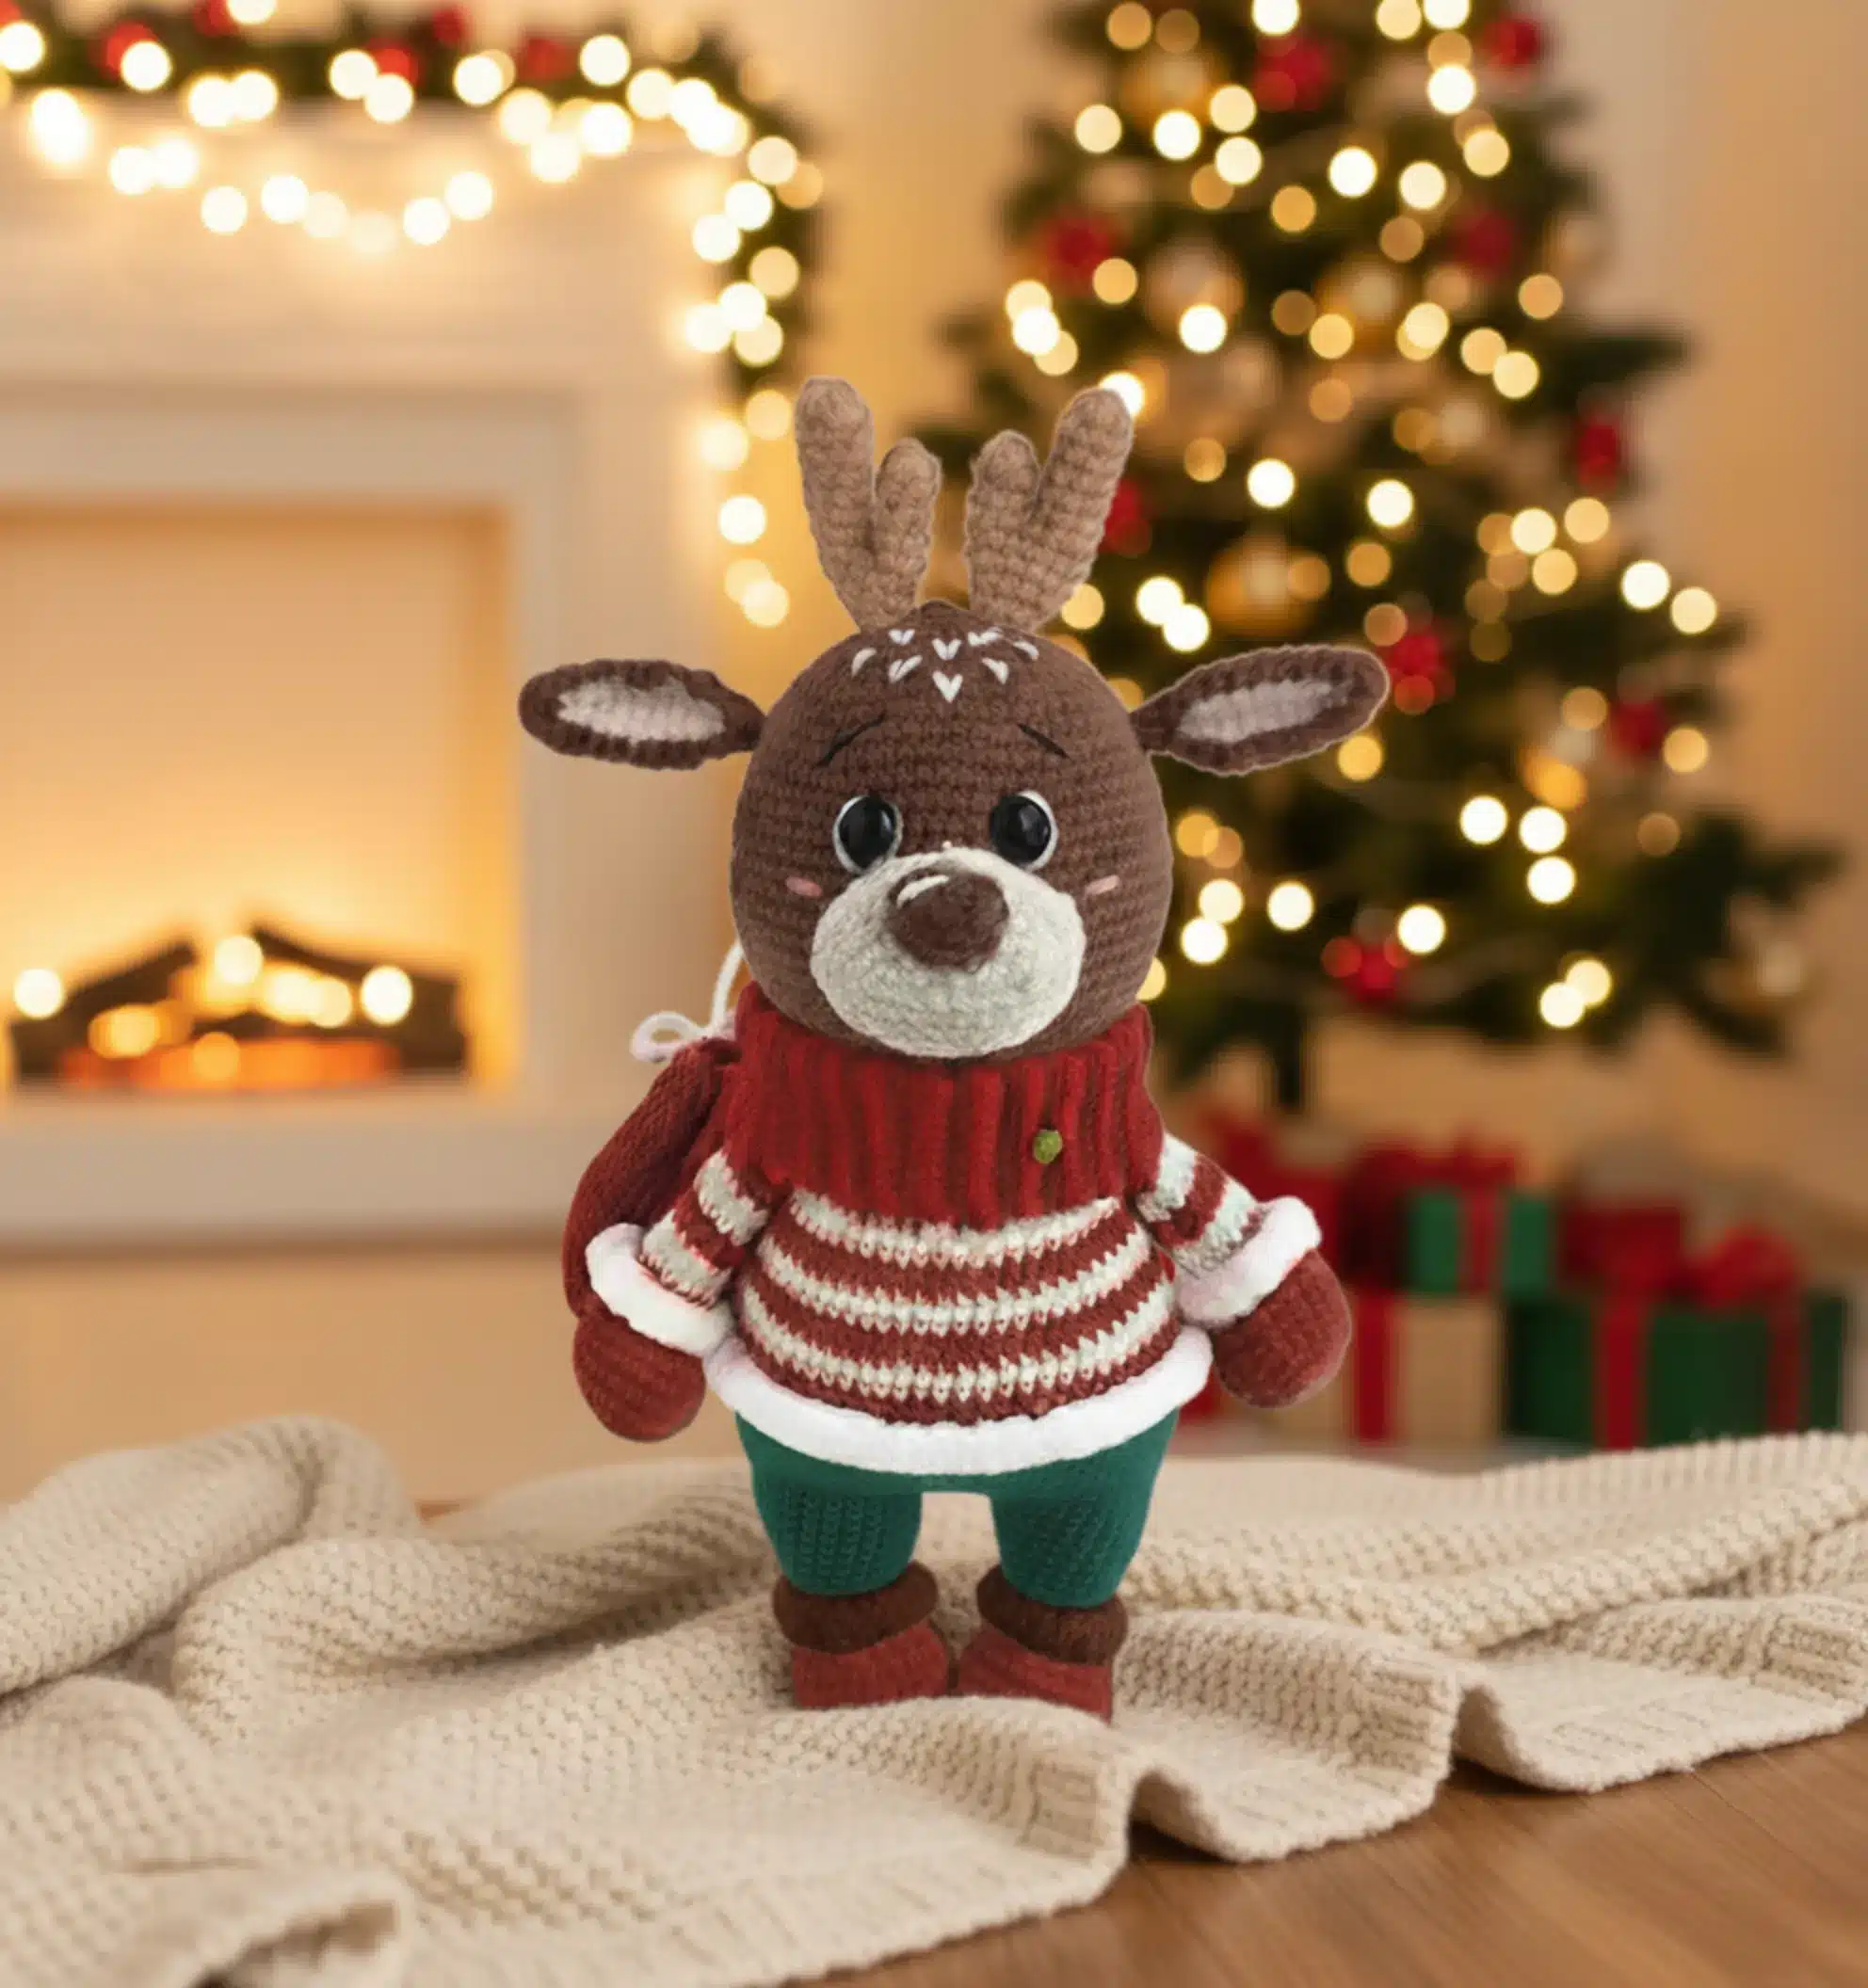
Are you ready to bring a charming winter companion to life with your crochet hook? This comprehensive tutorial will guide you through creating Reindeer Harry, a delightful amigurumi toy that stands approximately 25 cm (10 inches) tall, complete with festive details and an endearing personality.
What You’ll Need to Get Started
Essential Materials
Before diving into this project, gather the following supplies to ensure your creation turns out perfectly:
Yarn Requirements:
- Sport weight yarn (12 wpi, 5 ply) in the following colors:
- Red: 40g for the main body
- Green: 25g for clothing details
- White: 15g for striped accents
- Brown (darker shade): 5-10g for horns
- Brown (lighter shade): Primary color for the head
- Pink: Small amount for ears and cheeks
- Milk/cream: Small amount for the muzzle
- Black thin yarn or embroidery thread for facial features
- Plush yarn (like Alize Softy) in white for fluffy trim
Additional Supplies:
- 2mm crochet hook
- Polyester fiberfill stuffing
- 12mm safety eyes or sewing beads
- 5mm button for the scarf
- Tapestry or sewing needle
- Stitch markers
- Straight pins
- Scissors
Important Tips Before You Begin
Achieving the Perfect Gauge
Tip 1: Choose a crochet hook slightly smaller than what the yarn label recommends. This creates a tighter gauge, preventing gaps where stuffing might show through and giving your toy a more polished, professional appearance.
Tip 2: Use a stitch marker to track the beginning of each round. Pin it to the last loop of the round and move it up as you progress. This simple tool prevents confusion and ensures even shaping.

Understanding the Construction Method
This pattern uses spiral crocheting without slip stitches or turning chains unless specifically noted. This technique eliminates visible seams and creates smooth, continuous rounds perfect for amigurumi.
Mastering the Jacquard Color-Change Technique
When creating the ears with two colors, you’ll use a jacquard method. The key is to insert the new color during the final step of the last stitch in the previous color. Carry the unused color along the top of the previous row’s stitches, encasing it within your new stitches. This creates a neat reverse side and adds structural integrity to your work.
Step-by-Step Construction Guide
Crafting the Arms (Make 2)
Start with the red yarn and create a magic ring foundation. You’ll build from 6 stitches up to 24 at the widest point (the paw), then decrease to form the wrist before continuing up the arm. At row 11, crochet through back loops only to create a natural joint line.
Alternate red and white yarn every two rows from row 13 to row 22, creating a festive striped pattern reminiscent of candy canes. Pay attention to color changes to maintain an even stripe line.
The arms are mirror images—the right and left arms have slightly different decrease patterns in rows 8-10 to ensure they attach naturally to the body.
Pro Tip: Only stuff the hand portion firmly. Leave the upper arm lightly stuffed so it remains flexible and poseable.
Building the Head
Using the lighter brown yarn, begin with a magic ring and increase steadily to create a sphere shape, reaching a maximum of 72 stitches. Work several rounds at this width before beginning decreases.
The head construction follows a classic amigurumi sphere pattern:
- Rounds 1-16: Steady increases
- Rounds 17-22: Work even at maximum width
- Rounds 23-30: Gradual decreases
Stuff the head very firmly to maintain its round shape and support the facial features you’ll add later.
Creating the Legs and Body as One Piece
This clever construction technique eliminates the need for seaming legs to the body. Begin with the red yarn, crafting each leg separately up to row 20. When positioning the legs for joining, angle the toes slightly inward for a natural stance—but don’t turn them completely sideways as you did with the arms.
Connect the legs at row 21 with two chain stitches, then continue crocheting around both legs to form the body. The connection point should align with the back of the toy.
From row 31 onward, alternate red and white stripes (changing every two rounds) to match the arms. Use the back loops only technique at row 31 and row 14 (on the legs) to create attachment points for the fluffy white trim you’ll add later.
Attach the arms at row 48 by crocheting them directly into the body—this integrated approach creates sturdy, play-safe limbs.
Forming the Muzzle and Nose
The muzzle begins with a foundation chain and is worked in an oval shape, similar to the sole of a crocheted shoe. This creates the elongated snout characteristic of a reindeer.
The nose is a smaller oval worked in dark brown. Stuff both pieces lightly before attaching to maintain their dimensional shape.
Designing the Distinctive Ears
This is where the jacquard technique shines. Each ear features a pink inner ear surrounded by brown, created by switching colors mid-round. Follow the color pattern carefully:
- Brown forms the outer edge
- Pink creates the inner ear detail
Work increases and decreases to shape the ear, then fold it in half and close with single crochet stitches across the opening before sewing to the head.
Constructing the Majestic Horns
Each horn consists of three parts: two short branches and one longer main branch. Work them separately, then join them together in row 9. This creates the classic branched appearance of reindeer antlers.
Stuff each section as you go, but don’t overstuff—you want them to hold their shape without becoming stiff and heavy.
Making the Cozy Scarf
Work in back-and-forth rows using only back loops to create a ribbed texture. This simple pattern produces a scarf with natural drape and flexibility. Work 50 rows for a generous length that wraps beautifully around the neck.
Crafting the Festive Gift Bag
Create a cylindrical bag starting from the base and working upward. The final round uses double crochet stitches to create spaces for a drawstring. Add a diagonal strap and optional snowflake embroidery for extra charm.

Assembly: Bringing Harry to Life
Face and Head Details
- Attach the head to the body, adding extra stuffing in the neck area to prevent wobbling
- Create eye indentations between rows 14 and 15, spacing them 9 stitches apart
- Insert safety eyes or sew on beads, then embroider white highlights for sparkle
- Sew the muzzle between rows 16 and 25, positioned centrally on the face
- Attach the nose to the upper portion of the muzzle
- Add a white highlight to the nose for dimension
- Embroider eyebrows with black yarn for expression
- Stitch pink cheeks for a rosy, cheerful appearance
- Position the horns at the top of the head between rows 2 and 4
- Attach the ears at rows 11-12, folding and stitching them partway closed first
- Embroider forehead spots with milk-colored yarn
Finishing Touches
- Add fluffy trim by crocheting with plush yarn through the free front loops at row 31 of the body, row 14 of the legs, and row 11 of the arms
- Attach the button to the scarf
- Wrap and sew the scarf directly onto the toy, folding it in half first
- Place the gift bag over one shoulder
Your Reindeer Harry is Complete!
You now have a charming handmade companion perfect for holiday decoration, gift-giving, or cuddling. This project combines multiple crochet techniques—from basic increases and decreases to color work and seamless construction—making it an excellent skill-building pattern for intermediate crocheters.
The detailed instructions ensure success even with complex elements like the jacquard ears and multi-part horns. Take your time, follow each step carefully, and don’t hesitate to refer back to the tips provided throughout.
Remember: The joy of handmade toys lies not just in the finished product, but in the creative process itself. Each stitch carries your personal touch, making your Reindeer Harry truly one-of-a-kind.
Whether you’re creating Harry for yourself or as a heartfelt gift, this project offers the perfect blend of challenge and reward. Happy crocheting, and may your creation bring warmth and joy to all who meet him!
You’ll Love Also This