Table of contents
- What You’ll Need: Materials and Tools
- Understanding the Pattern: Abbreviations
- Essential Tips Before You Begin
- Creating the Head: Bringing Chocho to Life
- Crafting the Nose
- Building the Body
- Making the Arms
- Designing the Ears
- Creating the Signature Striped Tail
- Adding the Flower Accessory
- Assembly and Finishing
- Pattern Ethics and Community
- Showcasing Your Creation
- Troubleshooting Common Issues
- Customization Ideas
- The Joy of Raccoon Amigurumi Pattern
- Final Thoughts
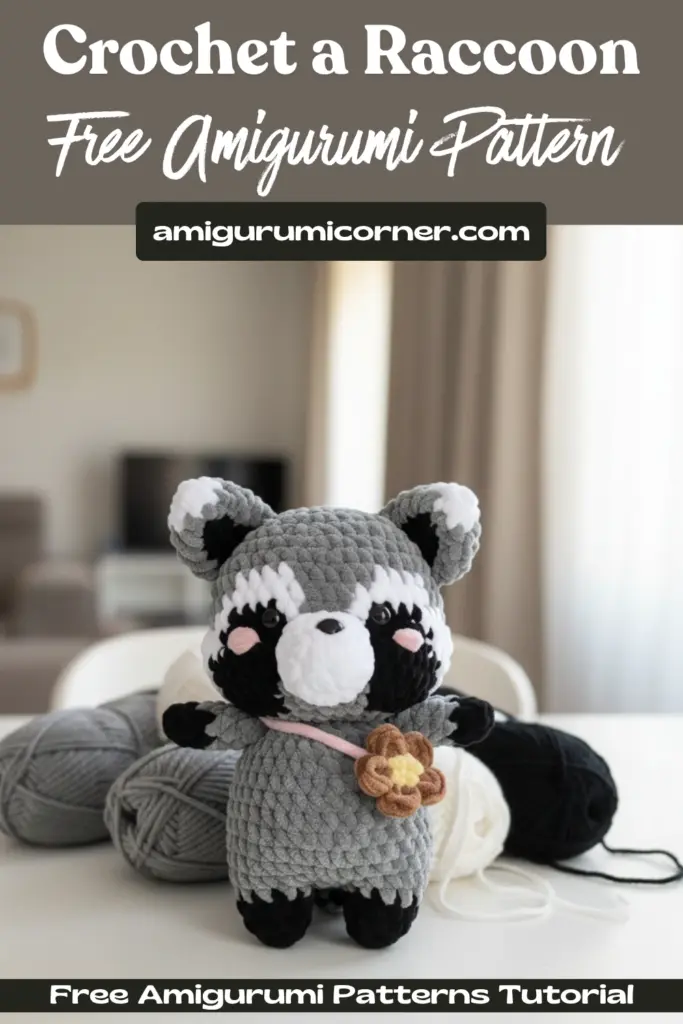
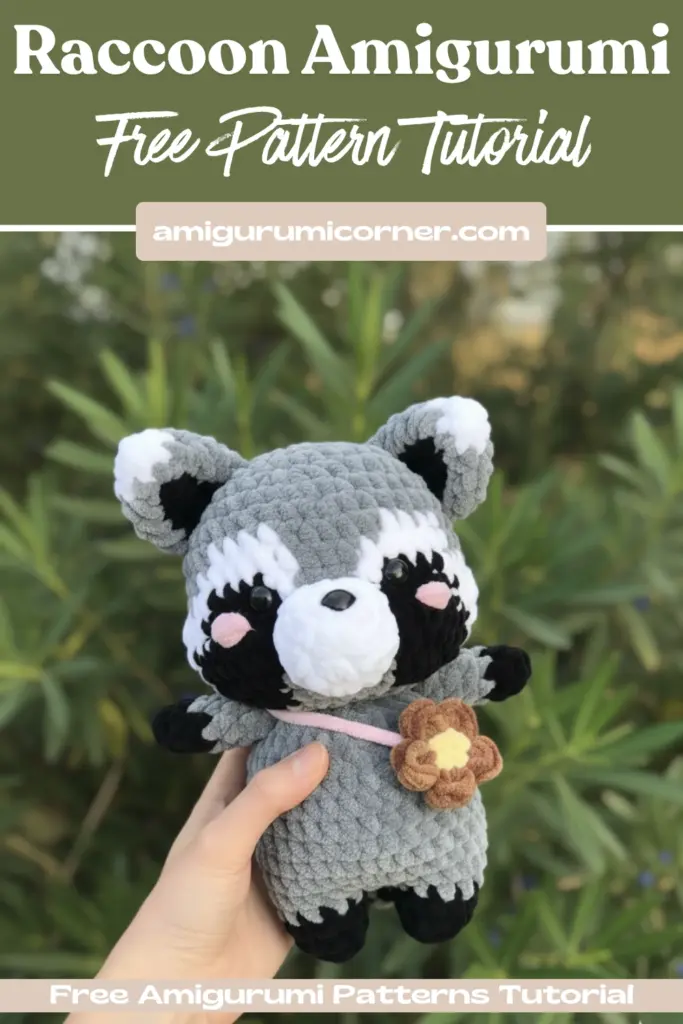
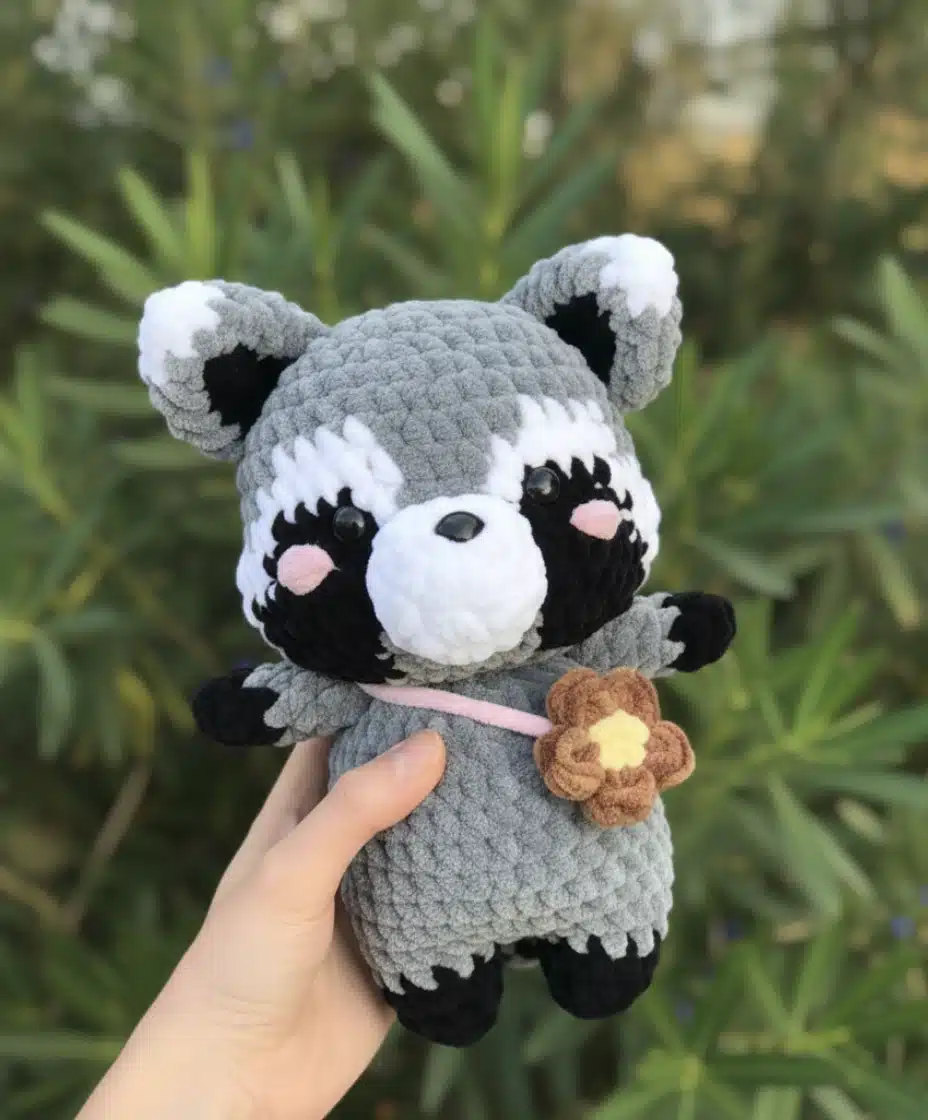
Creating your own cuddly crocheted raccoon has never been easier! This comprehensive guide will walk you through every step of making Chocho the Raccoon, a charming amigurumi project perfect for crafters of all skill levels. Whether you’re a seasoned crocheter or just starting your amigurumi journey, this pattern will help you create an irresistibly chubby and adorable raccoon friend.
Remember it later!
Planning to try this soon? Pin it for a quick find later!
What You’ll Need: Materials and Tools
Before diving into this delightful project, gather these essential supplies:
Yarn Requirements:
- Himalaya Dolphin Baby in gray, white, black, yellow, and pink (less than one skein per color)
- Alternative brands: Yarn Art or Premier Parfait, depending on your location
- Note: Using different yarn weights will adjust your finished raccoon’s size
Tools and Notions:
- Crochet hook: 4-5mm (suitable for chunky yarn)
- Stitch markers
- Scissors
- Fiberfill stuffing
- Yarn needle for sewing
- 12mm plastic safety eyes
- Optional: Safety nose or black embroidery yarn
Pro Tip: The beauty of this raccoon amigurumi pattern lies in its flexibility. Want a larger raccoon? Simply use thicker yarn and a bigger hook. Prefer a miniature version? Scale down your materials accordingly!
Understanding the Pattern: Abbreviations
Familiarize yourself with these common crochet terms before beginning:
- Mr – Magic ring (or chain 2 and crochet into first chain)
- Sc – Single crochet
- Inc – Increase
- Dec – Decrease (invisible decrease recommended)
- **(…)n* – Repeat stitches in brackets n times
- Slst – Slip stitch
- Ch – Chain
- Hdc – Half double crochet
- Dc – Double crochet
- Trc – Treble crochet
- BLO – Back loop only
- FLO – Front loop only

Essential Tips Before You Begin
Read Through First: Take time to review the entire pattern before starting. Understanding the construction process will help you work more efficiently and catch any potential questions early.
Stuffing Strategy: The secret to an adorable, huggable raccoon is generous stuffing! Fill the head and body until you think you can’t stuff anymore, then add just a bit more. This creates those irresistibly chubby cheeks and rounded body that give Chocho his charm. Shape as you stuff to maintain proper proportions.
Self-Care Reminder: Crocheting should be enjoyable! Remember to:
- Stay hydrated while working
- Take regular breaks to stretch
- Keep healthy snacks nearby
- Rest your hands and eyes periodically
Creating the Head: Bringing Chocho to Life
The head is where your raccoon’s personality truly shines. Starting with gray yarn, we’ll create the distinctive raccoon mask pattern.
Rounds 1-7: Begin with a magic ring and gradually increase to establish the head’s base shape. These rounds create a sturdy foundation for the facial features.
Rounds 8-12: This is where the magic happens! Carefully switch between gray, white, and black yarns to create the iconic raccoon mask. The pattern alternates colors to form the characteristic eye patches and facial markings.
- Round 8 introduces the first white sections around the eye areas
- Round 9 expands these white patches
- Round 10 adds the black eye mask details
- Round 11 incorporates dimensional shaping with multiple half double crochets into single stitches
Rounds 13-17: Complete the head by gradually decreasing to close the opening. The decreases are strategically placed to maintain the head’s rounded shape while incorporating the color pattern seamlessly.
Eye Placement: Insert 12mm safety eyes between rounds 10-11, spacing them approximately 6 stitches apart. The white patches you’ve crocheted will frame these eyes perfectly, creating an alert, friendly expression.
Finishing Touch: Stuff the head completely, paying special attention to filling out those adorable cheeks. The proper stuffing technique makes all the difference in achieving that perfect chubby-cheeked look!
Crafting the Nose
Using white yarn, the nose is a small but crucial detail:
- Magic ring with 8 single crochets
- Increase round to 16 stitches
- Work one round even
Stuff lightly with fiberfill and sew to the face between rounds 11-14. Using black yarn, embroider a triangular nose detail between rounds 2-3 of the nose piece, or insert a plastic safety nose for a different look.
Adding Character: Use pink yarn to create blushing cheeks beside each eye. These subtle touches bring warmth and personality to your raccoon’s expression.
Building the Body
The body construction begins with the legs and incorporates a color change that gives Chocho his distinctive look.
Creating the Legs:
Starting with black yarn, make two identical legs:
- Rounds 1-2: Establish the foot foundation
- Rounds 3-4: Build up the leg height
Joining the Legs:
The second leg connects to the first via a chain bridge in gray yarn. This technique creates a seamless transition into the body. If you’re unfamiliar with joining legs, this is a standard amigurumi technique that creates the characteristic pear-shaped body.
Body Rounds 5-16:
Working entirely in gray, shape the body with strategic increases and decreases:
- Early rounds expand the body width
- Middle rounds maintain the full body circumference
- Final rounds decrease to create the neck opening
Critical Stuffing Note: Like the head, the body requires generous stuffing. A well-stuffed body ensures your raccoon can sit upright and maintain its adorable posture.

Making the Arms
These simple arms add so much personality! Using black yarn for the paws and gray for the arms:
- Create a small tube starting with 4 stitches
- Increase to 8 stitches for the paw
- Switch to gray and continue for several rounds
Leave arms unstuffed for a floppy, natural appearance, or lightly stuff if you prefer more structured limbs. Attach to round 15 of the body, positioning them slightly forward for an embracing pose.
Designing the Ears
The distinctive black-tipped raccoon ears are created in white and gray with black accents:
- Begin with white yarn
- Transition through gray
- Add black detailing along one edge
These triangular ears should remain unstuffed to maintain their alert, perky appearance. Attach them between rounds 4-7 of the head, angling them slightly outward.
Creating the Signature Striped Tail
Nothing says “raccoon” quite like a ringed tail! This piece alternates between gray and black in a striking pattern:
Construction:
- Start with a wide base (18 stitches)
- Gradually decrease to create a tapered shape
- Alternate colors every 1-2 rounds
- End with a narrow tip (9 stitches)
Stuff the tail generously to give it structure and weight. Attach between rounds 7-9 of the body, positioning it to curve naturally.
Adding the Flower Accessory
This sweet finishing touch uses yellow and pink yarn:
- Create a yellow center with 5 stitches
- Add pink petals using (hdc, dc, hdc, slst) repeated 5 times
- Each repetition forms one petal
Leave a long pink tail to create a strap, allowing you to position the flower decoratively on your raccoon’s head or body.
Assembly and Finishing
With all pieces complete, it’s time to bring Chocho together:
- Sew the head to body: Ensure secure attachment with a strong whip stitch around the neck opening
- Attach arms: Position symmetrically on either side
- Add ears: Angle slightly for personality
- Secure the tail: Attach firmly as it provides stability
- Position the flower: Place wherever you find most charming
Pattern Ethics and Community
This Raccoon amigurumi pattern represents more than just instructions—it’s part of a larger mission. A portion of proceeds from pattern sales goes toward cancer research, a cause close to the designer’s heart following personal loss. When you respect pattern copyrights by not sharing or translating for resale, you’re supporting this charitable effort.
What You Can Do:
- Sell finished products made from this pattern (not mass-produced)
- Share photos of your completed raccoons
- Credit the original designer when posting
What to Avoid:
- Translating and selling the pattern
- Sharing the pattern file for free
- Mass-producing finished items
Showcasing Your Creation
Once you’ve completed your Chocho the Raccoon, share your achievement! The crochet community thrives on inspiration and mutual support. Consider:
- Photographing your finished raccoon in creative settings
- Sharing progress photos to encourage other crafters
- Offering tips you discovered during your project
- Connecting with other makers who’ve created their own versions
Troubleshooting Common Issues
Problem: Head or body looks lumpy
Solution: Stuff in small amounts, redistributing filling as you go. Sometimes removing stuffing and re-filling with better distribution helps.
Problem: Color changes look messy
Solution: When switching colors, complete the last stitch of the previous color by pulling through the new color. Weave in ends carefully along color transition lines.
Problem: Pieces won’t stay attached
Solution: Use a longer yarn tail for sewing and make multiple passes through attachment points. A dab of fabric glue can reinforce critical joints.
Problem: Proportions seem off
Solution: Compare your gauge to the recommended hook and yarn weight. Adjusting hook size can help achieve the intended proportions.
Customization Ideas
Make your Chocho uniquely yours:
- Seasonal variations: Add a tiny scarf for winter or sunglasses for summer
- Expression changes: Adjust eye placement slightly for different looks
- Size modifications: Use fingering weight yarn and a 2mm hook for a miniature version
- Color experiments: Try brown and white for a different raccoon variety
- Accessory additions: Create tiny props like acorns or leaves
The Joy of Raccoon Amigurumi Pattern
Creating amigurumi like Chocho offers more than just a finished product. The repetitive stitches provide meditation and stress relief. The gradual progress offers achievable goals. The finished piece brings joy as both a decorative item and a testament to your developing skills.
Whether you’re making Chocho as a gift, adding to your collection, or discovering the calming world of crochet, this pattern provides a rewarding creative journey. Each stitch contributes to something adorable and unique—a perfect reflection of the time and care you’ve invested.
Final Thoughts
Congratulations on completing your Chocho the Raccoon! This Raccoon amigurumi pattern combines technical skill development with creative satisfaction, resulting in an heirloom-quality stuffed animal that showcases your craftsmanship.
Remember, every crocheter’s tension and style creates subtle variations. These differences don’t represent mistakes—they’re what make your Chocho uniquely yours. Embrace the small quirks and imperfections as signatures of handmade love.
Happy crocheting, and may your Chocho bring as much joy to you and its future owner as the creation process brought to you!

Remember it later!
Planning to try this soon? Pin it for a quick find later!