Table of contents
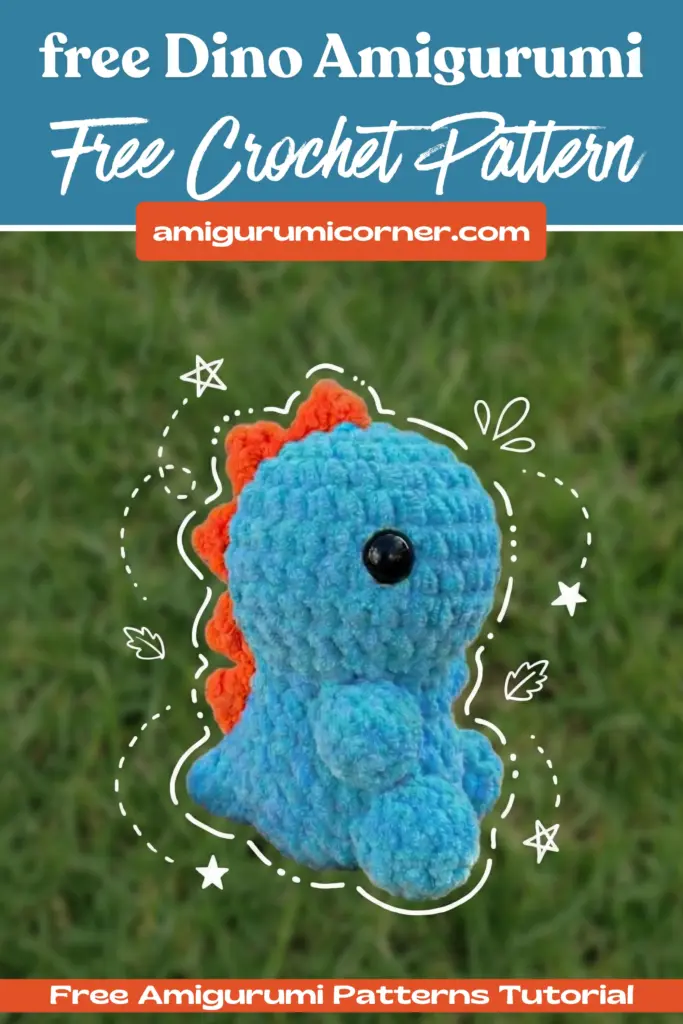
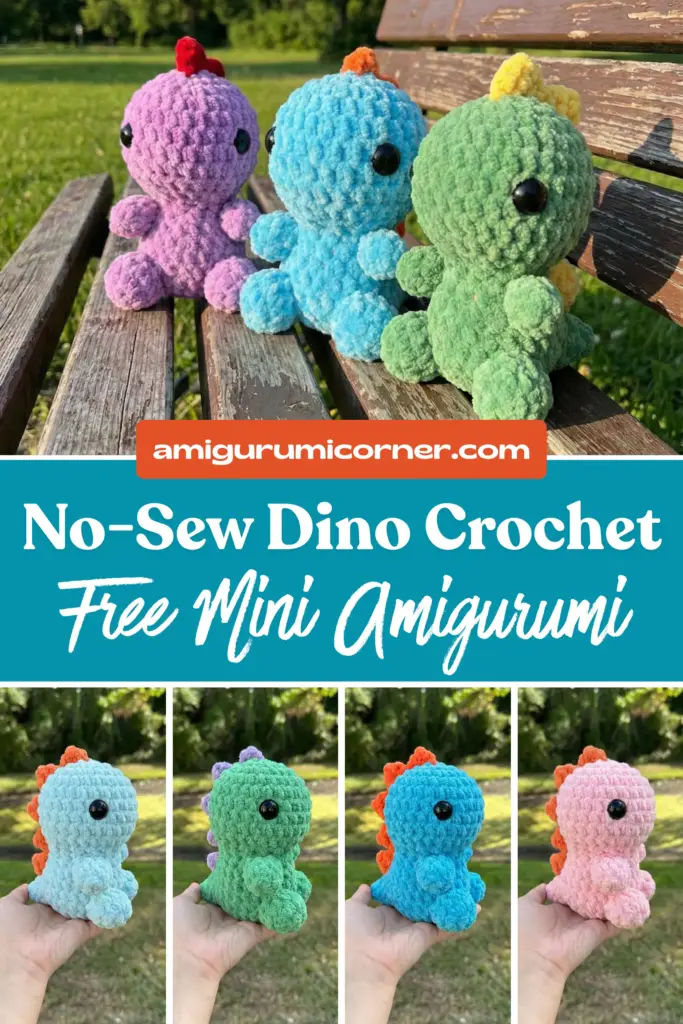
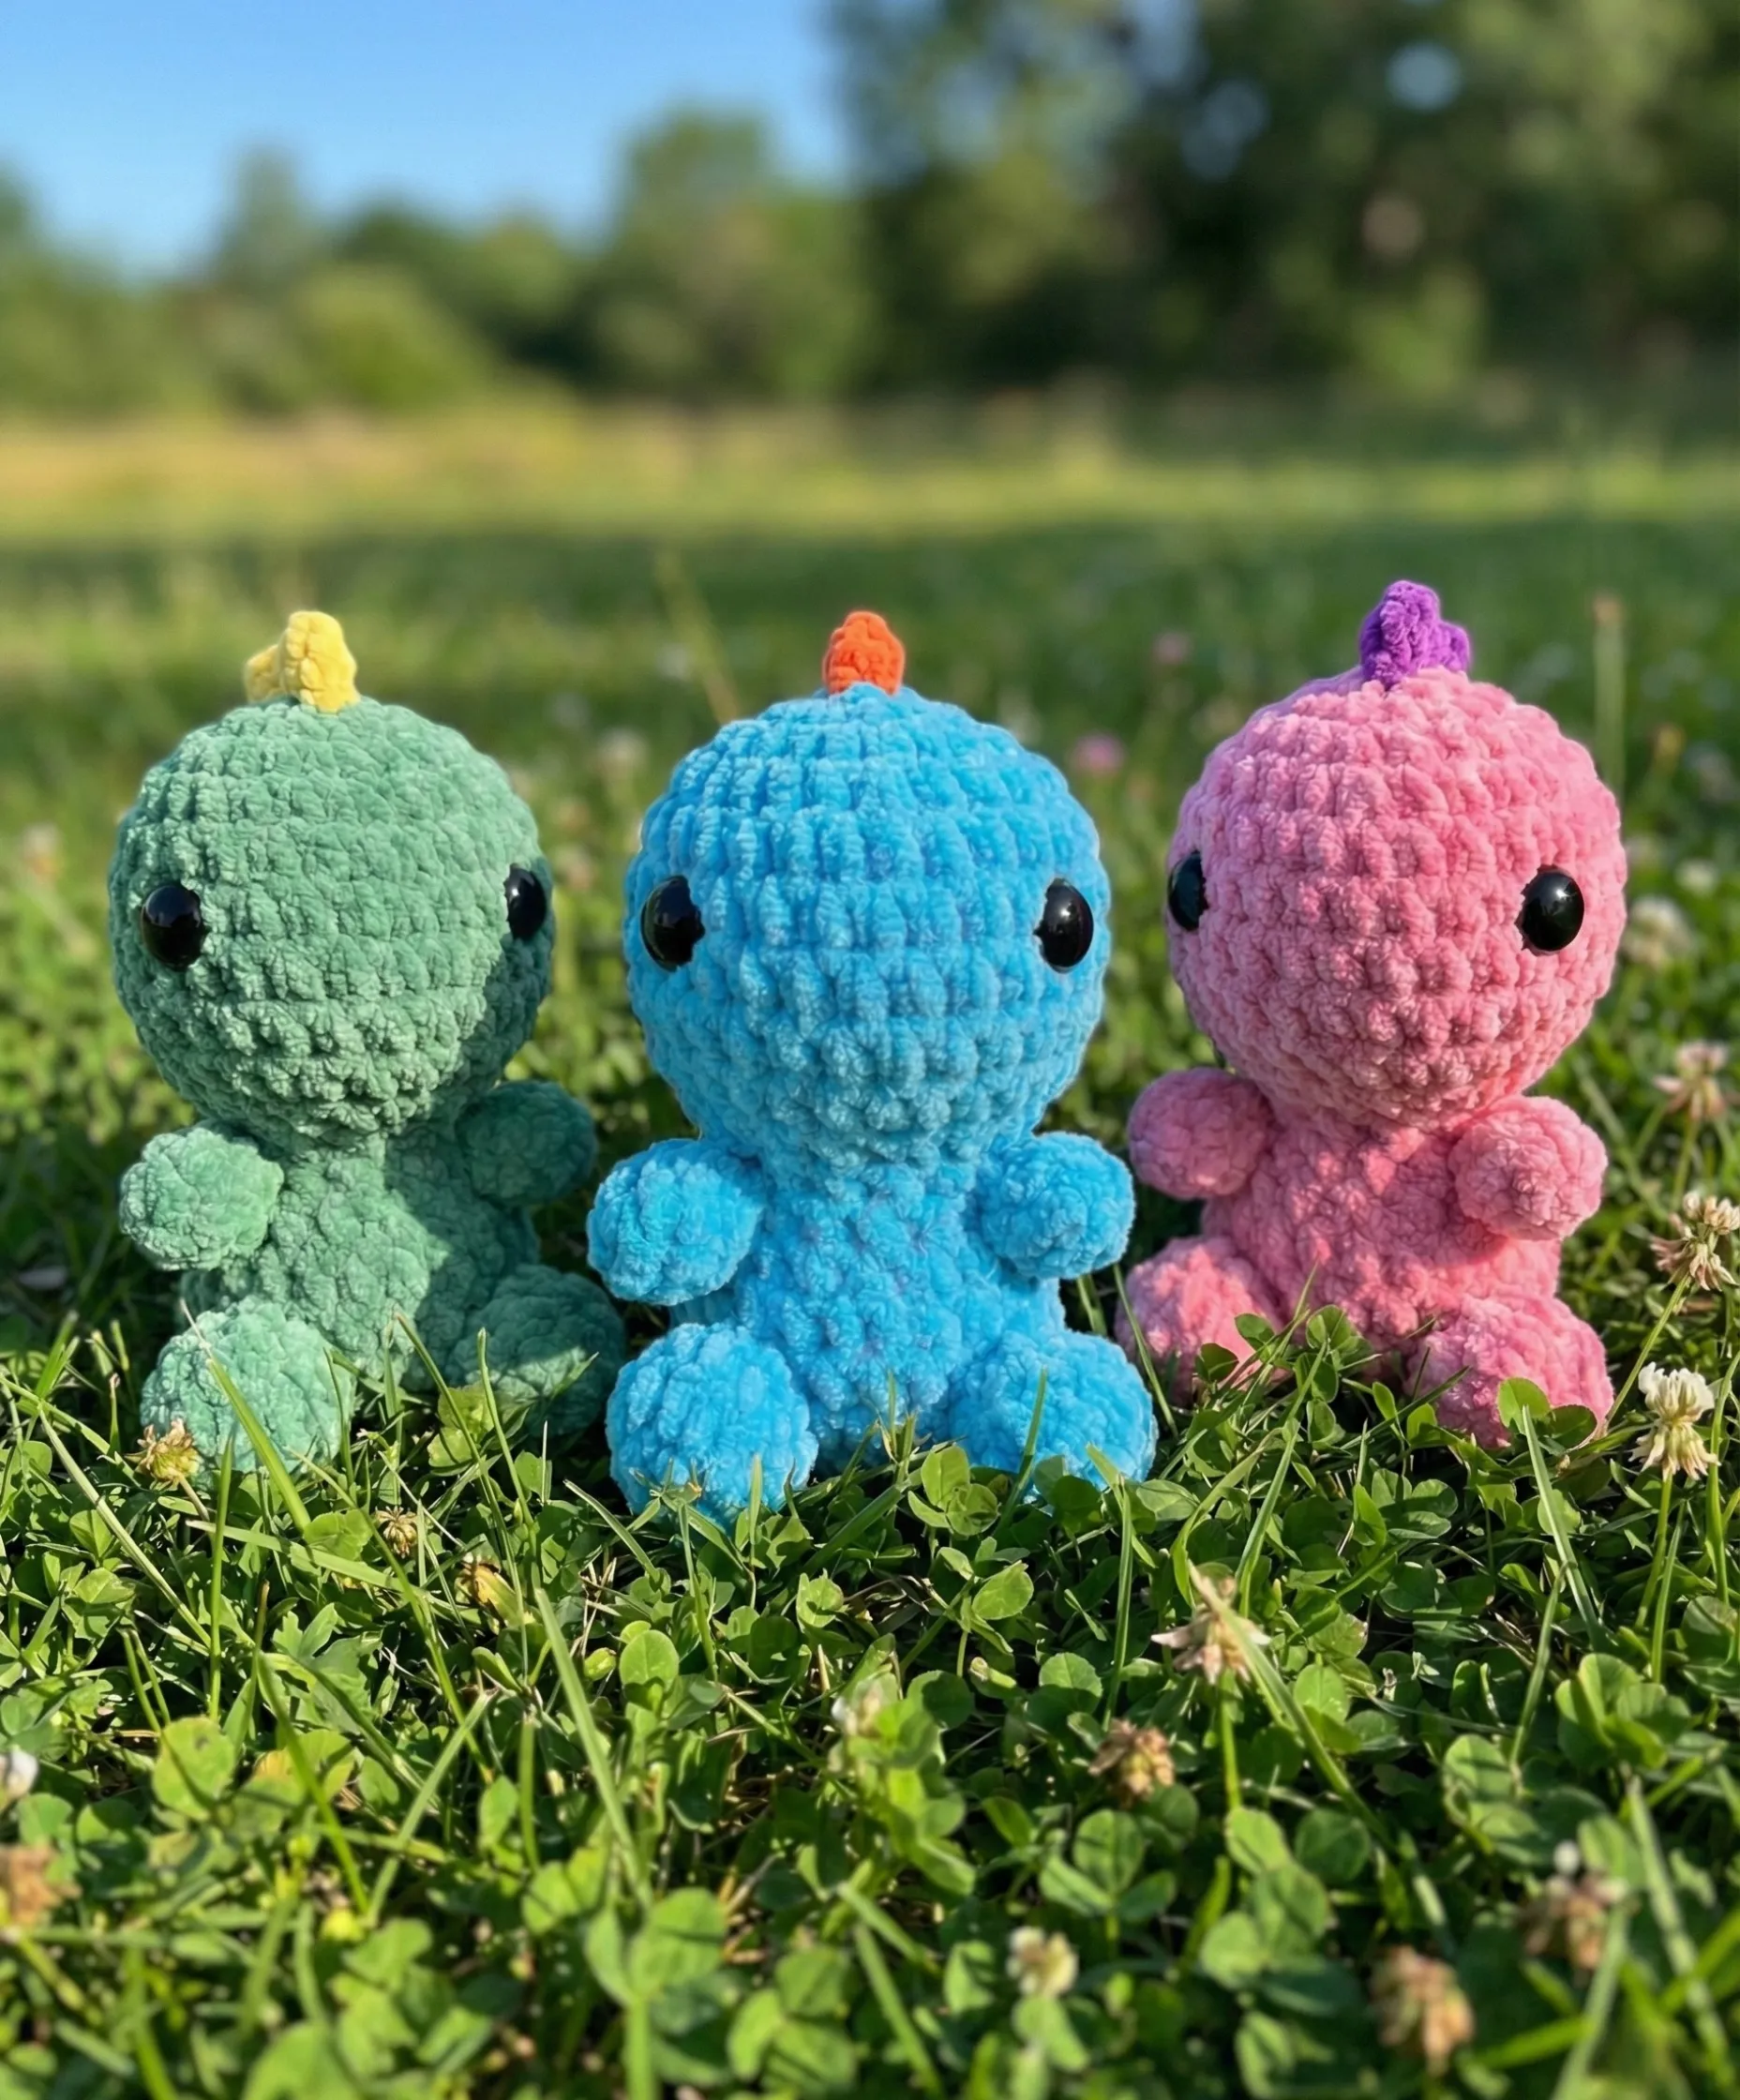
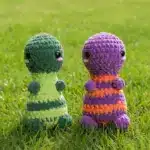
Looking for a fun and beginner-friendly crochet project? This charming no-sew dinosaur plushie is perfect for crafters of all skill levels. With its adorable bobble stitch arms, cute spikes, and customizable sizing options, this pattern will help you create a cuddly companion that’s sure to bring smiles.
What You’ll Need

Remember it later!
Planning to try this soon? Pin it for a quick find later!
Essential Materials
- Yarn: Your choice of weight (recommendations provided below)
- Crochet hook: Size varies based on yarn weight
- Safety eyes: Size depends on your chosen yarn
- Stitch marker: To track your rounds
- Yarn needle: For weaving in ends
- Polyfil stuffing: To bring your dino to life
- Scissors: For trimming yarn
- Optional: Blush for rosy cheeks
Sizing Options
This versatile pattern can be made in three different sizes:
Small Dinosaur (5 inches)
- Yarn: Premier Parfait Chunky
- Hook size: 4.5mm
- Safety eyes: 14mm
Medium Dinosaur (6 inches)
- Yarn: Sweet Snuggles Lite
- Hook size: 5mm
- Safety eyes: 18mm
Jumbo Dinosaur (9 inches)
- Yarn: Premier Parfait XL
- Hook size: 10mm
- Safety eyes: 30mm
Feel free to experiment with any yarn and hook combination, but keep in mind that your finished dinosaur’s size and proportions may vary accordingly.
Important Techniques and Tips

Mastering the Bobble Stitch
The bobble stitch creates the adorable arms for your dinosaur. Here’s how to execute it:
- Yarn over as if beginning a double crochet
- Insert your hook into the next stitch
- Yarn over and pull up a loop (3 loops on hook)
- Yarn over and pull through the first 2 loops (2 loops remaining)
- Repeat steps 1-4 three more times in the same stitch (5 loops total)
- Yarn over one final time and pull through all loops
Pro tip: You can create larger bobbles by adding more loops to your hook!
Essential Crocheting Tips
- Crochet tightly: Use the yarn-under technique to create tighter stitches and minimize gaps
- Mark your rounds: Use a stitch marker or contrasting yarn to track the beginning of each round
- Master invisible decreases: These are crucial for a professional-looking finish
- Work in continuous rounds: This pattern doesn’t require joining at the end of each round
Creating Your Dinosaur Body
Starting the Head
Begin with your main color yarn:
- Round 1: 8 single crochet in magic ring (8 stitches)
- Round 2: Increase in each stitch (16 stitches)
- Round 3: Single crochet, increase; repeat (24 stitches)
- Round 4: 3 single crochet, increase; repeat (30 stitches)
- Round 5: 2 single crochet, increase, then (4 single crochet, increase) five times, 2 single crochet (36 stitches)
- Rounds 6-8: Single crochet around for 3 rounds (36 stitches)
Shaping the Neck
- Round 9: 2 single crochet, decrease, then (4 single crochet, decrease) five times, 2 single crochet (30 stitches)
- Round 10: Single crochet around (30 stitches)
- Round 11: 7 single crochet, 8 decreases, 7 single crochet (22 stitches)
- Round 12: 7 single crochet, 4 decreases, 7 single crochet (18 stitches)
- Round 13: Single crochet around (18 stitches)
Building the Body
- Round 14: 2 single crochet, increase; repeat (24 stitches)
- Round 15: 3 single crochet, increase; repeat (30 stitches)
- Round 16: 12 single crochet, bobble stitch, 5 single crochet, bobble stitch, 11 single crochet (30 stitches)

Important: After creating the bobble stitch arms, position and attach your safety eyes. Place them between rounds 7-8, approximately 6-7 stitches apart, aligned with the bobble stitches. Stuff the head before proceeding.
Adding the Tail
- Round 17: 2 single crochet, increase, then (4 single crochet, increase) five times, 2 single crochet (36 stitches)
- Round 18: 3 single crochet, chain 5. Starting from the 2nd stitch, work 4 single crochet down the chain, then single crochet back into the same stitch where you started the chain. Continue with 33 single crochet (36 stitches plus tail)
- Round 19: 3 single crochet, work 3 single crochet and increase 4 single crochet into the tail, 33 single crochet (45 stitches)
Stuffing tip: Don’t forget to stuff your tail as you work to help it maintain its shape!
Completing the Body
- Round 20: (2 single crochet, 2 decreases) twice, 12 single crochet, bobble stitch, 8 single crochet, bobble stitch, 11 single crochet (41 stitches)
- Round 21: 2 decreases, 3 single crochet, 2 decreases, then (3 single crochet, decrease) six times (31 stitches)
- Round 22: 1 single crochet, 3 decreases, then (2 single crochet, decrease) six times (22 stitches)
- Round 23: Decrease 11 times (11 stitches)
Fasten off and weave in all ends. Make sure to stuff your dinosaur as you go for the best results!
Creating the Spikes
For that classic dinosaur look, add adorable spikes down the back:
- Position your work with the head facing down and closest to you
- Slip stitch in the middle of your magic ring and chain 1
- In the same stitch, work 2 double crochet and 1 half double crochet
- Work 2 slip stitches in the following 2 stitches
- Repeat these instructions to create 6-7 spikes along the back
- Slip stitch and fasten off
- Join both yarn ends, tie a secure knot, and hide the ends inside
Finishing Touches
Add personality to your dinosaur with these optional details:
- Rosy cheeks: Apply a small amount of blush to the cheeks for extra cuteness
- Color variations: Experiment with different color combinations for unique dinosaurs
- Expression: Adjust eye placement slightly to create different expressions

Troubleshooting Common Issues
- Gaps between stitches: Crochet more tightly or use a smaller hook
- Misaligned bobbles: Adjust placement based on your tension
- Tail losing shape: Ensure adequate stuffing throughout
- Uneven spikes: Practice consistency with your stitch tension
Why This Pattern Works
This no-sew design is perfect for beginners because it eliminates the need to attach separate pieces. The continuous round construction creates a seamless finish, while the simple shaping techniques produce an adorable result. The pattern’s flexibility allows you to customize size and colors to your preference.
Ready to Start Crocheting?
This charming dinosaur plushie makes an excellent gift for children and dinosaur enthusiasts of all ages. Whether you’re creating a collection in different sizes or personalizing one with unique color combinations, this pattern offers endless creative possibilities. Grab your hook and yarn, and start bringing your adorable dino to life today!

Remember it later!
Planning to try this soon? Pin it for a quick find later!