Table of contents
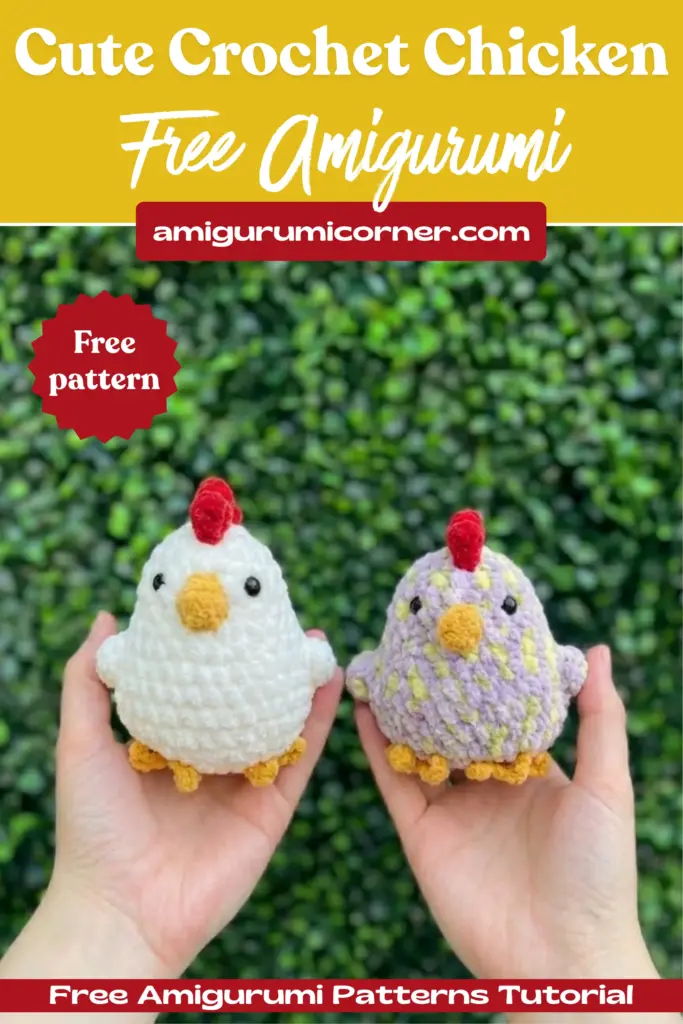
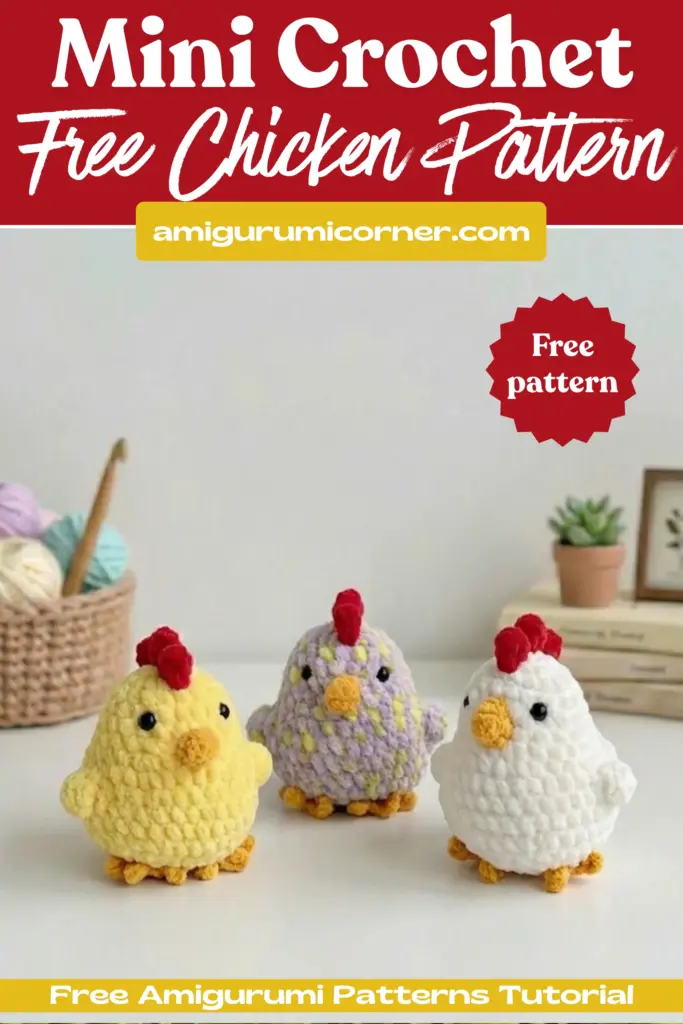
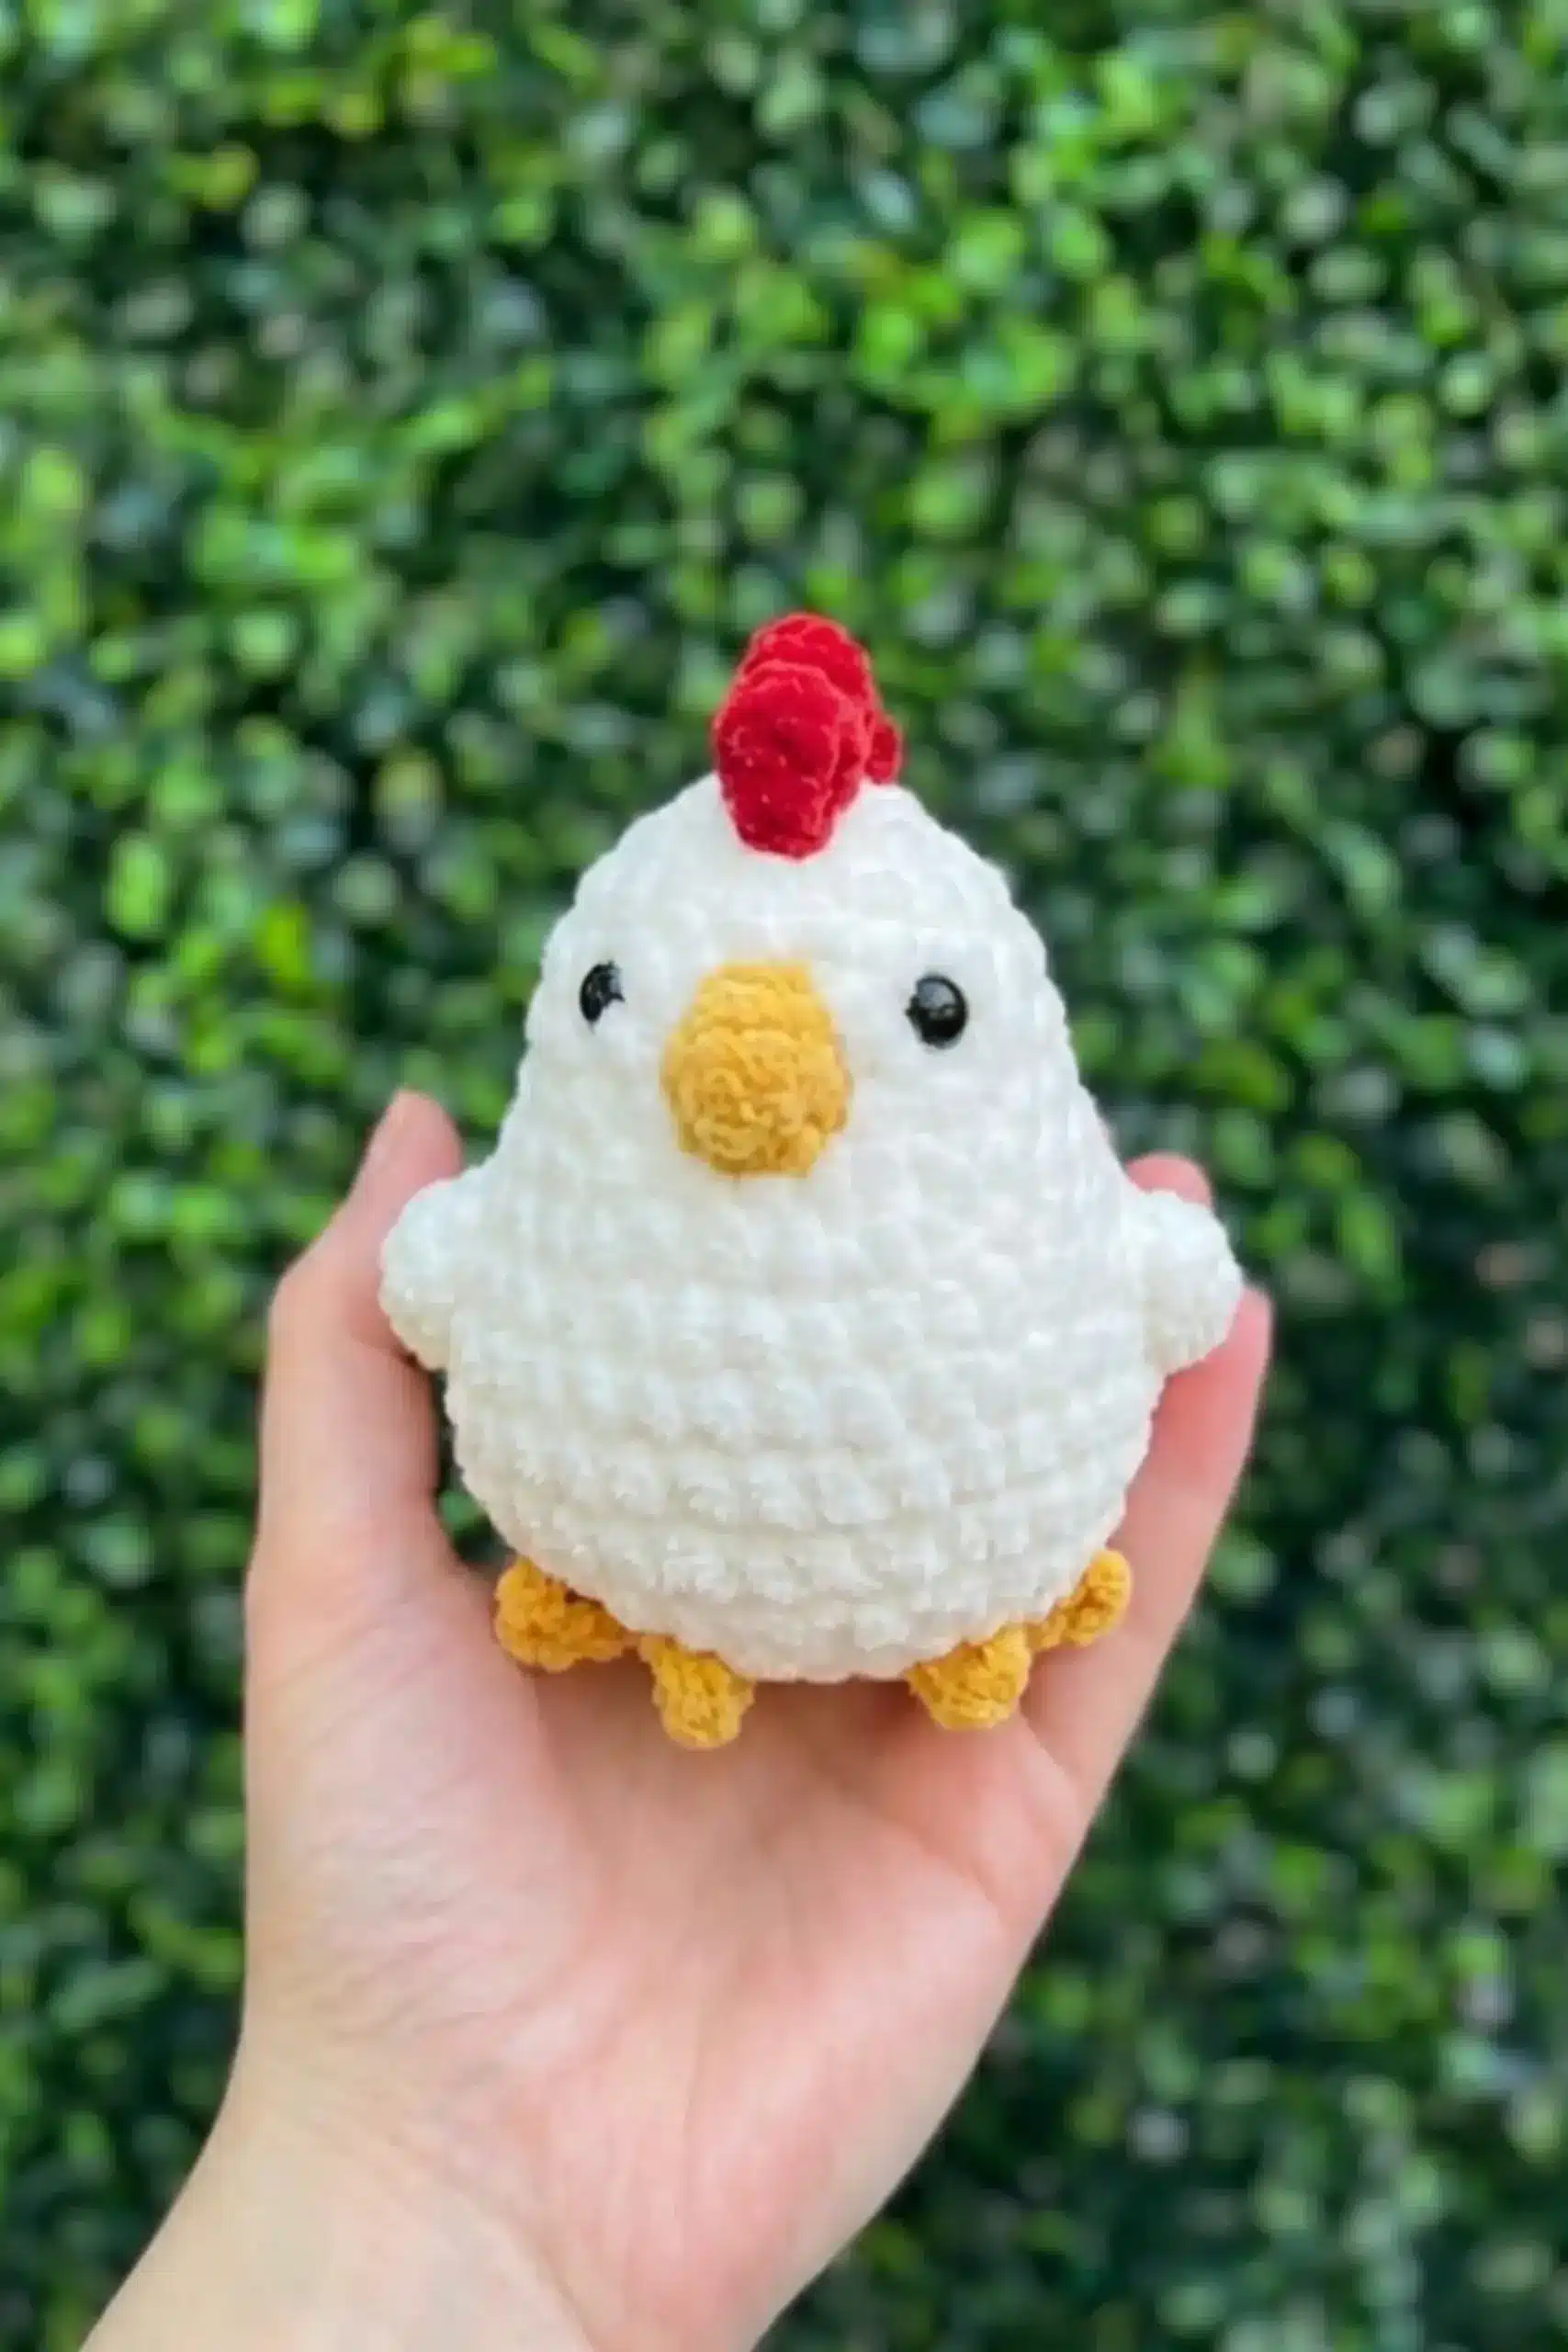
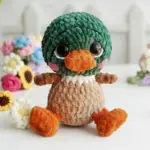
Looking for a quick and delightful crochet project? This charming crochet chicken pattern is perfect for beginners and experienced crocheters alike! Standing at just 10 cm tall, this plump little chicken makes an adorable decoration, gift, or addition to your amigurumi collection. With its cheerful red crest and bright orange beak and feet, this little bird is sure to bring a smile to anyone’s face.
Why You’ll Love This Crochet Chicken Pattern
This pattern is designed to be accessible and enjoyable for crocheters of various skill levels. The small size makes it a perfect weekend project, and the use of plush Himalaya Dolphin Baby yarn creates a soft, cuddly texture that’s irresistible. Whether you’re making it for yourself, as a gift, or to add to a farmyard-themed collection, this little chicken is guaranteed to delight.

Materials You’ll Need
Before you begin, gather the following supplies:
- Crochet Hooks: 3.5mm hook (for body) and 2mm hook (for details)
- Yarn:
- Himalaya Dolphin Baby in Brown (Color: 80337) or similar plush yarn
- YarnArt Sport yarn in Red (for crest)
- Orange cotton yarn (for beak and feet)
- Safety Eyes: 8mm plastic safety eyes
- Stuffing: Polyester fiberfill or bead fiber
- Other Supplies:
- Black embroidery thread (for details)
- Fabric adhesive
- Scissors
- Yarn needle for sewing
Finished Size: Approximately 10 cm (4 inches) tall
Pattern Abbreviations
Before we dive into the pattern, familiarize yourself with these common crochet abbreviations:
- MR: Magic Ring
- ch: Chain
- sl st: Slip stitch
- sc: Single crochet
- hdc: Half double crochet
- inc: Increase (2 sc in one stitch)
- dec: Decrease (single crochet 2 stitches together)
- FLO: Front loop only
- BO: Bobble stitch
- st(s): Stitch(es)
- (n): Stitch count of the row
- ()×: Repeat instructions within parentheses until the end of round
- (): Total number of stitches in the round
Important Notes Before You Start
Tension Matters: This pattern is created with medium-tight tension. Different tension may create different results in the finished size of your chicken.
Yarn Substitutions: While you can use different yarn types, pay attention to yarn weight and adjust your hook size accordingly to maintain proper proportions.
Working Method: Unless otherwise stated, work in continuous spiral rounds. Do not join or turn at the end of rounds.
Copyright Notice: This pattern is for personal use only. The finished product should not be mass-produced or factory-produced. Please respect the designer’s copyright by not duplicating, distributing, reselling, or translating this pattern.
Pattern Instructions
Head & Body
Use Brown yarn with 3.5mm hook:
- Row 1: Make a chain of 2, and work 6 sc in the first chain (6).
- Row 2: 6 inc (12).
- Row 3: (1 sc, 1 inc) *6 (18).
- Row 4: 18 sc.
- Row 5: (2 sc, 1 inc) *6 (24).
- Rows 6-7: 24 sc.
- Row 8: (3 sc, 1 inc) *6 (30).
- Row 9: (4 sc, 1 inc) *6 (36).
— Sew the eyes between the 6th and 7th rows, leaving 5 sc between them.
- Rows 10-13: 36 sc.
- Row 14: (4 sc, 1 dec) *6 (30).
- Row 15: (3 sc, 1 dec) *6 (24).
— Fill with fiber.
- Row 16: (1 sc, 1 dec) *8 (16).
- Row 17: 1 dec *8 (8).
— Close the opening with a needle.
Crest
Use Red cotton yarn with 2mm crochet hook:
- Row 1: Chain 6. Starting from the 5th chain from the hook, crochet 5 single crochets tightly.
- Row 2: Repeat the same process 4 more times (creating 5 crests in total).
- Leave a long yarn tail for sewing.
- Straighten the crests and sew them to the head using a needle.
Attach the crest across rows 1 to 3 on the head, positioning it slightly towards the back for a natural look.

Wings (Make 2)
Use Brown yarn with 3.5mm hook:
- Row 1: Chain 2, then work 6 sc into the first chain (6).
- Row 2: 6 sc.
Leave a long yarn tail for sewing.
Sew the wings to the sides of the body, between rows 8 and 10. The wings should be placed evenly on both sides to ensure a symmetrical look.
Beak
Use Orange cotton yarn with 2mm hook:
- Row 1: Make 4 sc in MR (magic ring) (4).
- Row 2: (1 sc, 1 inc) *2 (6).
- Row 3: (1 sc, 1 inc) *3 (9).
- Row 4: 9 sc.
- Row 5: (2 sc, 1 inc) *3 (12).
Leave a long yarn tail for sewing.
Fill with fiber and sew the beak onto the face.
Sew the beak between rows 7 and 8 (or adjust based on your chicken’s size).
Feet (Make 2)
Use Orange cotton yarn with 2mm hook:
- Row 1: Chain 11, then make a slip stitch into the 10th chain from the hook. Work double decreases across the remaining stitches to the end.
Repeat this process 2 more times to create 3 (fingers).
Gather the stitches from the ends of these sections together.
Leave a long yarn tail for sewing.
Sew the feet at the bottom of the body. Attach them between rows 2 and 4 of the body, making sure they are evenly spaced.
Assembly Instructions
Follow these detailed steps to bring your crochet chicken to life:
Starting the Head & Body
- Row 1: Make a slip knot and then chain 2 stitches. This will serve as the turning chain. After chaining 2, work 6 single crochet stitches (sc) into the second chain from the hook (the first chain you made).
Creating the Crest
- Row 1: Chain 6, begin crocheting from the 5th chain from the hook, and work 5 tight single crochet stitches.
— Repeat this process (crocheting 5 tight single crochets) four more times to create a total of 5 crests.
Making the Wings
- Row 1: Chain 2, then work 6 single crochet stitches into the second chain from the hook (the first chain you made).
Forming the Feet
- Row 1: Make a slip stitch by inserting your hook into the 10th chain from the hook (counting from the slip knot), yarn over, and pull through both the loop on the hook and the chain loop, joining the chain.
Make double decreases across the remaining stitches.
Double decrease: Insert your hook as if to crochet two stitches together, yarn over, and pull the yarn through all stitches.

Final Assembly Tips
Position the eyes carefully between rows 6 and 7, spacing them 5 stitches apart for the most charming expression.
Attach the crest slightly toward the back of the head (rows 1-3) for a natural, perky look.
Sew the wings symmetrically on both sides of the body between rows 8 and 10.
Place the beak centrally between rows 7 and 8, stuffing lightly before closing.
Attach the feet evenly at the bottom between rows 2 and 4, ensuring your chicken can stand if desired.
Frequently Asked Questions
Yes, you can use different yarn weights, but you’ll need to adjust your hook size accordingly. Using heavier yarn will create a larger chicken, while lighter yarn will make a smaller one. Always match your hook size to your yarn weight and maintain medium-tight tension for best results.
The pattern creates a 10 cm (4 inch) chicken with Himalaya Dolphin Baby yarn and a 3.5mm hook. If you use DK weight yarn with a 3mm hook, expect a chicken around 7-8 cm tall. With worsted weight yarn and a 4mm hook, your chicken will be approximately 12-13 cm tall.
Place the safety eyes between rows 6 and 7, spacing them 5 single crochets apart. Insert the eye post through the fabric from the outside, then firmly press the backing washer onto the post from the inside before stuffing the head. Once attached, safety eyes cannot be removed, so position them carefully before securing.
For a perkier crest, work the single crochets very tightly in Row 1. After completing all 5 crests, gently stretch and shape them with your fingers before sewing. You can also add a small amount of fabric stiffener or diluted white glue to help the crest maintain its shape after drying.
Conclusion
Congratulations! You’ve completed your adorable crochet chicken! This charming little bird makes a wonderful gift, decoration, or addition to any amigurumi collection. The small size and quick construction time make it perfect for craft fairs, stocking stuffers, or spontaneous creative sessions.
Don’t forget to share your finished creation on social media! When you post photos of your completed chicken, tag the designer to share your work and inspire other crocheters. If you encounter any difficulties with the pattern or have questions, don’t hesitate to reach out for support.
Now that you’ve mastered this chicken, why not create an entire barnyard? Try making different colored chickens, or experiment with the pattern to create chicks by using smaller yarn and hooks. Happy crocheting!

Remember it later!
Planning to try this soon? Pin it for a quick find later!