Table of contents
- Essential Materials to Master Crochet Mini Pops
- Understanding Key Crochet Abbreviations
- Professional Tips for Creating Perfect Master Crochet Mini Pops
- Creating the Mushie Pop: Woodland Wonder Edition
- Crafting the Jelly Pop: Oceanic Charm
- Designing the Flower Pop: Botanical Beauty
- Personalizing Your Mini Pops Creations
- Troubleshooting Common Issues When Making Mini Pops
- Final Thoughts: Your Mini Pops Mastery Journey Begins
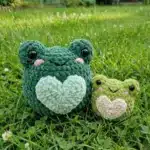
Have you ever dreamed of learning to master crochet mini pops? These charming creations strike the perfect balance between cuteness and craftsmanship. Whether you’re looking to craft unique keychains, decorative tabletop pieces, or simply want to expand your crochet portfolio with something special, this comprehensive guide will teach you everything needed to master crochet mini pops in three enchanting variations: the whimsical Mushie Pop, the oceanic Jelly Pop, and the botanical Flower Pop.
If you want to master crochet mini pops successfully, you’ll discover that this advanced beginner project delivers undeniably cute results that make perfect gifts or personal collection pieces. By following this complete guide, you’ll be able to master crochet mini pops with confidence and create adorable characters that fit perfectly in the palm of your hand.
Remember it later!
Planning to try this soon? Pin it for a quick find later!
Essential Materials to Master Crochet Mini Pops
Before you begin your journey to master crochet mini pops, gather all your materials. One of the best aspects of learning to master crochet mini pops is its flexibility—you can adapt it to work with various yarn weights. However, the original design uses these specifications:
Basic Tools and Notions:
- H/5 mm crochet hook (or 6.5 mm if using blanket yarn)
- Premier Parfait Chunky yarn in super bulky size 6
- 2 stitch markers
- Sharp scissors
- Fiber fill for stuffing
- 8 mm safety eyes
- Darning needle
- Optional: 10 inches of pink yarn for adding blush accents
Yarn Quantities by Character:
- Mushie Pop: 12 yards of cap color, 12 yards of head color, plus 15 inches of white or cream for embroidering details
- Jelly Pop: 28 yards total of your chosen color
- Flower Pop: 2 yards of stem color, 15 yards of flower color, and 12 yards of head color
Understanding Key Crochet Abbreviations
This pattern uses standard US crochet terminology. Familiarize yourself with these essential abbreviations before beginning your quest to master crochet mini pops:
- R: Round
- mc: Magic circle
- st(s): Stitch(es)
- sl st: Slip stitch
- sc: Single crochet
- hdc: Half double crochet
- ch: Chain
- BLO: Back loop only
- FLO: Front loop only
- inc: Increase
- dec: Decrease
Professional Tips for Creating Perfect Master Crochet Mini Pops
Success with these patterns requires understanding a few key techniques and best practices. When you master crochet mini pops, you’re learning valuable skills that apply to many amigurumi projects.
Master Continuous Rounds: Every round in this pattern flows continuously without requiring a chain 1 unless explicitly stated. This creates seamless transitions and a polished finish. Place a stitch marker at the beginning of each round to keep track of where you are in the pattern.
Adapt the Magic Circle: If you’re not yet comfortable with the magic circle technique, don’t worry. Simply chain 3, slip stitch into the first chain, and single crochet into the resulting ring. This creates the same foundation for your project.
Execute Invisible Decreases: For a cleaner, more professional appearance throughout your creations, use invisible decreases. To perform this technique: insert your hook into the front loop only of the decreasing stitches, yarn over, pull up a loop, yarn over again, and pull through two loops on your hook. This method minimizes visible decreases and creates a smoother surface.
Account for Yarn Weight Variations: Not all super bulky yarns behave identically. If you’re working with blanket yarn like Bernat, strongly consider going up a hook size to 6.5 mm. This adjustment prevents overly tight stitches and ensures better fabric drape and structure.
Prevent Stuffing Show-Through: When working with larger yarn weights, add an extra protective layer. Before completing and stuffing the head section, loosely sew a piece of matching yarn over the hole between the cap and head using back loop only stitches. This prevents fiber fill from poking through your stitches.
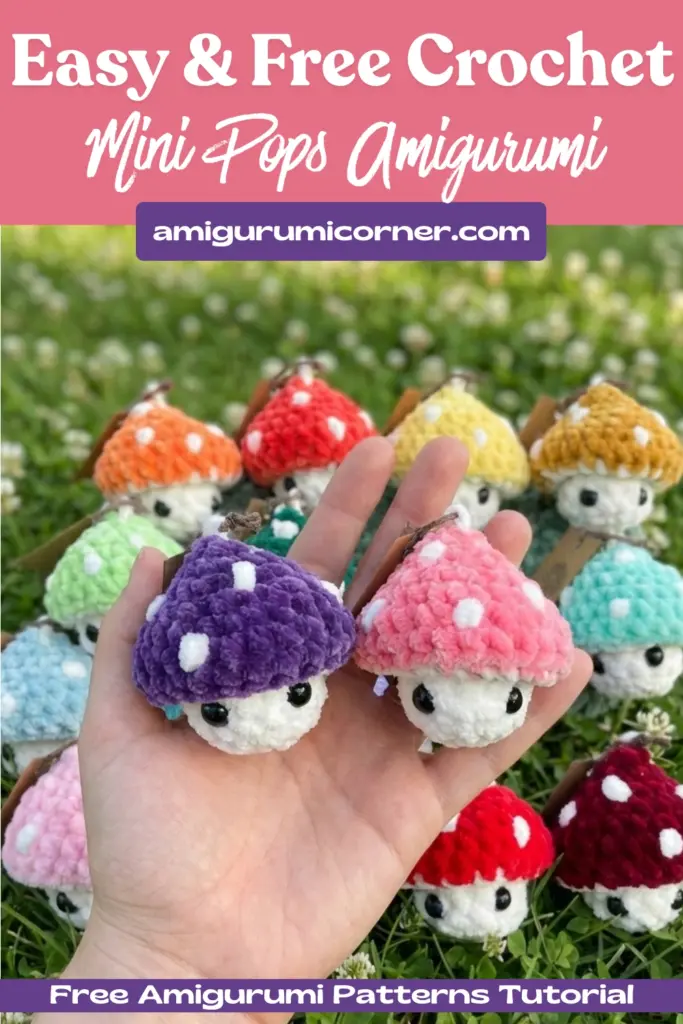
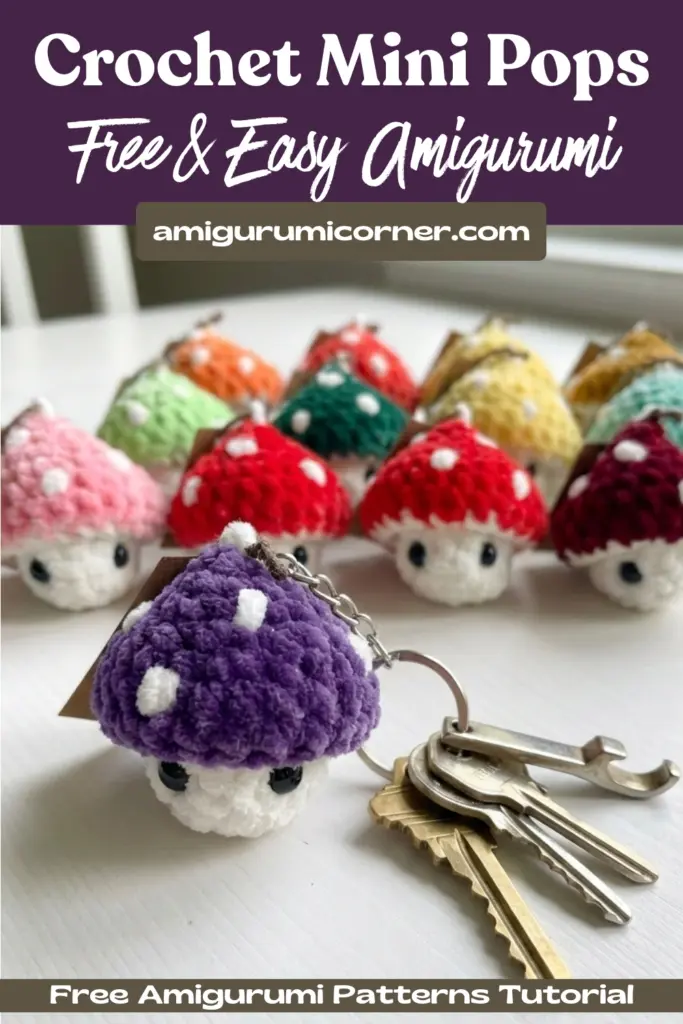
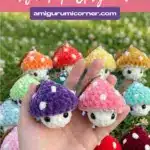
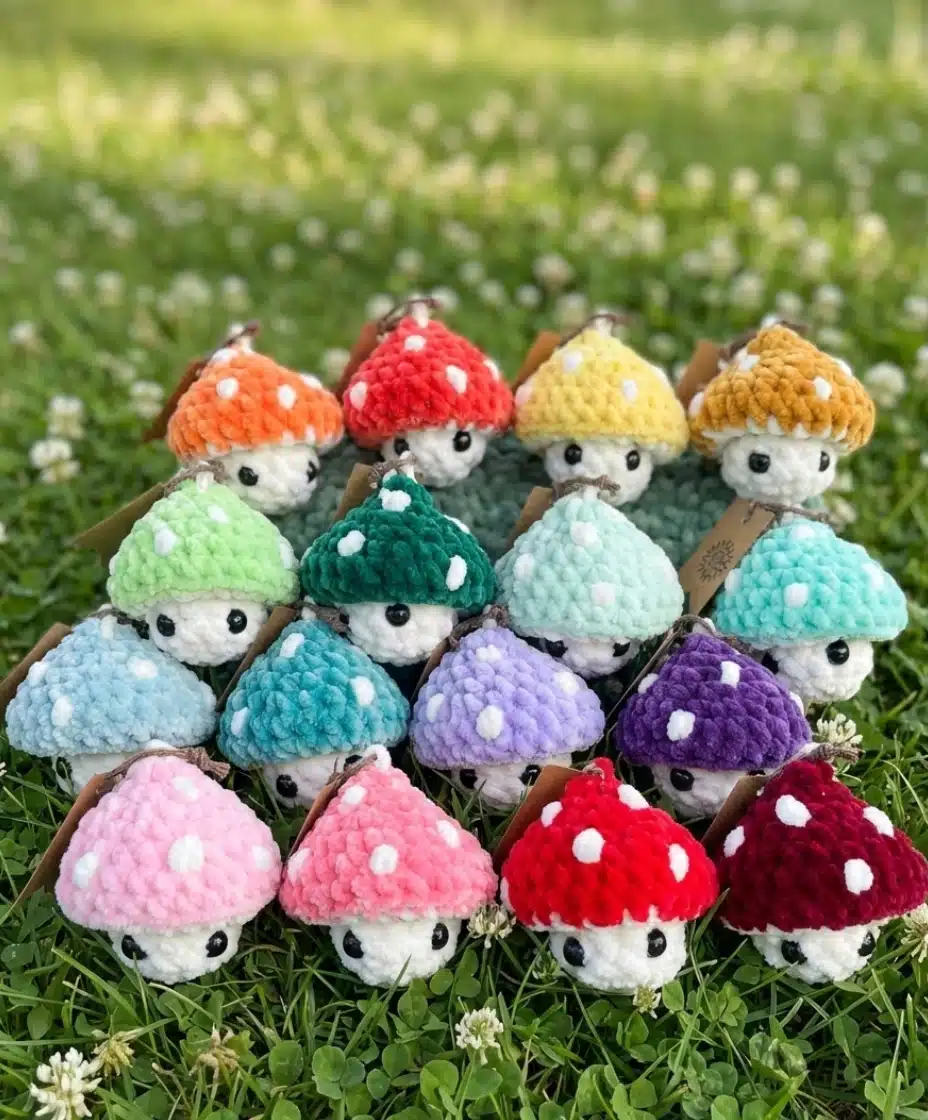
Creating the Mushie Pop: Woodland Wonder Edition
The Mushie Pop captures the charm of a forest mushroom with its distinctive speckled cap and rounded head. Follow these step-by-step instructions to bring this woodland creature to life.
Cap Section Construction
Begin with your cap color and work through rounds 1 through 7, gradually increasing from 6 stitches to 24 stitches. This graduated increase creates the mushroom’s characteristic rounded top.
Round-by-Round Breakdown:
- Round 1: Work 6 single crochets into the magic circle
- Round 2: Increase in every stitch around (12 total stitches)
- Round 3: Alternate between 1 single crochet and 1 increase around (18 total stitches)
- Round 4: Single crochet in every stitch (18 stitches)
- Round 5: Work 1 single crochet, 1 increase, then repeat 2 single crochets followed by 1 increase five times, ending with 1 single crochet (24 stitches)
- Rounds 6-7: Single crochet in every stitch, maintaining 24 stitches. After completing round 7, switch to your head color in the final stitch.
Adding Authentic Details: Using approximately 15 inches of white or cream-colored yarn, embroider small specks randomly across the cap’s surface. These tiny speckles create an authentic mushroom appearance and add delightful character to your finished piece.

Head Section Development
Continue building your Mushie Pop with the head section, which creates the adorable face for your creation.
Rounds 8-12 (Creating the Cap Edge):
- Round 8: Work in back loops only to create a defined edge. Work 1 single crochet, 1 decrease, then repeat 2 single crochets followed by 1 decrease five times, ending with 1 single crochet (18 stitches)
- Round 9: Single crochet in every stitch (18 stitches)
- Round 10: Alternate 1 single crochet with 1 decrease around (12 stitches)
- Round 11: Single crochet in every stitch (12 stitches)
- Round 12: Decrease in every stitch around (6 stitches)
Critical Stuffing Note: At this point, do NOT stuff the cap section. It should remain empty to maintain its flat, cap-like appearance and distinct separation from the head.
Rounds 13-17 (Completing the Head):
- Round 13: Work in front loops only and increase in every stitch around (12 stitches)
- Rounds 14-16: Single crochet in every stitch, maintaining 12 stitches through all three rounds
- Between rounds 15 and 16: Insert your safety eyes with 2 stitches between them
- Begin stuffing the head gently as you progress
- Round 17: Decrease in every stitch around (6 stitches)
Finishing: Fasten off your yarn, complete stuffing the head section, carefully sew the opening closed, and weave in all ends. Your Mushie Pop is complete!
Crafting the Jelly Pop: Oceanic Charm
The Jelly Pop brings aquatic whimsy to your collection with its signature curly tentacles that add movement and playfulness to this delightful character. Whether you love sea creatures or simply want something uniquely charming, this design delivers.
Main Body Construction
The Jelly Pop’s body follows a similar structure through round 17, but with an important difference—you won’t fasten off after round 17, as the magic happens next.
Rounds 1-12 (Body Foundation):
- Round 1: Work 6 single crochets into the magic circle
- Round 2: Increase in every stitch around (12 stitches)
- Round 3: Alternate 1 single crochet with 1 increase around (18 stitches)
- Round 4: Single crochet in every stitch (18 stitches)
- Round 5: Work 1 single crochet, 1 increase, then repeat 2 single crochets with 1 increase five times, ending with 1 single crochet (24 stitches)
- Rounds 6-7: Single crochet in every stitch (24 stitches for both rounds)
- Round 8: Work in back loops only. Work 1 single crochet, 1 decrease, then repeat 2 single crochets with 1 decrease five times, ending with 1 single crochet (18 stitches). Place an additional stitch marker in the first front loop stitch to help locate it later when adding ruffles.
- Round 9: Single crochet in every stitch (18 stitches)
- Round 10: Alternate 1 single crochet with 1 decrease around (12 stitches)
- Round 11: Single crochet in every stitch (12 stitches)
- Round 12: Decrease in every stitch around (6 stitches)
Rounds 13-17 (Head Development):
- Round 13: Work in front loops only and increase in every stitch around (12 stitches)
- Rounds 14-16: Single crochet in every stitch for all three rounds (12 stitches)
- Between rounds 15 and 16: Place safety eyes with 2 stitches between them
- Begin stuffing the head gently
- Round 17: Decrease in every stitch around (6 stitches). Do NOT fasten off yet—you’ll use this loop for the tentacles.
Creating the Signature Tentacles
Round 18 is where the Jelly Pop truly comes alive with its characteristic tentacles that give it personality and charm.
Tentacle Construction Instructions:
- Round 18: Work in front loops only. Slip stitch into the next stitch, then chain 7.
- Starting from the second chain from your hook, work 2 single crochets in each of the first 5 chain spaces.
- Slip stitch into the last chain space. This completes one tentacle.
- Repeat this sequence—slip stitch into the next stitch, chain 7, and work the same pattern—in each front loop stitch around until you create 6 tentacles total.
- Slip stitch into the first stitch of round 18 to join, then fasten off.
- Finish stuffing your head and use the back loops to sew the bottom opening closed.
- Weave in all remaining ends.
Pro Technique: Keep your chains extra tight when creating the tentacles. This tension helps them curl naturally at the tips, creating that perfect jellyfish effect that makes your creation irresistibly charming.
Optional Ruffles for Extra Dimension
For an enhanced appearance, you can add delicate ruffles to your Jelly Pop. This optional step creates visual interest and texture.
Creating Jelly Ruffles:
- With the Jelly Pop color and the top of the head facing you, place a slip knot on your hook.
- Go into the first front loop stitch created in round 8 of your Jelly Pop.
- Work 1 single crochet and 1 increase in the same stitch, then repeat this pattern around 12 times (36 stitches total).
- Slip stitch to join, fasten off, and weave in all ends.
Designing the Flower Pop: Botanical Beauty
The Flower Pop brings natural elegance to your collection with its delicate stem base and lovely petal details, making it perfect for those who appreciate floral designs or want to gift something truly special.
Stem and Base Construction
The Flower Pop begins with a simplified stem, making this design distinctive among the three variations.
Stem Creation:
- Round 1: Work 4 single crochets into the magic circle
- Round 2: Work 1 single crochet and 1 increase alternating around (6 stitches). Change to flower color in the last stitch.
- Round 3: Work in back loops only. Increase in every stitch around (12 stitches)
Flower Head Development
Once your stem is complete, continue building the flower head with its expanding structure.
- Rounds 4-8 (Flower Base):
- Round 4: Alternate 1 single crochet with 1 increase around (18 stitches)
- Round 5: Single crochet in every stitch (18 stitches)
- Round 6: Work 1 single crochet, 1 increase, then repeat 2 single crochets with 1 increase five times, ending with 1 single crochet (24 stitches)
- Rounds 7-8: Single crochet in every stitch (24 stitches for both rounds). After round 8, change to head color in the final stitch. Place an additional stitch marker in the first front loop stitch created in round 9 to help when adding petals.
- Rounds 9-13 (Creating Definition):
- Round 9: Work in back loops only. Work 1 single crochet, 1 decrease, then repeat 2 single crochets with 1 decrease five times, ending with 1 single crochet (18 stitches)
- Round 10: Single crochet in every stitch (18 stitches)
- Round 11: Alternate 1 single crochet with 1 decrease around (12 stitches)
- Round 12: Single crochet in every stitch (12 stitches)
- Round 13: Decrease in every stitch around (6 stitches)
- Rounds 14-18 (Completing the Head):
- Round 14: Work in front loops only and increase in every stitch around (12 stitches)
- Rounds 15-17: Single crochet in every stitch for all three rounds (12 stitches)
- Between rounds 16 and 17: Place safety eyes with 2 stitches between them
- Begin stuffing the head gently
- Round 18: Decrease in every stitch around (6 stitches)
- Fasten off, finish stuffing, sew the opening closed, and weave in all ends.
Creating Delicate Petals
The petals transform your Flower Pop into a beautiful botanical creation with charm and character.
Petal Construction:
- With flower color and the top of the head facing you, place a slip knot on your hook.
- Go into the first front loop stitch created in round 9 of your Flower Pop.
- Work the petal pattern: slip stitch and half double crochet in the same stitch, then half double crochet and slip stitch in the next stitch.
- Repeat this alternating pattern 12 times around, creating 12 beautiful petals total (48 stitches).
- Slip stitch to join, fasten off, and weave in all remaining ends.
Personalizing Your Mini Pops Creations
Adding Blush for Extra Character
Give your Mini Pops charming personality and expression by sewing delicate blush marks. Using pink yarn, create small stitches over a single stitch located directly under the corner of each eye. This surprisingly simple detail adds incredible warmth and lifelike expression to your creations, making them even more adorable and endearing.
Transforming Into Functional Keychains
These charming Mini Pops make fantastic keychains that serve as practical accessories and delightful conversation pieces. To convert any of your creations into a keychain, simply attach any type of keychain hardware to the top of the head or stem (depending on the design). This transforms your adorable crochet creation into a functional accessory perfect for keys, bags, or as unique handmade gifts that recipients will treasure.
Troubleshooting Common Issues When Making Mini Pops
Stuffing Showing Through Your Stitches: If you notice fiber fill peeking through, especially when working with larger yarn weights, remember to add that protective layer of matching yarn between the cap and head sections before you begin stuffing. This extra step makes a significant difference in your finished product’s appearance.
Tentacles Not Curling Properly: Ensure you’re maintaining tight, consistent tension on your chains and working exactly 2 single crochets in each chain space. The natural tension from proper technique will create the beautiful curl at the tips.
Cap Appearing Too Floppy: Double-check that you’re not stuffing the cap section. The cap should remain completely empty and unstuffed to maintain its characteristic flat, mushroom-like shape and keep a clear visual distinction between cap and head.
Uneven Stitches or Tension Issues: Remember that continuous rounds without chain 1 transitions require practice. As you complete more Mini Pops, your muscle memory will develop and your tension will become increasingly consistent, resulting in more even, professional-looking stitches.
Final Thoughts: Your Mini Pops Mastery Journey Begins
Creating these adorable Itty Bitty Mini Pops opens up a world of creative possibilities that extends far beyond the three main designs presented here. Whether you stick faithfully to these three variations or experiment with your own unique color combinations and personal modifications, these patterns provide an excellent foundation for endless creative variations.
The advanced beginner skill level makes these projects accessible to crocheters who have mastered the basics but are ready for something more challenging, while still offering enough complexity to keep experienced crafters engaged and entertained. Once you master crochet mini pops, you’ll discover endless variations and creative possibilities for your craft collection.
Remember it later!
Planning to try this soon? Pin it for a quick find later!
Remember that success with these patterns requires patience and consistent practice. Don’t become discouraged if your first attempt isn’t absolutely perfect—each time you master crochet mini pops, you’ll refine your technique and improve your skills. Soon, you’ll have developed an adorable collection of tiny friends that are absolutely certain to bring smiles wherever they go. The combination of technical skill-building and the rewarding satisfaction of creating something beautiful makes these projects truly special. Happy crocheting, and enjoy bringing these charming characters to life!