Table of contents
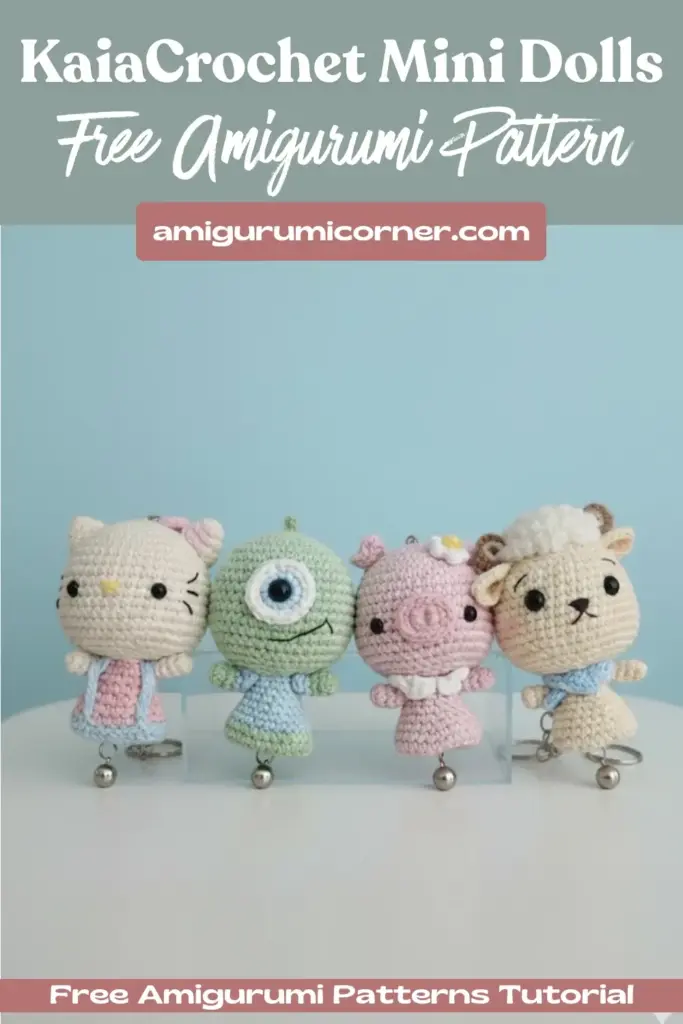
Are you ready to bring a splash of playful color and a whole lot of charm into your craft routine? Kaia Crochet Mini Dolls are the perfect blend of adorable design, manageable size, and delightful detail. Each doll stands about 9 cm tall about the height of a sweet little plush making them easy to crochet for beginners and intermediate crocheters alike.
What Makes the Group D Series Special?
- All are ready-to-use patterns: from the classic “Pink Pig” to the beloved “Hello Kitty,” the spooky “Big Eyed Monster,” and the gentle “Little Sheep”
- Shared core structure: the body, head, arms, ears, and clothes follow the same basic technique, so learning one pattern opens the door to all
- High-quality yarn palette: KaiaCrochet supplies a curated set of soft, washable yarns in the right colors for each part
With the basics covered, we’ll walk you through each doll’s unique features, the materials you’ll need, and step-by-step instructions that keep the patterns fun and easy. Grab your hook, pick a yarn color, and let’s get stitching!
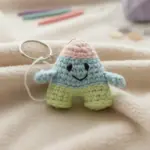
Remember it later!
Planning to try this soon? Pin it for a quick find later!

Pattern Overview: Size, Skill & Materials
Size & Finish
Finished height: ~9 cm (3.55 in) excluding key ring and bell. If you use a thinner yarn, the final doll will be a bit smaller, and the key ring will also shrink proportionally.
Skill Level
Intermediate – well-suited for crocheters with a solid grasp of single and double crochet, and comfortable joining rounds.
Key techniques: single crochet, decreases, increases, magic ring, and stitch markers for clean joins.
Materials
The pattern supplies a comprehensive yarn set for each doll. Below is a consolidated list (adjust for your favorite color variation):
| Material | Details | Quantity | Note |
|---|---|---|---|
| 4-ply milk cotton | Milk white, Light pink, Light yellow, Mustard green | 10 g per ball (5 balls total) | Light, washable, good for stitching |
| 3-ply candy yarn | White | 5 m | Optional for extra softness or decorative threads |
| Needles | 5 mm, 4–6 mm | 1 set | For stuffing and attaching key rings |
| Stitch marker | 10 mm | 1 | Track round starts |
| Beading needles | 12 mm | 1 | For attaching small parts |
| Eyes | 8 mm flat-bottom or oval (plastic) | 4–5 pairs | Secure placement |
| Key rings & bells | Silver | 4 each | Optional accessories |
| Split rings | 10 mm | 10 | For attachments |
| Thin wires | 1 m | 2 | Structural support |
| Toy stuffing | 50 g | 1 bag | Hypoallergenic fill |
Tools: crochet hook (1 mm or 1.5 mm for the size), scissors, a light needle for stuffing, and a small glue gun if you prefer stronger attachment for the bell/key ring.
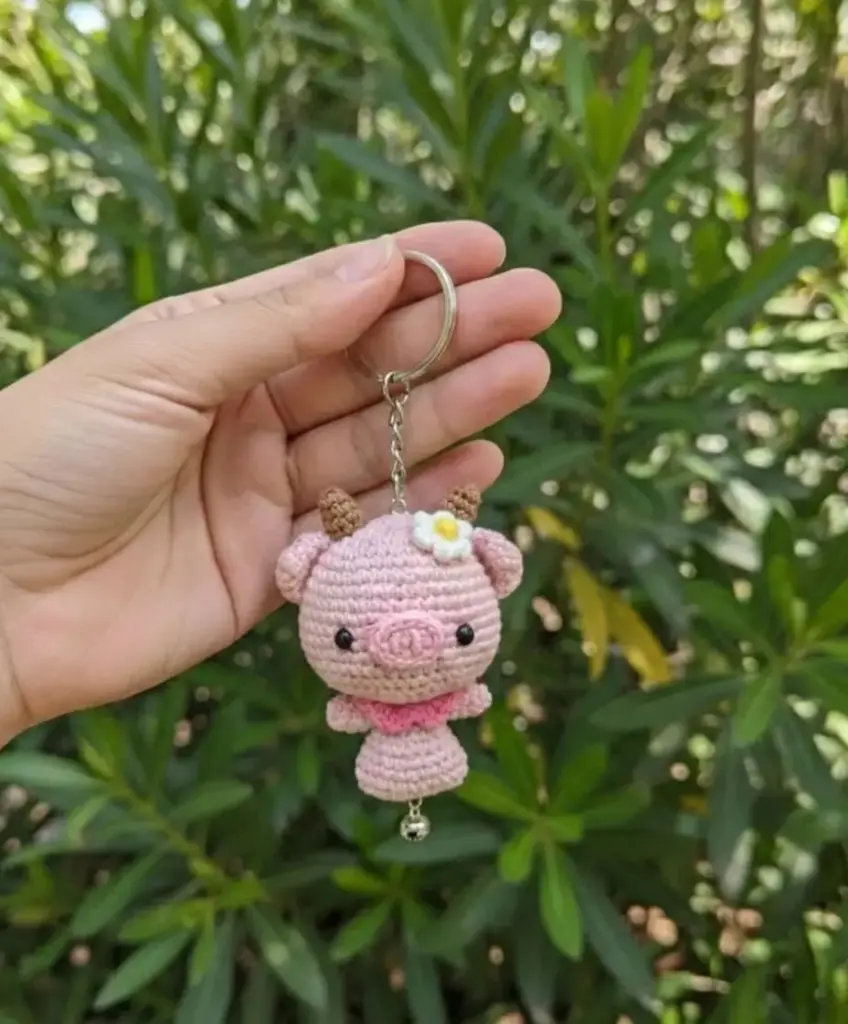
Pink Pig: A Colorful Classic
Visual Features
- Soft pink body with a subtle yellow belly
- Glowing blue eyes and a small, friendly nose
- Shoe-like foot accents for a whimsical touch
Step-by-Step Instructions To Make Kaia Crochet Mini Dolls
Head Construction
Start with a magic ring, chain 7, and work 5 single crochets (SC) into the ring. Continue the round adding increases to reach 28 SC total.
Body Assembly
Begin at 9 SC in a magic ring, add a row of 12 SC, then work 4 rounds of 12 SC, gradually decreasing to 6 SC.
Ears
Crochet from 6 SC in a magic ring, then 3 SC, 4 SC, 4 SC, and finish at 6 SC.
Legs & Feet
Work from 6 SC in a magic ring, 5 SC, 4 SC, 4 SC, finish 6 SC; then attach 3 SC each from a magic ring as the feet.
Finishing Touches
Sew the head, ears, and legs to the body, thread the eyes between rows 8-13, stitch the nose at row 10, and add a tiny blush.
Optional Enhancement
Add a silver key ring and bell using split rings for easy swapping.
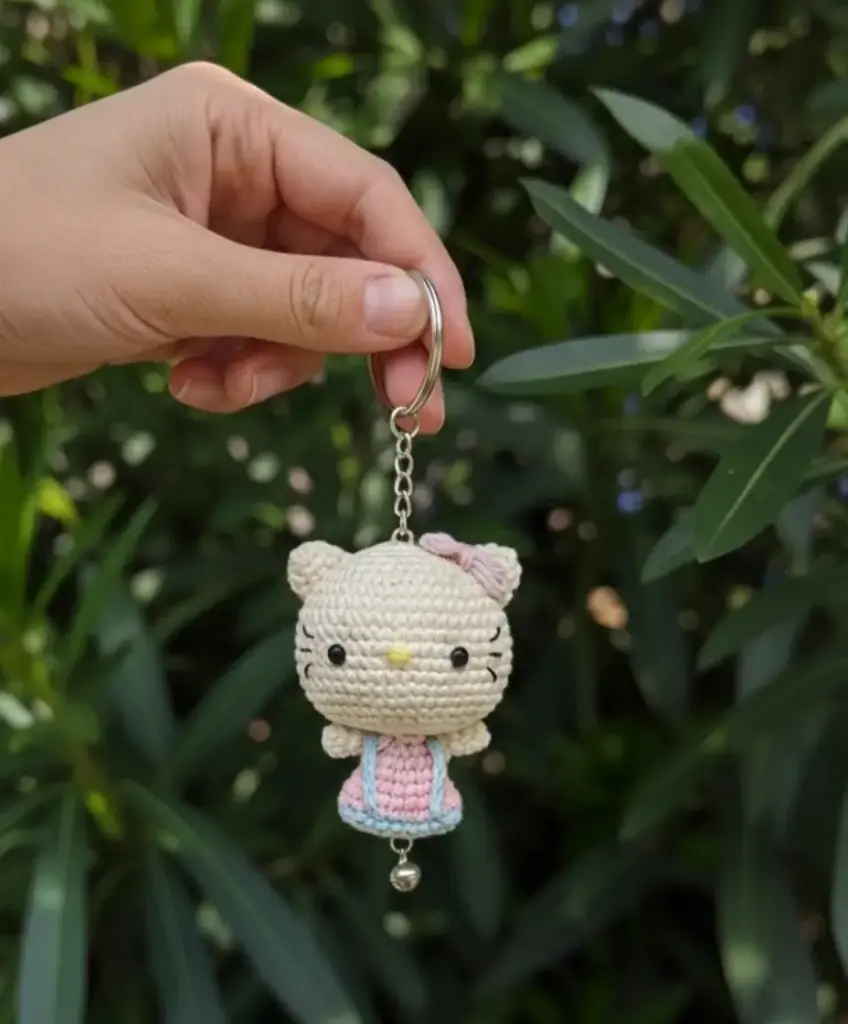
Hello Kitty: Charm Meets Simplicity
Visual Features
- Iconic white face with red bow, pink ears, and a dainty black nose
- Simpler shape, ideal for a starter mini-doll
Step-by-Step Instructions
Head Construction
Create a magic ring, work 6 SC. Add 6 SC increase per round, stopping at 48 SC total.
Body Assembly
Begin with 9 SC in a magic ring, then 12 SC in the following round, keep 12 SC for two rounds, then decrease slowly to 6 SC.
Ears
Start with a magic ring of 6 SC, add 3 SC, 4 SC, 4 SC, finish 6 SC.
Bow Creation
From a magic ring, work 2 × (3ch, 2dc, 3ch). Slip off, wrap the remaining yarn around the bow 2 times, then tie.
Assembly
Attach bow to head and ears to the head using 4th-to-5th rows. Add eyes (8 mm flat) at row 11, nose and blush.
Final Touch
Add the key ring and bell for that extra sparkle.
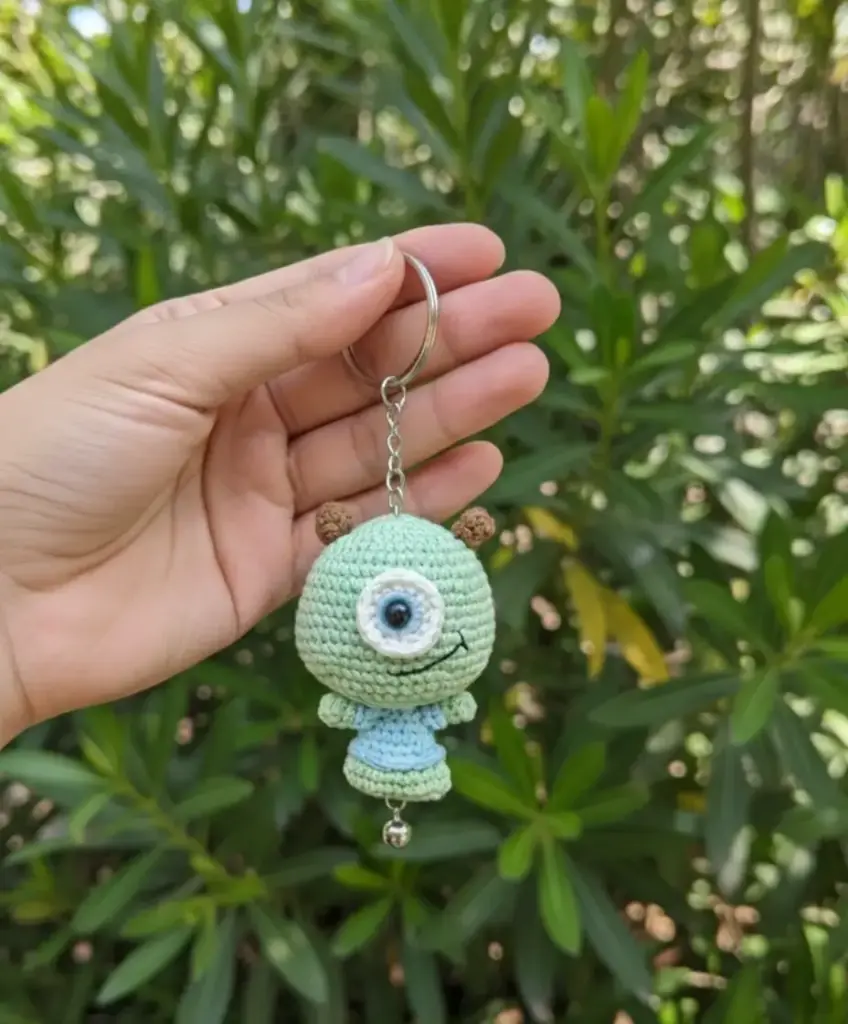
Big Eyed Monster: A Playful Spook
Visual Features
- Large gray body with a menacing yet adorable eye set
- Spiky hair or simple horns to enhance the “monster” vibe
Step-by-Step Instructions
Head Construction
Magic ring, 6 SC, then 12 SC, maintain 12 SC two rounds, decrease gradually to 6 SC.
Body Assembly
Start 9 SC, then 12 SC, keep 12 SC for two rounds, decrease to 6 SC.
Ears
6 SC from a magic ring, add 3 SC, 4 SC, 4 SC, finish 6 SC.
Eyes Placement
Use 8 mm flat eyes; position them at the center of the head (between rows 8-13).
Feature Addition
Stitch a spooky nose, simple hair or horns, and a smile-like mouth for extra character.
Finishing
Sew the parts together, add blush, attach key ring and bell.
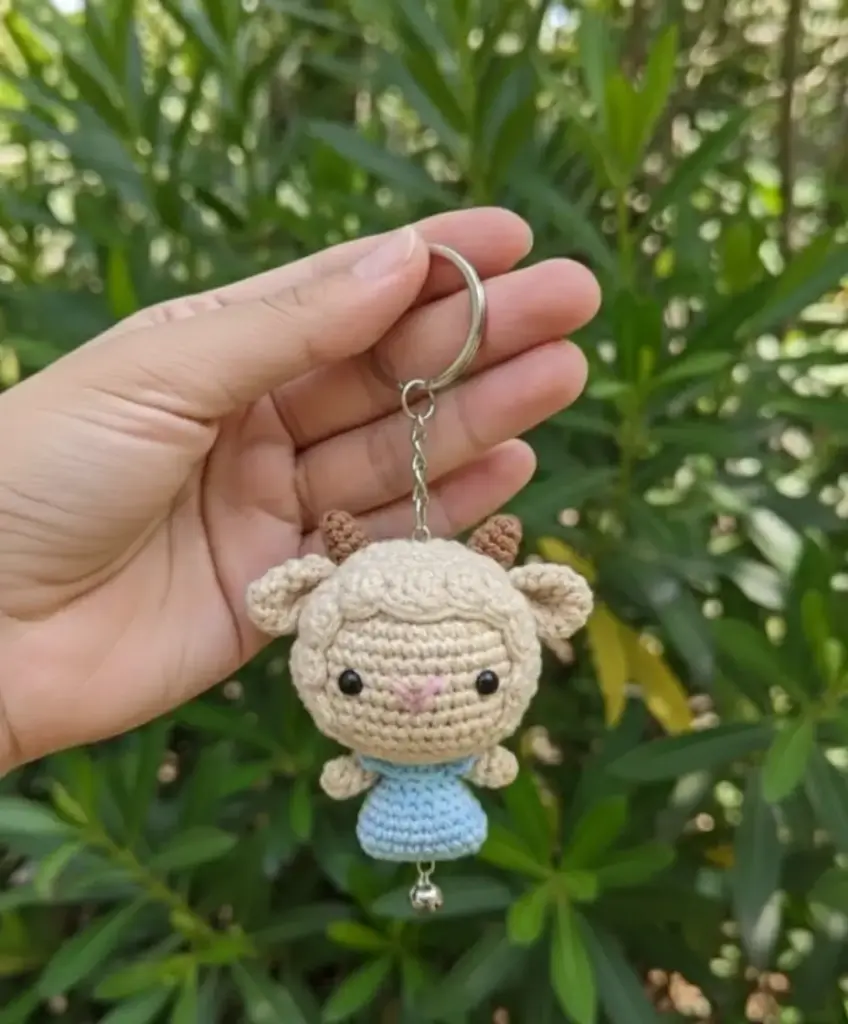
Little Sheep: Soft and Cozy
Visual Features
- Light-yellow body with a gentle face, long ears, and a fluffy tail
- Sweet, approachable look
Step-by-Step Instructions
Head Construction
Magic ring, 6 SC, 12 SC gradually, decreasing to 6 SC.
Body Assembly
9 SC, 12 SC, maintain 12 SC, then decrease steadily to 6 SC.
Ears Creation
Start with a magic ring of 6 SC, proceed with 3 SC, 4 SC, 4 SC; finish at 6 SC.
Ears & Tail
Combine ear and tail stitch, working from the base to a rounded tip.
Finishing
Attach ears to the head, place eyes at row 8-13, add blush.
Key Ring & Bell
Attach these with split rings for quick customization.
Common Tips for All Patterns
Use a Stitch Marker
Use a marker at the start of each round to keep track of your progress and avoid miscounts.
Count Carefully
Especially when decreasing or increasing. A small error can throw off the symmetry of the doll.
Stuffing Technique
Gradual stuffing ensures a balanced shape. Do not overstuff; a slightly under-stuffed doll will be easier to sew together.

Attachment Methods
For the key ring and bell, thread a thin wire through the split rings. This allows you to swap them or add a new one without tearing the doll.
Finishing Off
Wrap any remaining yarn around the body or head before shearing tips to avoid loose ends that could snag.
Your Kaia Crochet Mini Dolls Masterpiece is Ready
With these four Kaia Crochet Mini Dolls patterns, you’ve unlocked a versatile mini-doll toolkit. Each design offers a fresh challenge and a charming finished product perfect for gifting, play, or adding to your own collection.
Next step: Pick a pattern, gather your yarn, and bring your minifigure to life!
If you enjoyed this guide, share your finished dolls with us on social media using #amigurumicorner, and tag us for a chance to be spotlighted.
Happy crocheting, and keep stitching that sparkle into your small masterpieces!

Remember it later!
Planning to try this soon? Pin it for a quick find later!