Table of contents
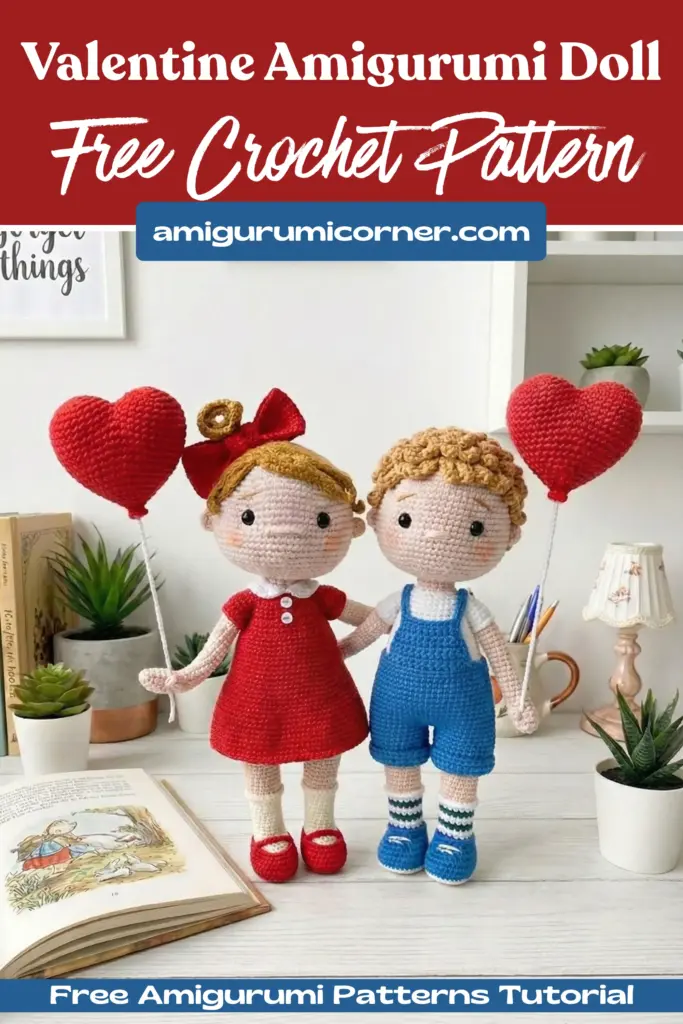
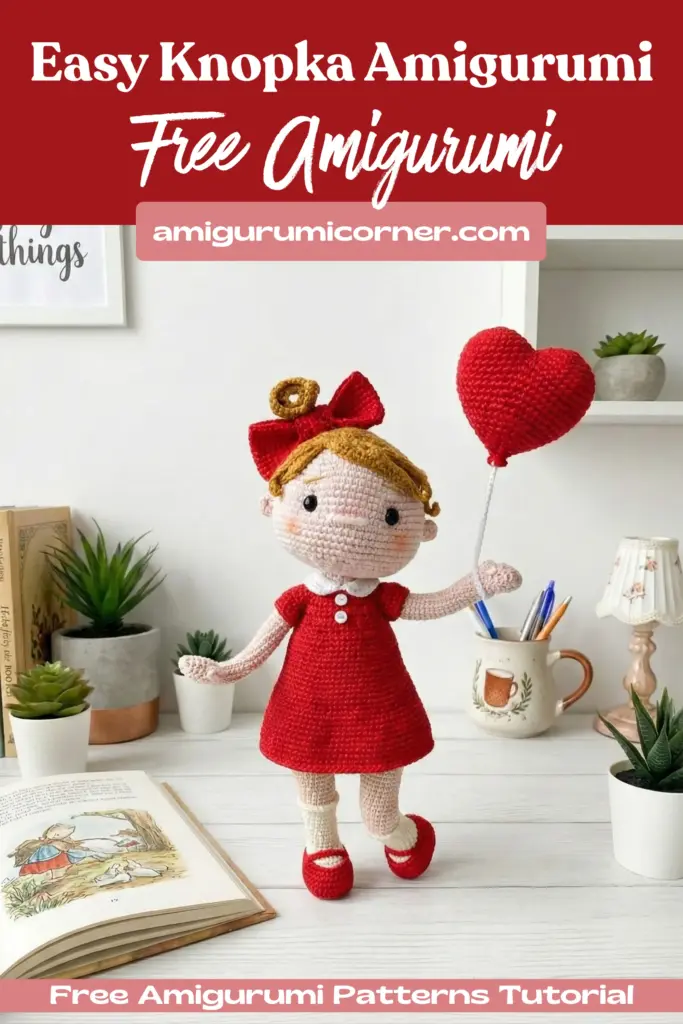
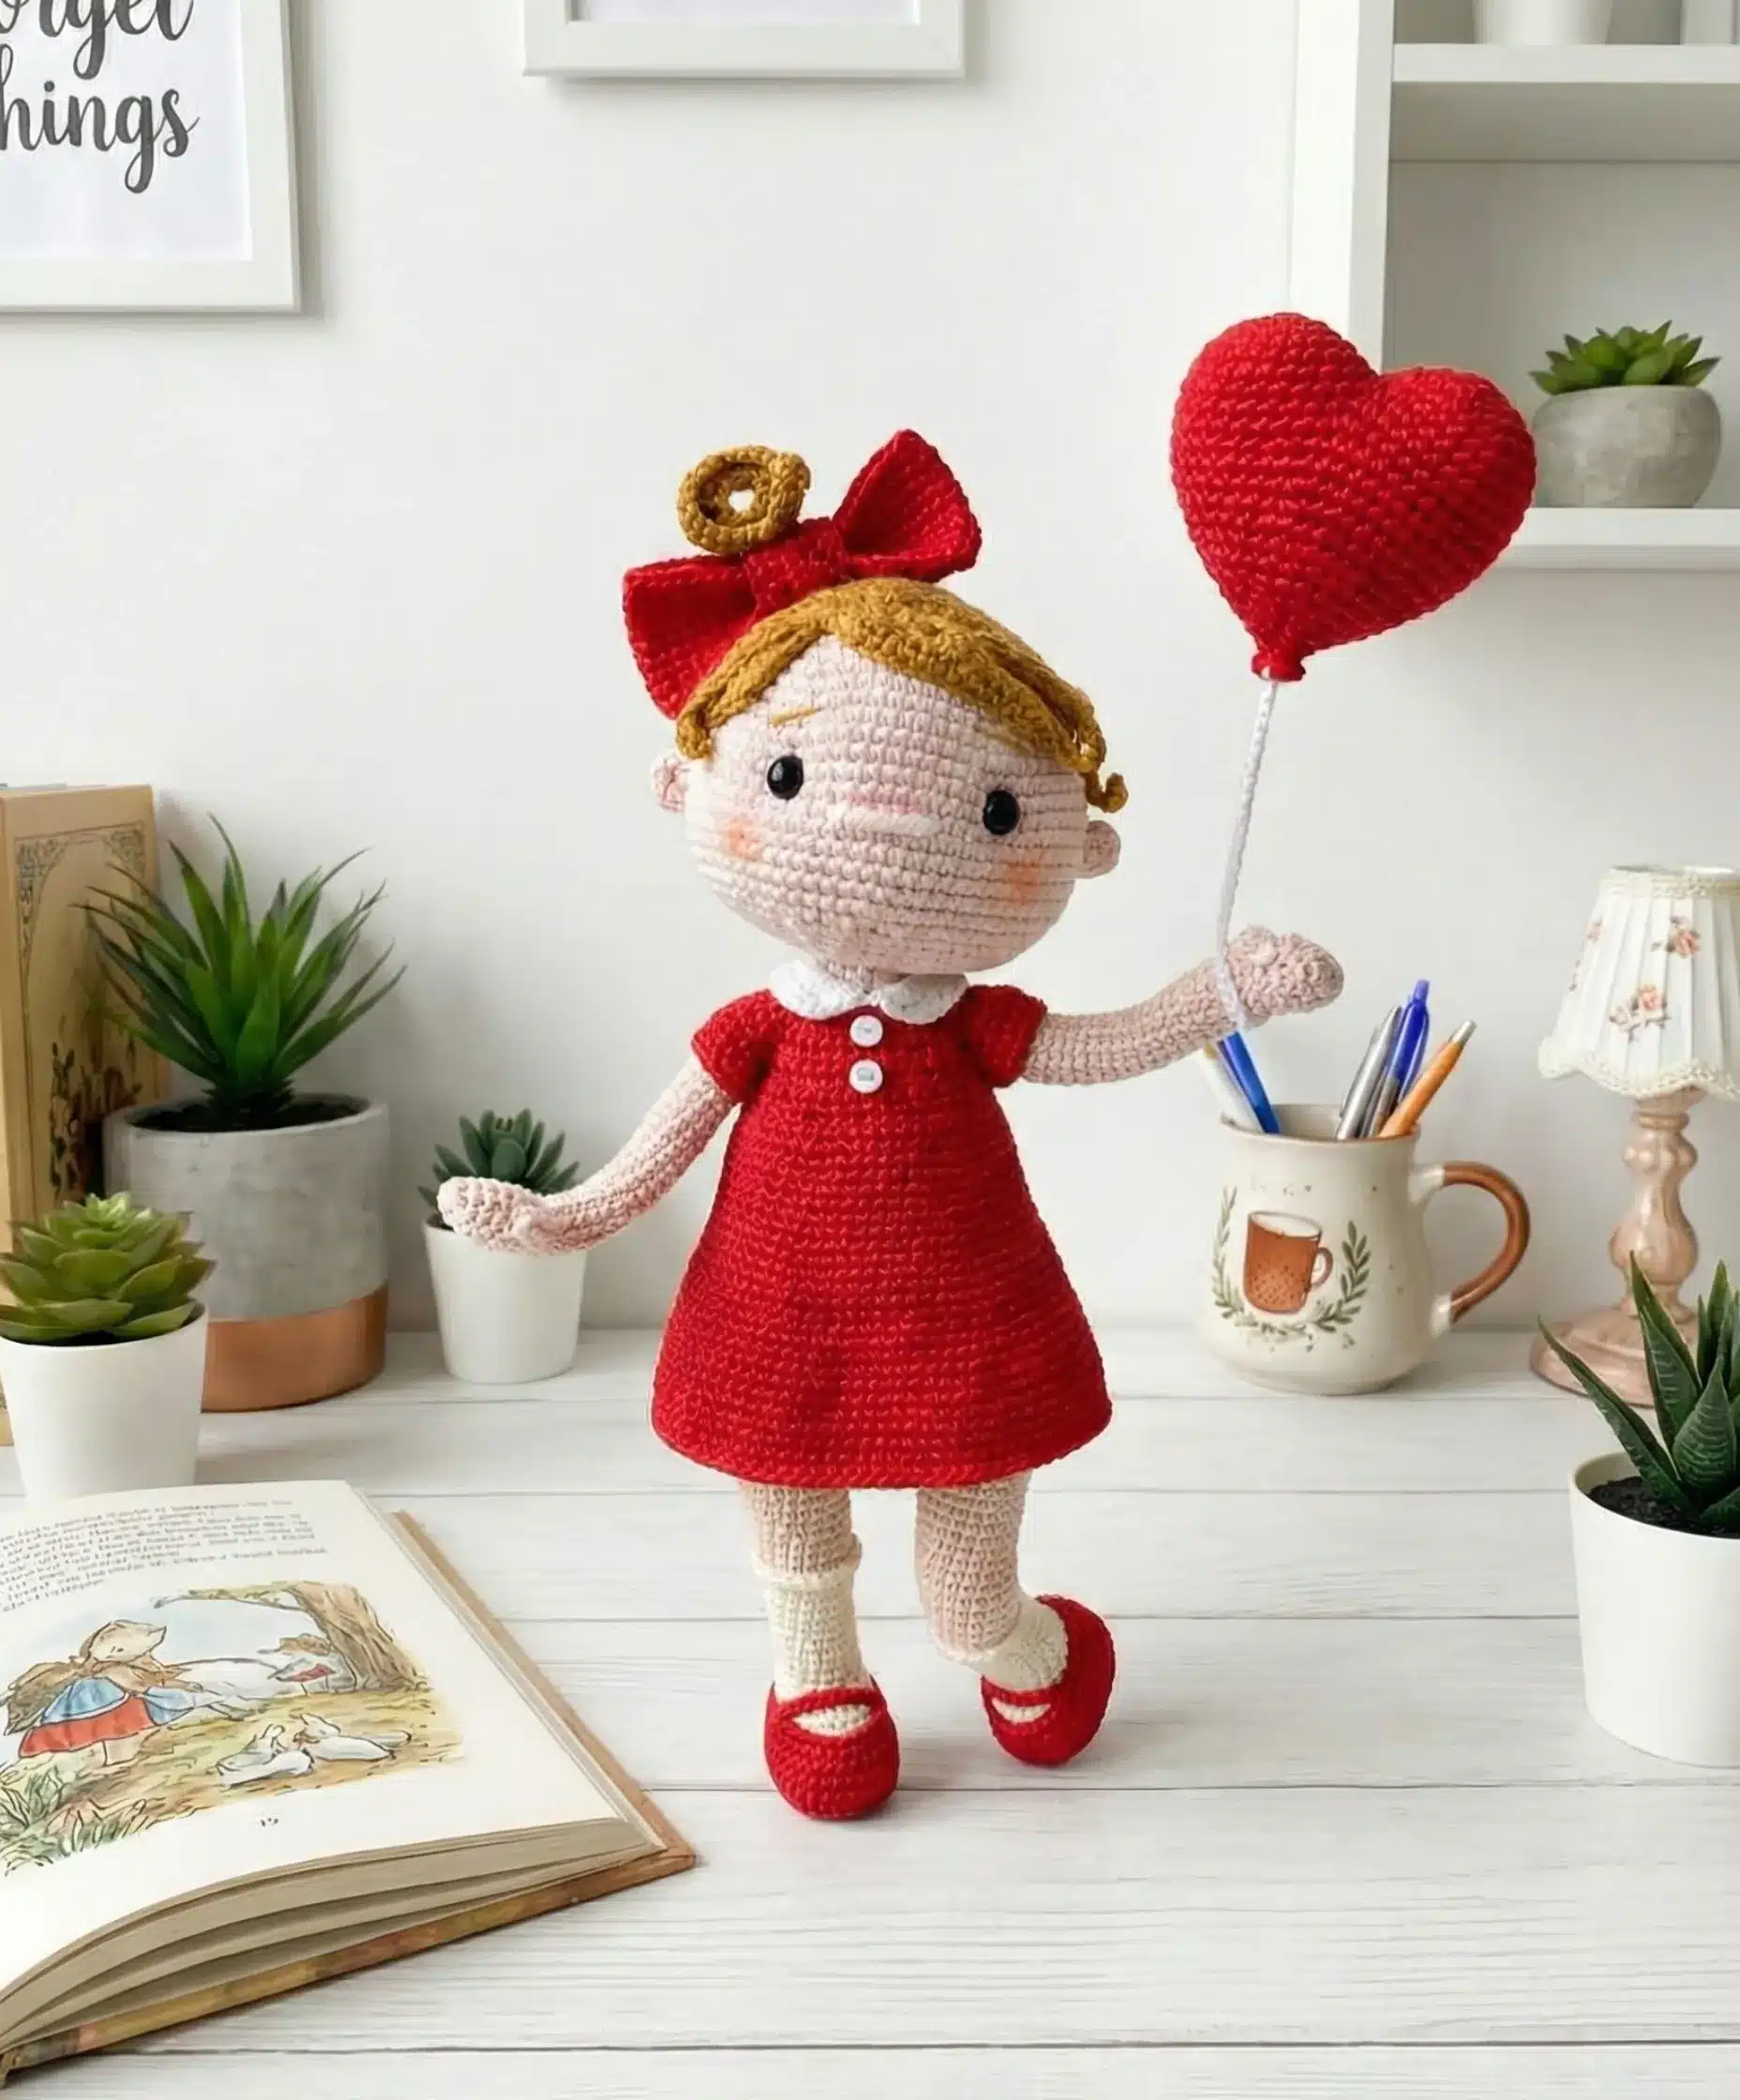
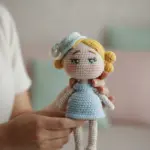
Welcome to the enchanting world of amigurumi! If you’re looking to create a charming Valentine’s Day companion, you’ve found the perfect project. Meet Knopka, an adorable crocheted doll designed to capture hearts and spread joy during the season of love.
Designer: tvoya_plyusha_
About This Pattern
This comprehensive crochet pattern will guide you through creating your own Little Valentine doll, complete with a sweet dress, tiny boots, and heart-shaped balloons. Whether you’re crafting a special gift for someone dear or adding to your own collection of handmade treasures, Knopka promises to be a delightful project that celebrates creativity and the joy of making something with your own hands.
What You’ll Need
Yarn Requirements:
The pattern uses YarnArt Jeans and similar weight yarns in various colors:
- Beige for the head and body
- White for underwear and socks
- Red for the bow
- Blue for the dress
- Brown for the hair
- Mustard and Brown for the boots
- Pink and Dust Pink for the balloons
- Gray for balloon tails
Additional Materials:
- Crochet hook: 2mm or 1.75mm (Clover or your preferred brand)
- Safety eyes: 6mm (2 pieces)
- Small buttons: 4mm (4 pieces total – 2 for boots, 2 for dress)
- Aluminum wire: 2-2.5mm diameter for the doll’s skeleton
- Thin florist wire: 0.45mm diameter for balloon tails
- Tapestry needle
- Fiberfill stuffing
- Strong invisible glue
- Adhesive plaster
- Stitch markers and pins
- Cardboard or polymer material for boot insoles
Skill Level and Size
This pattern is rated as elementary difficulty, making it accessible to crocheters with basic skills. The finished doll measures approximately 25 cm (9.8 inches) tall when made with the recommended materials and using the semi-X stitch technique.

Remember it later!
Planning to try this soon? Pin it for a quick find later!
Understanding the Technique
The Semi-X Stitch Method
This pattern uses a specific crochet technique called the semi-X stitch, which combines yarn under and yarn over methods. This technique creates a distinctive stitch shape and affects both the appearance and yarn consumption of your project.
How to create semi-X stitches:
- First stitch: Wrap yarn under (hook moves from right to left in a circular motion under the yarn)
- Second stitch: Wrap yarn over (hook moves from right to left over the yarn)
- Continue alternating this pattern
This method creates stitches that are more economical with yarn while maintaining good structure and definition.
Important Pattern Notes
Color Changes: Change colors in the last stitch of a round before starting the new color. Pull up a loop with your current yarn, then complete the stitch with the new color.
Increases: The pattern recommends invisible increases worked in the front loops only (FLO), though classic increases in both loops work for some stitches.
Stuffing: Fill all pieces firmly as you go, adding small portions gradually to create the proper shapes.
Invisible Edge Technique: To finish rounds neatly, insert your needle two stitches before your last stitch, pull through, then insert between front and back loops of the stitch before your last one. This creates a seamless finish.
Crocheting the Doll
Starting with the Arms
Begin with beige yarn and work in continuous rounds. Each arm consists of:
- A foundation starting from a magic ring
- Gradual increases to shape the hand and wrist
- A long tube section for the arm itself
- A color change to blue for the sleeve
- A decorative cuff worked in back loops only
The arms remain unstuffed initially and will be filled later when attached to the body.
Creating the Legs and Boots
The legs are among the most detailed components, featuring:
Boot Construction:
- Start with brown yarn for the sole, working around a chain foundation
- Create a three-dimensional foot shape with strategic increases
- Add a mustard-colored boot upper
- Insert cardboard insoles for structure and stability
- Attach decorative straps with tiny buttons
Leg Assembly:
- Transition to white for socks with decorative cuffs
- Continue with beige for the legs
- Insert wire armature for posability
- Join both legs together to form the foundation for the body
Building the Body
The body construction involves:
- Joining the legs with chain stitches and working increases at the connection points
- Shaping the torso with strategic decreases
- Creating underwear details with white cuffs and decorative elements
- Attaching the arms at the shoulder level (around round 66)
- Forming the neck with final decreases and color changes
The wire armature runs through the entire body, legs, and arms, allowing your doll to be posed in various positions.
Crafting the Head
The head is worked in beige yarn with:
- A foundation starting from 6 stitches in a magic ring
- Consistent increases to create a spherical shape
- A section of even rounds for the face area
- Strategic decreases to close the bottom
- Placement for 6mm safety eyes between rounds 18-19, spaced 11 stitches apart
Important: Insert eyes carefully, and consider melting the backs slightly with a lighter for extra security (be cautious to avoid damage).

Styling the Hair
The brown hair is one of the most creative elements, featuring:
- A cap base that mirrors the head’s construction
- Decorative loops and chains of varying lengths to create textured bangs and side pieces
- A small ponytail accent
- Long tails for secure sewing
The hair can be attached neatly for a polished look or with casual stitching for a playful, slightly messy appearance.
Adding Details
Ears: Simple small pieces (8 stitches in a magic ring) sewn at nose level
Bow: A charming red accessory made from two crocheted tubes arranged attractively
Facial Features:
- Embroidered nose using lengthwise and transverse stitches
- Eyebrows positioned 2 stitches above the eyes
- Optional white highlights on the eyes
- Face sculpting for eye depth using nylon thread
- Freckles and blush added with makeup (eyebrow pencil and eyeshadow)
Dressing Your Doll
The Blue Dress
The dress is worked directly onto the body, featuring:
- Attachment at round 61 of the body
- Gradual increases to create an A-line silhouette
- Multiple rounds creating a full, flowing skirt
- A white collar with decorative stitches
- Button embellishments under the collar
The dress design is both charming and practical, integrating seamlessly with the doll’s construction.
Creating the Heart Balloons
No Valentine doll is complete without heart-shaped balloons! The pattern includes instructions for two sizes:
Large Pink Heart
- Two identical halves joined together
- Strategic shaping to create the heart’s curves
- Wire insertion for the tail
- A flared bottom edge for realistic balloon appearance
Small Dust Pink Heart
- Similar construction to the large heart but scaled down
- Delicate proportions perfect for a second balloon
- Matching wire tail wrapped in gray thread
The wire tails can be bent and shaped to position the balloons attractively around your doll.
Assembly Tips for Success
Secure Attachment: Use the loop-through-loop technique for invisible seaming when attaching the head to the body. This creates a neat, professional finish.
Wire Management: When inserting the skeleton wire, wrap all ends with adhesive plaster to prevent them from poking through the fabric. Twist wires together at the torso for stability.
Arm Wire Installation: Cut a piece of wire longer than both open arms, wrap the ends, and thread it through both arms while wrapping it around the central body wire.
Strategic Pinning: Use pins liberally during assembly to ensure proper alignment before final sewing.
Hair Attachment: For play dolls, sew the hair securely with multiple stitches. For display dolls, a few strategic stitches create a charming, slightly loose look.

Final Thoughts
Creating Knopka is more than just following a pattern—it’s about bringing a character to life through your own hands and creativity. Each stitch carries your attention and care, making every finished doll unique and special.
The combination of thoughtful construction techniques, including the wire skeleton and detailed clothing, results in a posable, durable doll that can be treasured for years. Whether standing proudly on a shelf or clutched in loving hands, your Little Valentine will spread joy wherever she goes.
Sharing Your Creation
When you complete your Knopka doll, take pride in your accomplishment! Share your creation with the crafting community, and remember that each maker brings their own personality to the pattern. Your color choices, facial expression details, and finishing touches make your doll one-of-a-kind.
This Valentine’s Day, let Knopka remind you of the joy found in creating something beautiful with your own two hands. Happy crocheting, and may your crafting journey be filled with creativity, satisfaction, and love!

Remember it later!
Planning to try this soon? Pin it for a quick find later!