

Table of contents
- Materials You’ll Need
- Pattern Abbreviations
- Legs Instructions
- Arms Instructions
- Body Instructions
- Head Instructions
- Snout Instructions
- Ears Instructions
- Horns Instructions
- Tail Instructions
- Heart Patch Instructions
- Strawberry Bag Instructions
- Assembly Instructions
- Gift Ideas: Strawberry Hair Accessories
- Frequently Asked Questions
- Conclusion
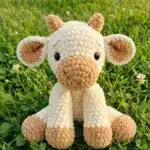
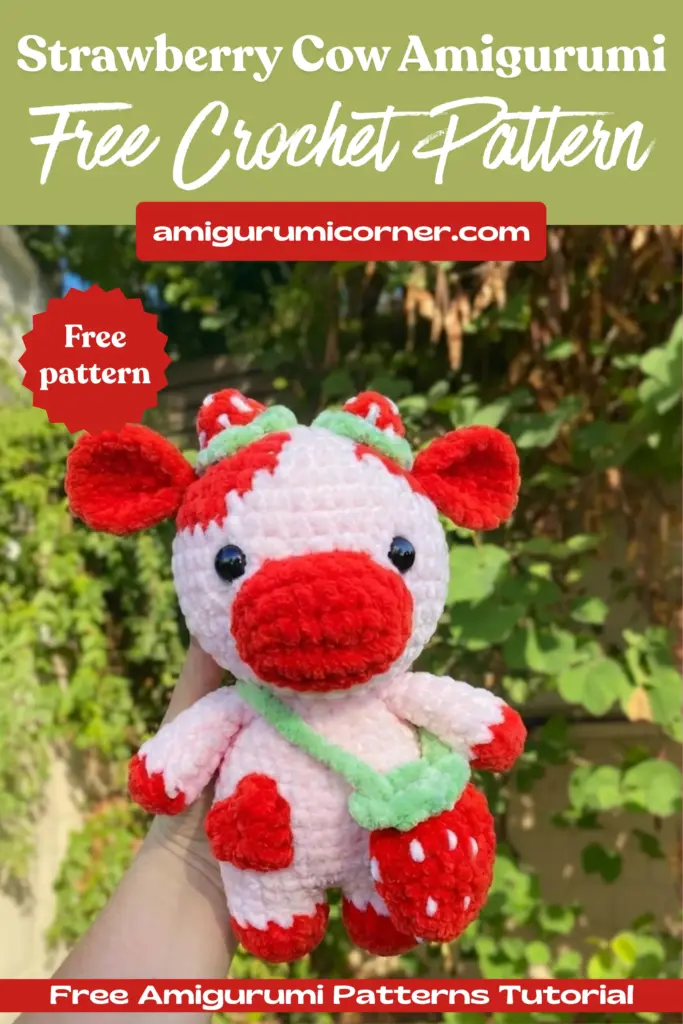
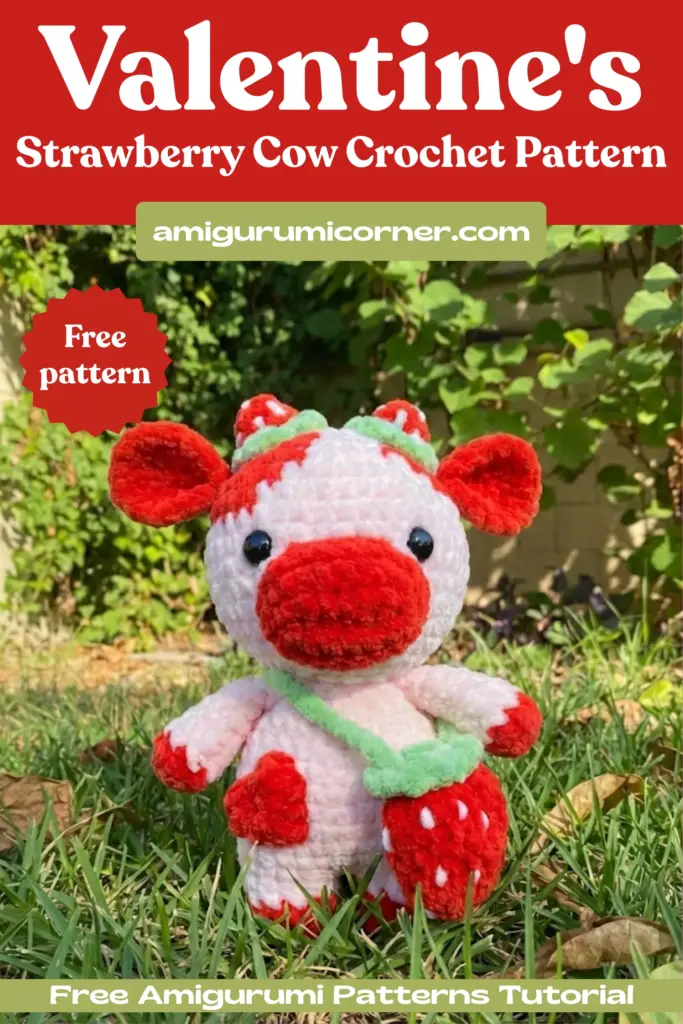
If you’re looking for your next irresistible crochet project, this plush strawberry cow is guaranteed to steal hearts! Standing at 12 inches tall when made with the recommended materials, this charming amigurumi combines the sweetness of a cow with delightful strawberry accents. Whether you’re crafting for a nursery, creating a special gift, or adding to your own plushie collection, this detailed pattern will guide you through every step of creating this unique and cuddly companion.
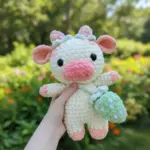
This step-by-step tutorial includes detailed round-by-round instructions with photos to help you along the way. The finished toy features pink strawberry spots, adorable horns topped with green leaves, and even comes with optional accessories like a strawberry bag and decorative patches. Let’s dive into creating this one-of-a-kind plush friend!
Materials You’ll Need
Before starting your strawberry cow, gather these essential supplies:
Yarn:
- Main yarn: HIMALAYA DOLPHIN BABY (131 yards / 3.5oz or 120m/100g)
- White (color 80301 or 80308) – 1 skein
- Pink (color 80324) – 1/2 skein
- Green (color 80307) – small amount
Other Supplies:
- Stuffing material
- 4.5mm crochet hook (US size 7)
- Black beads for eyes, 1/2 inch (12-14mm) – 2 pieces
- Transparent glue
- Sewing needle
- Black yarn scraps for embroidery
- White sewing thread
- 5 pins for assembly
- Stitch markers
Important Note: The finished toy measures approximately 12 inches (30 cm) when using the specified materials. If you substitute different yarn or hook sizes, your finished toy will be proportionally smaller or larger.

Pattern Abbreviations
- MR – magic ring (alternatively, make 2 ch and crochet 6 sc in the second chain from the hook)
- sc – single crochet
- ch – chain
- inc – increase
- sl st – slip stitch
- dec – decrease
- dc – double crochet
- tr – treble crochet
- (…) x N – repeat N times
Legs Instructions
First Leg:
Crochet with pink color.
- Round 1: 6sc in MR (6)
- Round 2: inc*6 times (12)
- Round 3: (3 sc, inc)*3 times (15)
- Round 4: 15 sc, change the color to white
- Rounds 5-7: 15 sc (3 rounds)
Fasten off and cut the yarn.
Second Leg:
- Rounds 1-6: Repeat as for the first leg
- Round 7: 15sc, 1 ch
Do not cut the yarn, continue crocheting.
Arms Instructions
Crochet with pink color.
- Round 1: 6sc in MR (6)
- Round 2: inc*6 times (12)
- Round 3: 12sc, change the color to white
- Round 4: (2sc, dec)*3 times (9)
- Rounds 5-8: 9sc (4 rounds)
Stuff only the bottom of the arm. Fold the detail in half and crochet 4sc, grasping the stitches of both edges. Fasten off and cut the yarn, hide the end. Crochet the second arm in the same way.
Body Instructions
Then crocheting:
- Round 1: 15sc in the first leg, 1sc in ch, 15sc in the second leg, 1sc in ch (32)
- Round 2: (3 sc, inc) х 8 (40)
- Rounds 3-7: 40 sc (5 rounds)
- Round 8: (5 sc, dec) х 5, 5sc (35)
- Round 9: 35 sc
- Round 10: (4 sc, dec) х 5, 5sc (30)
- Round 11: 30 sc
- Round 12: (3 sc, dec) х 6 (24)
- Round 13: (2 sc, dec) х 6 (18)
Move the marker to the middle of the body, crochet sc to the marker. Attach the arms with pins on the sides of the body. In the next round crochet together the stitches of the body and arms.
- Round 14: 18 sc
Stuff the legs and body.
- Round 15: (1 sc, dec) х 6 (12)
Do not cut the yarn, continue crocheting.
Head Instructions
- Round 16: 12 inc (24)
- Round 17: (3 sc, inc) х 6 (30)
- Round 18: (4 sc, inc) х 6 (36)
- Round 19: (5 sc, inc) х 6 (42)
- Round 20: (6 sc, inc) х 6 (48)
- Rounds 21-24: 48 sc (4 rounds)
Move the marker to the middle of the head, crochet sc to the marker. In the next round, we begin to crochet pink spots, changing white and pink yarn, leaving broaches inside the head. You can make spots of any shape, the main thing is to make 6 decreases in each round.
- Round 25: white (6sc), pink (dec, 6sc), white (dec, (6sc, dec) х 4) (42)
- Round 26: white (4sc), pink (1sc, dec, 5sc, dec, 1sc), white (4sc, dec, (5sc, dec) х 3) (36)
- Round 27: white (3sc), pink (1sc, dec, 4sc, dec, 4sc), white (dec, (4sc, dec) х 2, 2sc), pink (2sc), white (dec) (30)
- Round 28: white (2sc), pink (1sc, dec, (3sc, dec) х2, 1sc), white (2sc, dec, 3sc, dec, 1sc), pink (2sc, dec) (24)
- Round 29: white (2sc), pink (dec, (2sc, dec) х2, 2sc), white (dec, 2sc), pink (dec, 2sc, dec) (18)
- Round 30: white (1sc), pink (dec, (1sc, dec) х5) (12)
Fasten off and cut the white yarn. Stuff the head.
- Round 31: pink 12 dec (6)
Cut the yarn, tighten the hole. Fasten the yarn, hide the end inside the head.
Snout Instructions
Crochet with pink color.
Ch 6
- Round 1: sc in 2nd ch from hook, 3sc, 3sc in last st, Underside: 3 sc, inc (12)
- Round 2: (3sc, 3inc) х 2 (18)
- Round 3: (3 sc, (1sc, inc)х 3) х 2 (24)
- Rounds 4-5: 24 sc
Crochet sl st. Fasten off and cut the yarn.
Ears Instructions
Crochet with pink color.
- Round 1: 6sc in MR (6)
- Round 2: 6 inc (12)
- Round 3: (1sc, inc) х 6 (18)
Crochet sl st, 1 ch. Fold the detail in half and crochet 2sc, grasping the stitches of both edges. Fasten and cut the yarn, leaving a tail for sewing. Crochet the second ear in the same way.
Horns Instructions
Crochet with pink color.
- Round 1: 5sc in MR (5)
- Round 2: 5 inc (10)
- Rounds 3-4: 10 sc
Change the color to green.
- Round 5: (1sc, 4ch, 1sc) х 5
Crochet sl st. Fasten off and cut the yarn. Embroider grains with white yarn. Crochet two pieces in the same way.
Tail Instructions
Crochet with white color.
12 ch, 11 sl st in 2nd ch from hook.
Cut the yarn, leaving the tails for sewing. At the end of the tail, make a brush with pink yarn (5-6 elongated loops), tie the ends with a knot, cut and burn.
Heart Patch Instructions
Crochet with pink color.
MR
- Round 1: 3ch, 3 tr, 2 dc, tr, ch, sl st in 2nd ch from hook, 2 dc, 3 tr, 2ch, sl st in MR
Fasten off and cut the yarn.

Strawberry Bag Instructions
Crochet with pink color.
- Round 1: 6sc in MR (6)
- Round 2: (1sc, inc) х 3 (9)
- Round 3: (2sc, inc) х 3 (12)
- Round 4: (3sc, inc) х 3 (15)
- Round 5: (4sc, inc) х 3 (18)
- Rounds 6-7: 18sc
- Round 8: (1sc, dec) х 6 (12)
- Round 9: 6 dec (6)
Change the color to green.
- Round 10: Crochet for the front loops only ((1sc, 4ch, 1sc) in one loop) repeat 6 times, sl st
- Round 11: Crochet for the back loops only of the 9th round 6sc
Crochet 30 ch, sl st. Fasten off and cut the yarn. Embroider grains with white yarn.
Assembly Instructions
Now it’s time to bring your strawberry cow to life!
Attach the eyes: Position black bead eyes between Rounds 24 and 25, spacing them 9 stitches apart. Secure with transparent glue. You can add black felt circles behind the beads for extra definition.
Stuff remaining parts: Lightly stuff the snout and horns before attaching.
Pin all details: Use your pins to temporarily position the snout, ears, horns, tail, and any decorative patches. This allows you to adjust placement before permanently sewing.
Sew parts securely: Using a needle and white strong thread, sew all pieces in place. You can use the pink yarn ends to sew the ears for a matching finish.
Create eye indentations: For a professional look, make a tightening for the eyes. Insert a needle with thread through the bottom of the snout into the eye placement area through points 1-2, then through 3-4, and 5-6. Tug slightly on the thread to create small depressions and tie a knot. Hide the thread ends inside the head.
Embroider facial features: Using thick black thread or yarn, embroider the nostrils on the snout, eyelashes above the eyes, and a sweet smile below the snout.
Gift Ideas: Strawberry Hair Accessories
Make your strawberry cow extra special by creating matching strawberry accessories!
Crochet with pink color.
- Round 1: 5sc in MR (5)
- Round 2: 5 inc (10)
- Round 3: 10 sc
- Round 4: (4sc, inc) х 2 (12)
- Round 5: 12 sc
- Round 6: 6 dec (6)
Change the color to green.
- Round 7: (1sc, 4ch) х 5, sl st
Stuff the detail. Cut the yarn, tighten the hole. Fasten the yarn, hide the end inside. Embroider grains with white yarn. Crochet two pieces in the same way. Sew strawberries to hair accessories like clips or headbands for an adorable matching set!
Frequently Asked Questions
This pattern is suitable for intermediate crocheters who are comfortable with basic amigurumi techniques including working in the round, increases, decreases, and color changes. Beginners with some amigurumi experience can also succeed with this pattern by following the detailed instructions carefully.
Yes, you can substitute different yarn, but keep in mind that using a different weight yarn will change the final size of your strawberry cow. If you use a lighter weight yarn with a smaller hook, your toy will be smaller, and vice versa. Make sure to adjust your hook size accordingly to match your yarn choice and maintain the proper gauge.
The strawberry spots are created by color changes during Rounds 25-30 of the head. You’ll alternate between white and pink yarn while crocheting, leaving the yarn broaches (carried yarn) inside the head. The pattern provides specific stitch counts for each color in each round, but you can customize the spot shapes while maintaining the required number of decreases per round.
Position the black bead eyes between Rounds 24 and 25 of the head, spacing them 9 stitches apart. Use transparent glue to secure them permanently. For added depth and dimension, create eye indentations by threading through the snout bottom to the eye areas and pulling slightly to create depressions before tying off. This technique gives your cow a more professional, three-dimensional appearance.
Conclusion
Congratulations on completing your adorable strawberry cow plush! This charming creation combines classic amigurumi techniques with creative strawberry-themed details to produce a truly unique toy. The combination of soft textures, sweet pink accents, and those endearing embroidered features makes this plush perfect for gifting or displaying in your own collection.
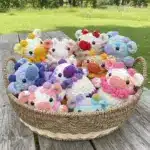
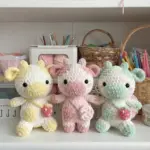
Don’t forget to share your finished strawberry cow with fellow crafters! Each one will have its own personality based on your yarn choices and how you position the features. Consider making additional strawberry accessories or creating an entire herd in different color combinations.
Happy crocheting, and enjoy every stitch of bringing this delightful character to life!
Remember it later!
Planning to try this soon? Pin it for a quick find later!

Please help with the tail. I have no clue what elongated loops is supposed to mean and there are no pictures of how it’s supposed to look. Please help!
Hi! Thanks for reaching out – I’m happy to help clarify the tail instructions!
The “elongated loops” refer to creating a fluffy tassel or pom-pom effect at the end of the tail. Here’s how to do it:
Creating the Pink Brush/Tassel:
After you’ve crocheted the white tail (the 12 chain with slip stitches), you’ll add pink yarn to create a fluffy end.
Cut 5-6 pieces of pink yarn, each about 4-5 inches long.
Take each piece and fold it in half to create a loop.
Insert your crochet hook through the end stitch of the white tail, catch the folded middle of one pink yarn piece, and pull it partway through to create a loop.
Then pull the loose ends of that same piece through the loop and tug to secure it – this creates a “lark’s head knot” or tassel attachment.
Repeat with the remaining 5-6 pieces of pink yarn.
Once all pieces are attached, gather all the loose ends together, tie them with a knot to secure, then trim them to your desired length to create a neat, fluffy brush effect.
The result should look like a classic cow tail – white on top with a pink tuft at the bottom!
I hope this helps clarify the instructions. If you’re still unsure, searching for “how to make a tassel” or “fringe on crochet” tutorials online might give you some helpful visual guides. Happy crocheting!