Table of contents
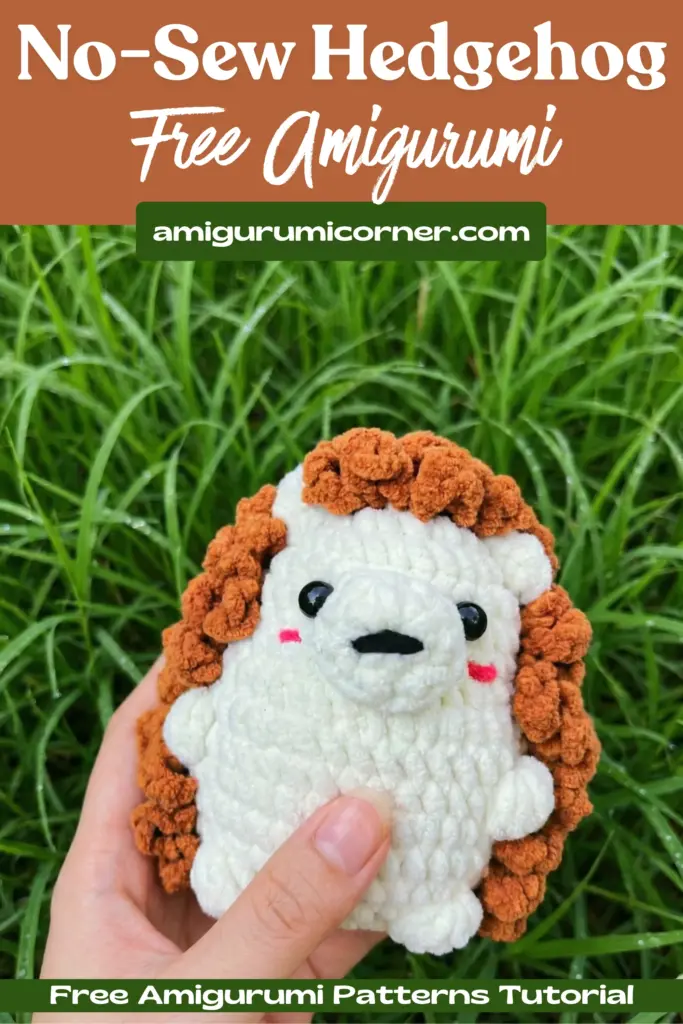
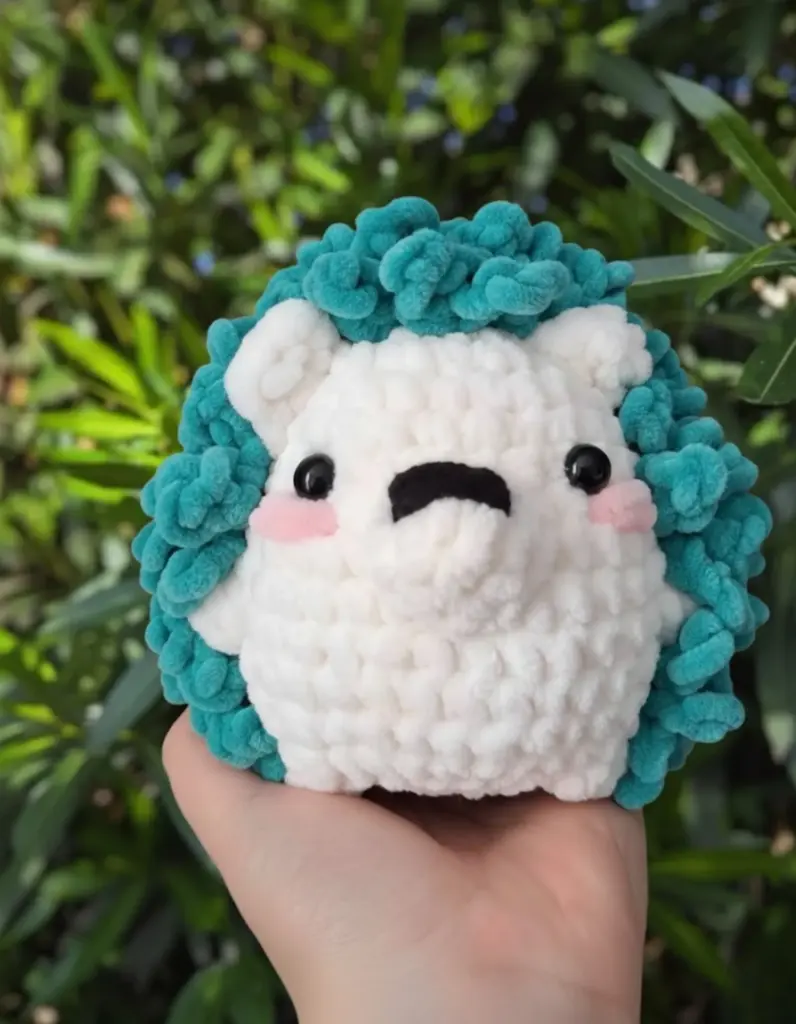
Are you ready to create the cutest amigurumi hedgehog without the hassle of sewing multiple pieces together? This delightful no-sew hedgehog pattern is perfect for both beginners looking to advance their skills and experienced crocheters seeking a quick, satisfying project. With its charming spines and sweet face, this little hedgehog will steal your heart!
What You’ll Need

Remember it later!
Planning to try this soon? Pin it for a quick find later!
Materials
Before diving into this adorable project, gather these essential supplies:
Yarn Requirements:
- Super Bulky weight yarn (Category 6) in white
- Super Bulky weight yarn (Category 6) in purple
- 3.5mm (E) crochet hook
Additional Supplies:
- Stitch marker for tracking your rounds
- Sewing needle for finishing touches
- Sharp scissors
- 10mm plastic safety eyes
- Hot glue gun
- Fiberfill stuffing
Understanding the Abbreviations
Familiarize yourself with these common crochet terms before starting:
- MR: Magic Ring
- st(s): stitch(es)
- sl st: slip stitch
- ch: Chain
- SC: Single crochet
- INC: Increase
- DEC: Decrease
- FLO: Front loop only
- BLO: Back loop only
- HDC: Half double crochet
- BO: Bobble stitch
- Picot stitch: SLST in 2nd chain from the hook
Creating Your Hedgehog: Step-by-Step Instructions
The Head and Body (Worked as One Piece)
One of the best features of this pattern is that you’ll crochet the head and body together, eliminating the need for assembly later. Start with white yarn and follow these instructions carefully:
Foundation and Initial Rounds:
- Row 1: Create 6 SC in a Magic Ring (6 stitches total)
- Row 2: Working in back loops only, make 6 INC (12)
- Row 3: BLO (SC, INC) 6 times (18)
- Row 4: BLO (SC, INC) 2 times, then (SC, INC) 5 times, finish with BLO (SC, INC) 2 times (27)
Building the Shape:
Rows 5-7: Work BLO 7SC, 13SC in both loops, BLO 7SC (27)
Row 8: This is a shaping round – BLO (2SC, INC) 2 times, BLO 2SC, INC, (2SC, INC) 3 times, SC, BLO SC, BLO INC, BLO (2SC, INC) 2 times (36)
Rows 9-10: BLO 10SC, 15SC, BLO 11SC (36)
Adding Character with Bobble Stitches:
Row 11: BLO 10SC, BO, 14SC, BO, BLO 10SC (36)
Rows 12-14: BLO 10SC, 16SC, BLO 10SC (36)
Decreasing and Finishing:
Row 15: BLO (2SC, DEC) 3 times, SC, BO, DEC, (2SC, DEC) 2 times, BO, SC, BLO DEC, BLO (2SC, DEC) 2 times (27)
Row 16: (SC, DEC) 9 times (18)
Row 17: (SC, DEC) 6 times (12)
Important: Before continuing, stuff the hedgehog firmly with fiberfill, shaping it as you go.
Row 18: 6DEC (18)
Weave in the yarn end and cut, leaving a tail for securing.
Crafting the Nose
The tiny nose adds so much personality to your hedgehog. Using white yarn:
- Row 1: 6 SC in a Magic Ring (6)
- Row 2: (SC, INC) 3 times (9)
Fasten off but DO NOT cut the yarn—you’ll use this tail to attach the nose later.
Creating Adorable Ears
The ears are worked directly onto the body between rows 3 and 4. Position them carefully—the starting point should be straight from where an arm would be, going upward. Each ear spans 12 stitches total, with 2 ears needed.
For each ear:
- 2 CH
- 3 HDC
- SLST in the next stitch
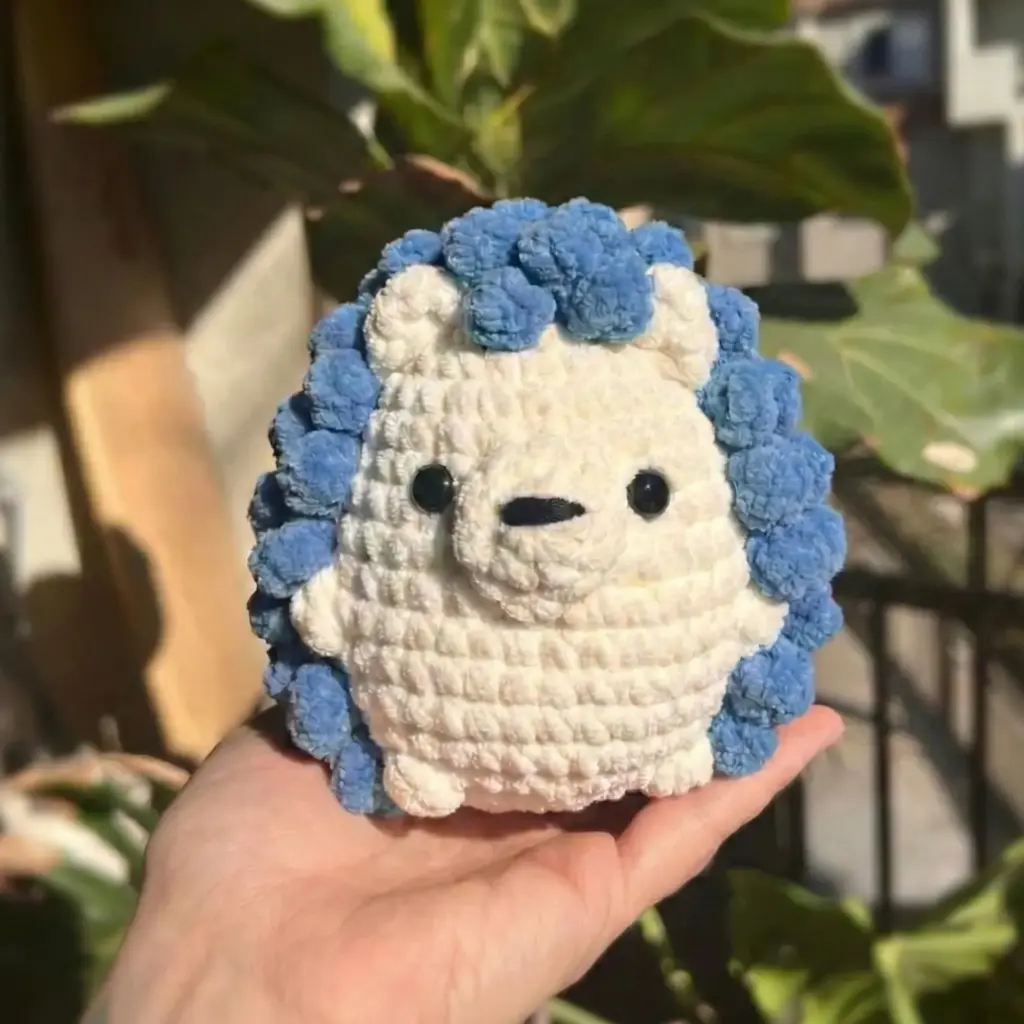
Adding the Signature Hedgehog Spines
This is where your hedgehog truly comes to life! Switch to purple yarn and work into the front loops only (FLO) that you’ve been leaving throughout the body construction.
Spine Pattern:
Attach purple yarn to any FLO stitch on the body. Then repeat this sequence: (3CH, PICOT, 2CH, SLST in the next stitch). Continue this pattern around all the FLO stitches until the entire back is covered in adorable spiky texture.
Final Assembly and Details
Attaching the Nose
Using the tail you left on the nose piece, attach it to the head at rows 7-9. Use 9 slip stitches to securely fasten it in place, ensuring it’s centered and aligned with the face.
Creating Facial Features
- Mouth Line: Using black yarn, embroider a simple curved line beneath the nose to create a sweet smile
- Eyes: Attach the 10mm safety eyes at row 7, positioning them evenly on either side of the nose. Use the hot glue gun to secure them from the inside for extra safety
Tips for Success
- Tension Matters: Maintain consistent tension throughout your work for even stitches
- Count Carefully: Use a stitch marker to keep track of your rounds
- Stuff Gradually: Add fiberfill as you work rather than waiting until the end
- Spine Spacing: Take your time with the spines to ensure even coverage
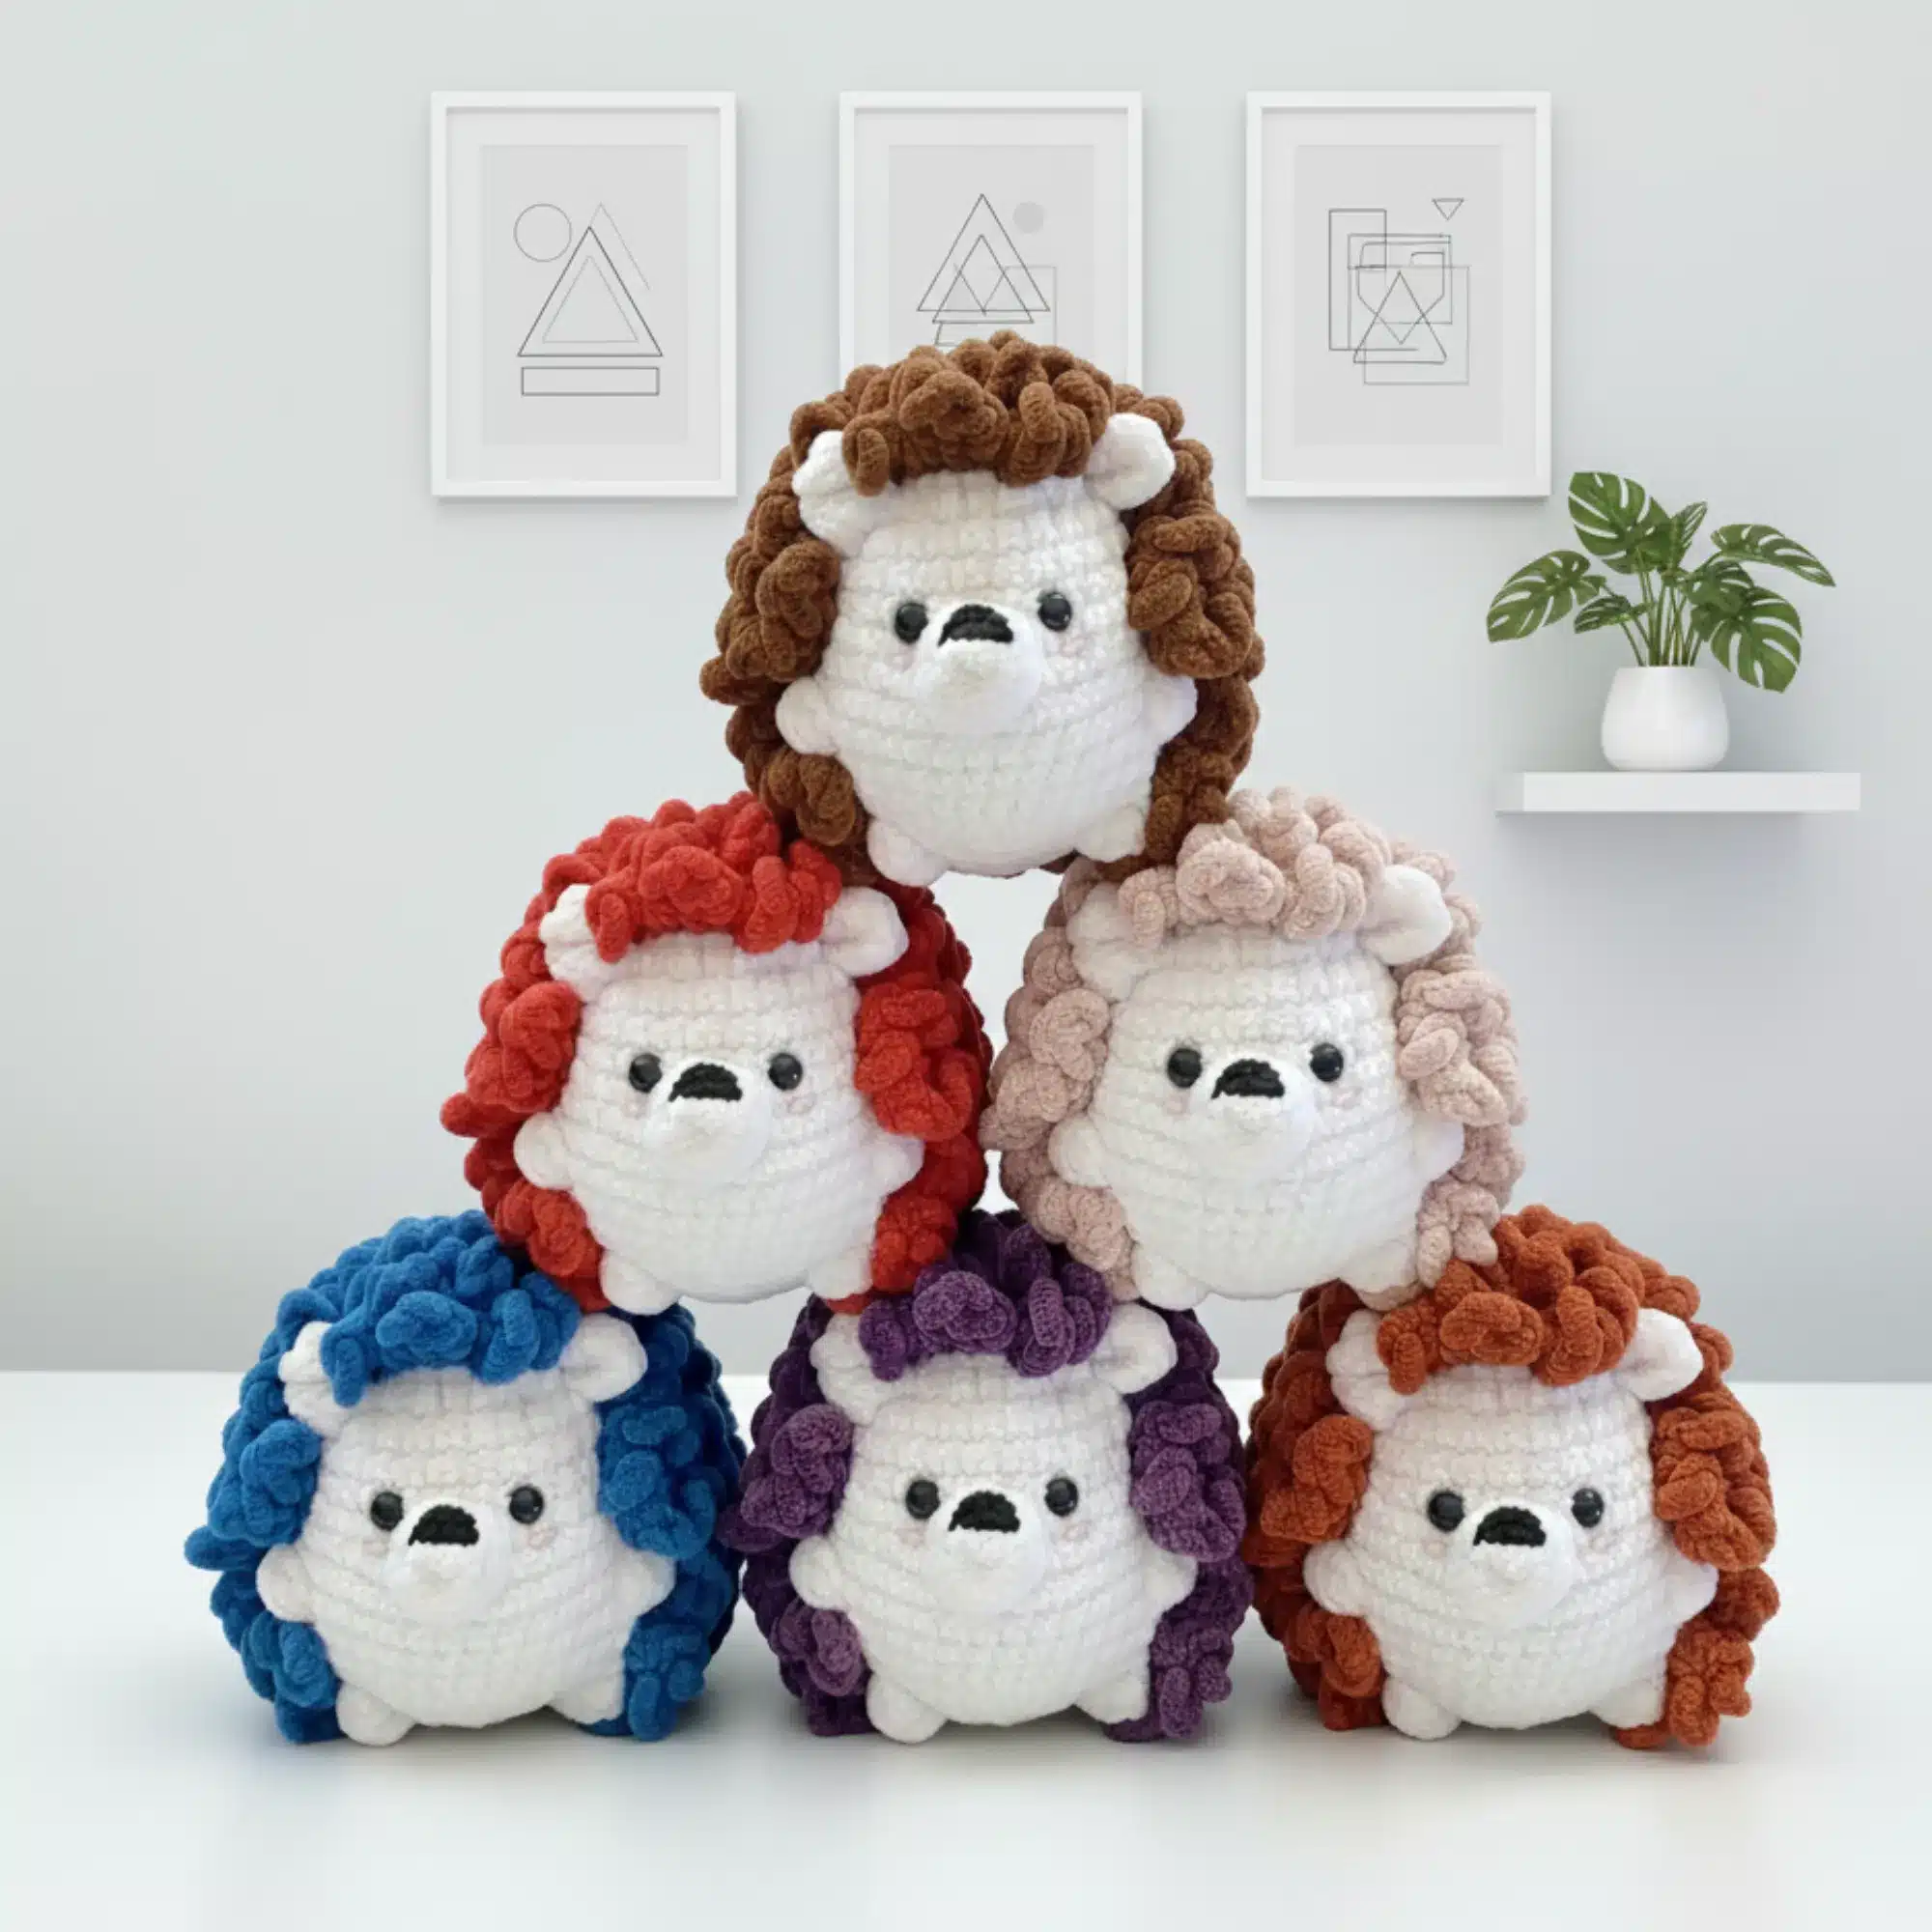
Customization Ideas
Make your hedgehog unique by:
- Experimenting with different color combinations for the body and spines
- Adding a tiny bow or flower accessory
- Creating multiple hedgehogs in various sizes by adjusting your hook size
- Making a family of hedgehogs with different expressions
Conclusion
Congratulations on completing your adorable no-sew hedgehog! This charming amigurumi makes a perfect gift, nursery decoration, or addition to your own collection. The no-sew technique not only saves time but also creates a seamless, professional finish that you’ll be proud to display.
Whether you’re creating this sweet hedgehog for yourself or as a heartfelt handmade gift, the combination of simple stitches and clever construction makes this pattern both enjoyable and rewarding. The finished hedgehog is sure to bring smiles and serve as a testament to your crochet skills.
If you have any questions about the pattern or need clarification on any steps, don’t hesitate to reach out. Happy crocheting, and enjoy your new spiky friend!
Remember it later!
Planning to try this soon? Pin it for a quick find later!