Table of contents
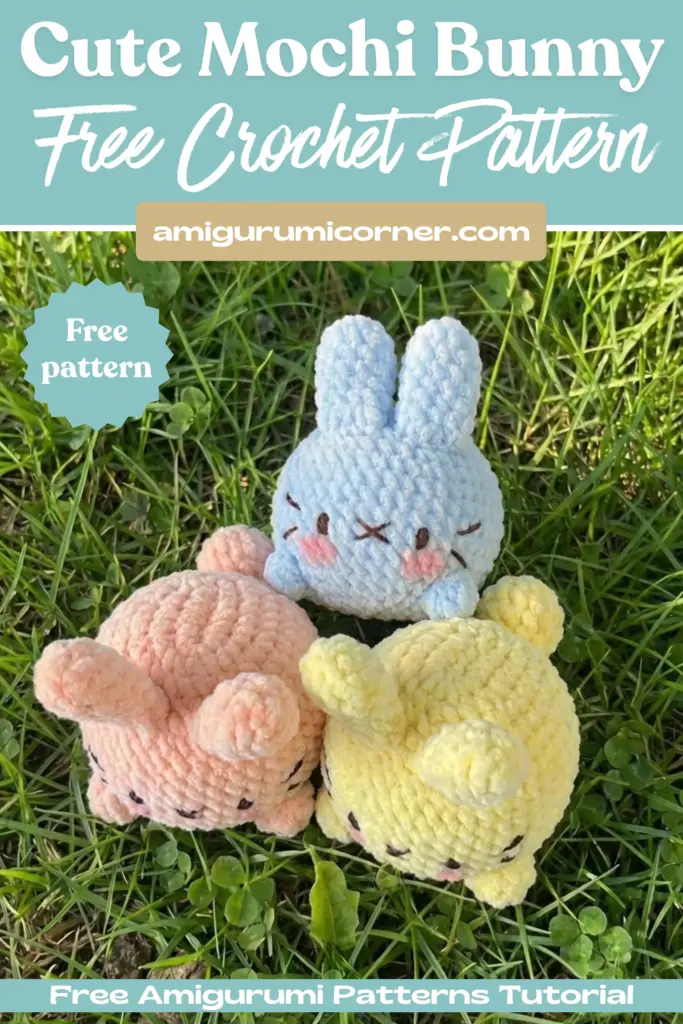
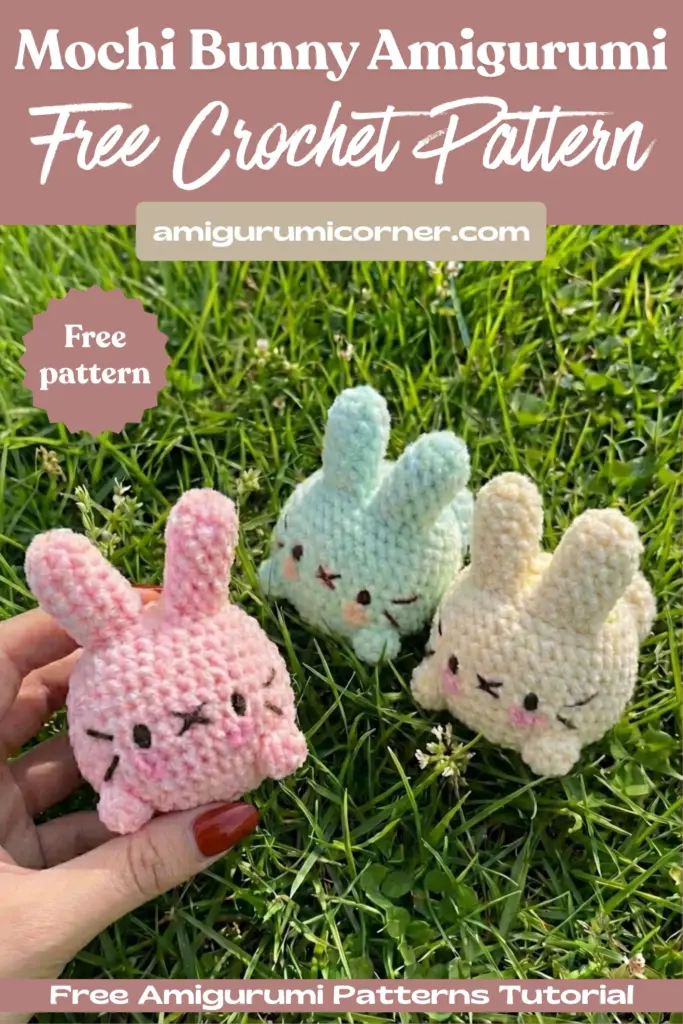
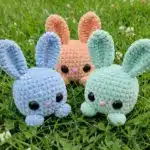
If you’re looking for the perfect beginner-friendly amigurumi project, these adorable mochi bunnies are calling your name! These squishy, cute little rabbits are ideal for gift-giving, nursery decor, or simply adding to your growing plushie collection. With their charming round shape and sweet embroidered faces, these mochi bunnies will steal your heart from the very first stitch.
Designer: chubbiesbyash
Materials You’ll Need

Before you begin your crochet adventure, gather these essential supplies:
- Thin chenille yarn or milk cotton 5ply in pink
- Dark brown milk cotton yarn for face embroidery
- 2.5mm or 3mm crochet hook
- Stuffing materials (polyester fiberfill works great)
- Darning needle
- Fabric glue
- Scissors
- Pink blusher for cheeks
Crochet Abbreviations Guide
Familiarize yourself with these common crochet terms before starting:
- Ch – Chain
- mr – Magic ring
- st – Stitch
- R – Round/Row
- sc – Single crochet
- inc – Increase
- dec – Decrease
- dc – Double crochet
- slst – Slip stitch
-
- Repeat
-
-
- Total stitch count in each round
Crochet Pattern Instructions
Tail
The tail is a simple component that adds adorable dimension to your mochi bunny. Follow the instructions carefully to create this cute little pom-pom detail.
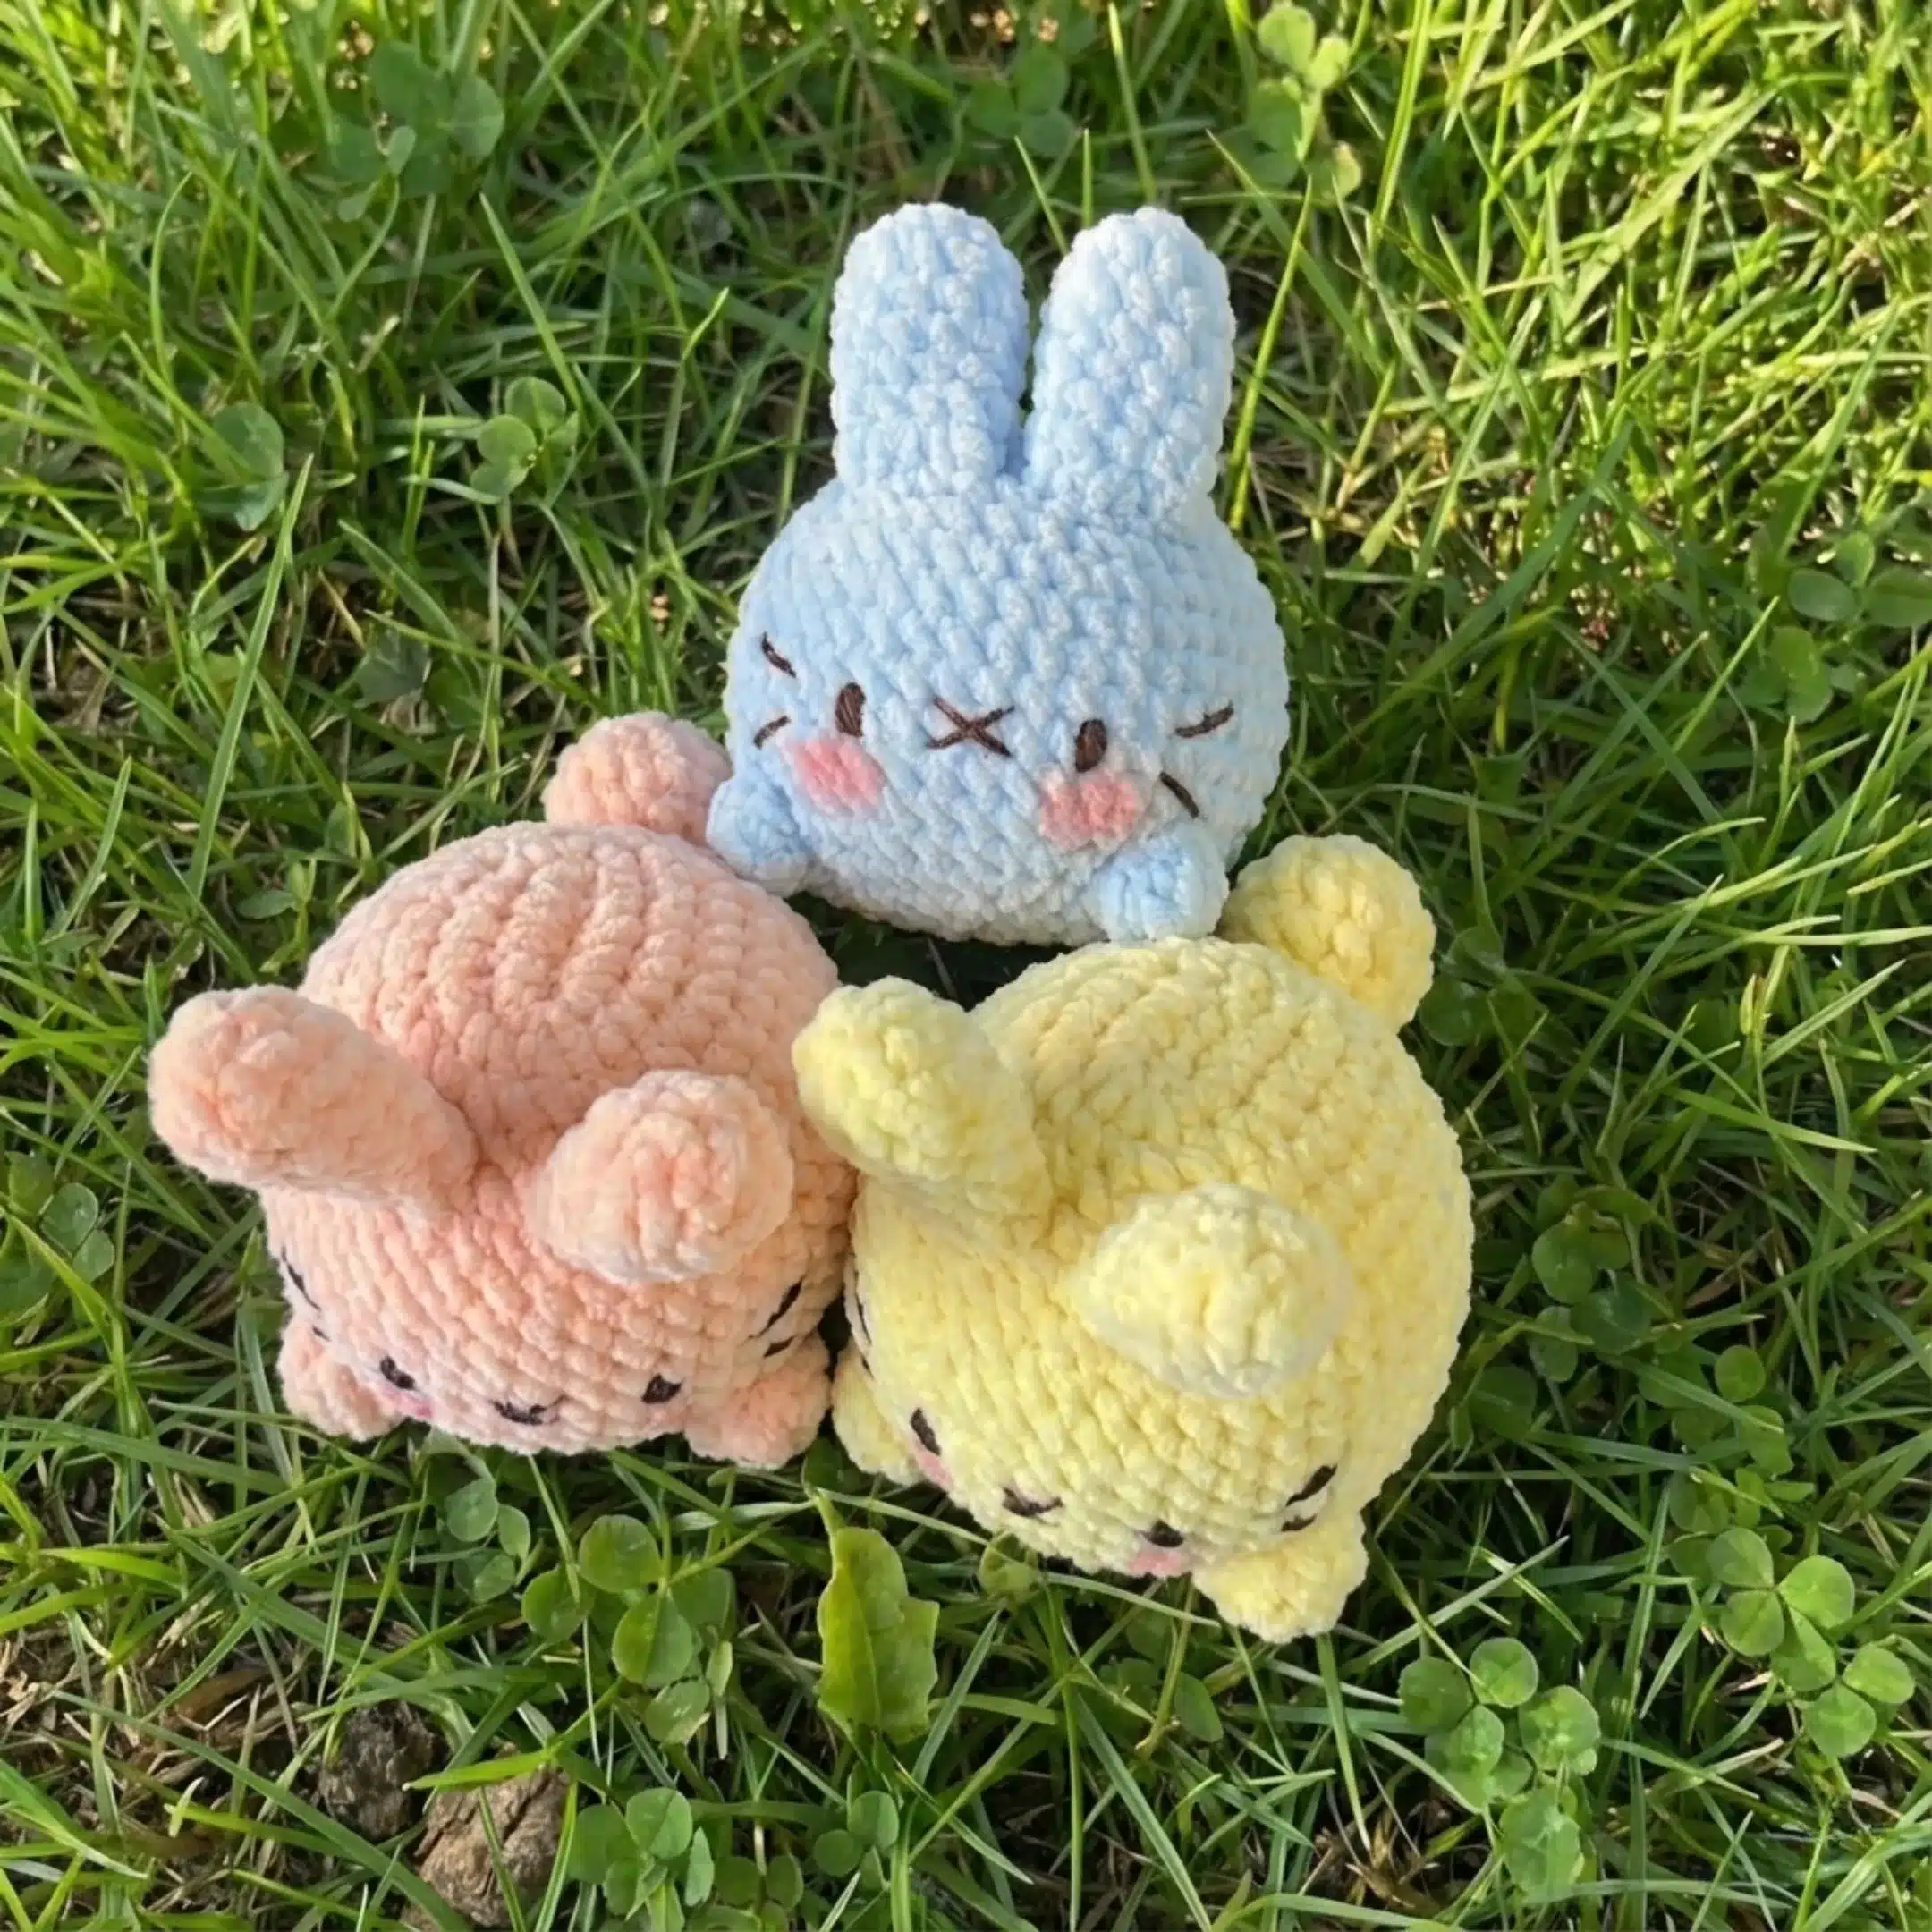
Ears (Make 2)
The ears give your bunny its signature look. Make sure to create two identical pieces for a symmetrical appearance.
Body
This is the main component of your mochi bunny. The body creates that perfectly round, squishy shape that makes these bunnies so huggable.
a) Starting the Body:
Begin with your magic ring technique to create a seamless start for your bunny’s body.
b) Building the Rounds:
Continue working in continuous rounds, increasing strategically to create the rounded shape.
c) Shaping the Middle:
Work even rounds to build up the height of your bunny’s body.
d) Decreasing:
Carefully decrease to close up the body, remembering to stuff firmly before completely closing.

Assembly Instructions
Step a: Positioning the Ears
Place the ears on top of the bunny’s head, ensuring they’re evenly spaced and symmetrical.
Step b: Attaching the Tail
Secure the tail to the back of the bunny’s body at the appropriate position.
Step c: Embroidering the Face
Using your dark brown yarn, carefully embroider simple eyes and a cute nose.
Step d: Adding Cheeks
Apply a small amount of pink blusher to give your bunny those adorable rosy cheeks.
Step e: Final Touches
Check all attachments are secure and add any final details.
Step f: Quality Check
Examine your finished bunny to ensure everything is properly attached and the stuffing is evenly distributed.
Tips for Success
- Tension Matters: Keep your stitches consistent throughout the project for a professional finish.
- Stuff Gradually: Add stuffing as you work through the decreasing rounds rather than waiting until the end.
- Face Placement: Take time to position the face embroidery correctly—this makes all the difference in your bunny’s personality.
- Chenille Care: If using chenille yarn, be gentle as it can be more delicate than traditional yarn.

Customization Ideas
While the pattern calls for pink, don’t be afraid to get creative! Consider making:
- A whole rainbow family of mochi bunnies
- Seasonal variations with holiday-themed colors
- Mini versions using thinner yarn and smaller hooks
- Larger cuddle buddies by using bulkier yarn
Frequently Asked Questions
Thin chenille yarn or milk cotton 5ply works perfectly for these mochi bunnies. The chenille creates an extra soft, plush texture while milk cotton gives a smooth, professional finish. Both options create the adorable squishy appearance that makes these bunnies so huggable.
For beginners, expect to spend 2-3 hours completing one mochi bunny. More experienced crocheters can finish one in about 1-2 hours. The simple design makes this a great quick project, perfect for gift-making or when you need a satisfying weekend craft.
Absolutely! To make larger bunnies, use a bulkier yarn weight with a corresponding larger hook size. For tiny versions, try using fingering weight yarn with a 2mm hook. Just remember that changing the size will affect the amount of yarn and stuffing needed for your project.
Use a tapestry needle with dark brown yarn for the face. Create simple dots for eyes using French knots or small stitches, and add a small Y-shape or triangle for the nose. Position the eyes about 1/3 down from the top of the head and space them evenly for the cutest expression.
Conclusion
Congratulations on choosing to create these delightful mochi bunnies! This pattern is perfect for crocheters of all skill levels and makes wonderful handmade gifts for loved ones. Whether you’re making just one or an entire fluffy family, these adorable amigurumi bunnies are sure to bring smiles wherever they go.
Remember to take your time, enjoy the creative process, and don’t worry if your first bunny isn’t perfect—each one will have its own unique charm and personality. Happy crocheting, and may your hook be swift and your stitches even!
Remember it later!
Planning to try this soon? Pin it for a quick find later!