Table of contents
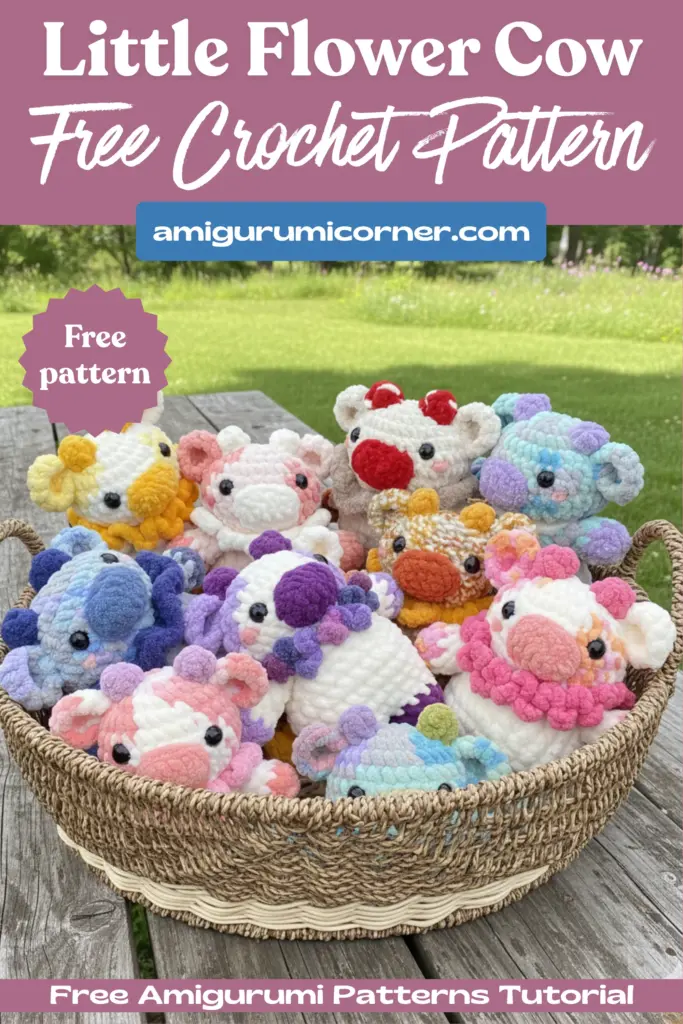
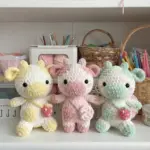
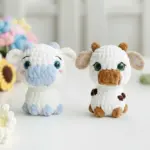
Spring has arrived, and with it comes the perfect opportunity to create adorable handmade companions! These charming little flower cow plushies stand approximately 8 inches tall and make wonderful medium-sized projects for craft markets or personal collections. Whether you’re creating a solid color cow, a spotted variety, or even a whimsical mushroom cow, each variation can be customized with delightful flower dresses and accessories that make every plushie unique and special.
Designer: anniecarrawayart
Materials and Tools
Before you begin crafting your little flower cow, gather these essential supplies:
- Yarn: Bernat Blanket Varieties (or similar bulky/chunky weight yarn)
- Crochet Hooks: 5.5mm and 6.5mm Susan Bates hooks
- Poly-Fil Stuffing: For filling your plushie
- Safety Eyes: 14mm size
- Darning Needle: For sewing pieces together
- Stitch Marker: To keep track of your rounds (optional but helpful)
Yarn Options and Recommendations

Primary Choice – Bulky Weight Yarns (6.5mm hook):
Bernat Blanket Varieties, Big Twist Plush, Premier Basix, and Yarn Bee Cozy Occasion are excellent choices for these plushies. These yarns create the perfect texture and size, with one skein making multiple plushies. Keep in mind that some colors may be softer than others, and weight can vary between skeins, so purchasing in person when possible allows you to select the best quality.
Alternative Choice – Lighter Chunky Yarns (5.5mm hook):
Premier Parfait Chunky, Sweet Snuggles Lite, and Chenille Home Slim offer a super soft, velvety texture. While beautiful, these yarns can be less reliable in quality and tend to shed and break more easily.
Custom Options:
Feel free to experiment with any yarn you prefer! Just remember to use a smaller hook size than recommended to prevent holes in your work. Your yarn choice will determine the final size of your plushie, but they’ll look adorable regardless of the materials you choose.
Pattern Variations
This pattern includes instructions for nine delightful variations:
Base Cow Designs:
- Solid Cow
- Spotted Cow
- Mushroom Cow
Necklace Accessories:
- Wavy Necklace
- Daisy Necklace
- Sunflower Necklace
- Frill Necklace
Dress Options:
- Daisy Dress
- Sunflower Dress
Abbreviations Guide
- ch: chain stitch
- st: stitch
- sl st: slip stitch
- mc: magic circle
- sc: single crochet
- hdc: half double crochet
- blo: back loop only
- flo: front loop only
- inc: increase (2 sc in the same stitch)
- dc: double crochet
- dc inc: double crochet increase (2 dc in the same stitch)
- inv dec: invisible decrease (pull up front loop only of 2 stitches, finish like a normal sc)
Important Note: This plushie pattern is worked in the round. After completing the first row, continue crocheting without chaining or joining. Using a stitch marker to track your progress is highly recommended.
Solid and Spotted Little Cow Head
For spotted cows, the accent color instructions are indicated in the pattern. When making a solid color cow, simply use your main body color throughout.
Head Instructions
- Row 1: Make a magic circle, ch 1 (doesn’t count), 8 sc in mc (8)
- Row 2: inc around (16)
- Row 3: (1 sc, inc) x 8 (24)
- Row 4: (2 sc, inc) x 8 (32)
For Solid Cows – Rows 5-7: sc around (32)
For Spotted Cows:
- Row 5: 2 sc (main color), 5 sc (accent), 8 sc (main), 5 sc (accent), 12 sc (main) (32)
- Row 6: 4 sc (main), 3 sc (accent), 8 sc (main), 5 sc (accent), 12 sc (main) (32)
- Row 7: 16 sc (main), 3 sc (accent), 13 sc (main) (32)
After Row 7, use only the main color. This is a great time to tie off your accent color ends.
- Row 8: (2 sc, inv dec) x 8 (24)
- Row 9: (1 sc, inv dec) x 8 (16)
Slip stitch to fasten off and leave a long tail for sewing the head onto the body.
Eye Placement: Insert 14mm safety eyes between Row 5 and Row 6, positioned 6 visible stitches apart. Consider adding a dot of fabric glue to the inside before securing the washer for extra security. Stuff the head firmly before adding the horns and ears to ensure they’re positioned straight.
Horns (make 2)
- Row 1: Make a magic circle, ch 1 (doesn’t count), 5 sc in mc (5)
- Row 2: sc around (5)
Slip stitch and leave a long tail for sewing. Tie the starting and ending tails together and use the excess starting yarn to stuff the horn lightly. These horns are intentionally small, so make sure to push the horn outward while crocheting to prevent it from turning inside out. Sew horns onto the head at Rows 2-3.
Ears (make 2)
- Row 1: Make a magic circle, ch 1 (doesn’t count), 5 sc in mc (5)
- Row 2: inc in each st (10)
- Row 3: sc around, sl st, leave a long tail for sewing (10)
Weave in the starting end before sewing the ears onto the head directly below the horns. For spotted cows, the ear on the same side as the accent color spot can match that accent color for added detail.
Nose
- Row 1: Create a slip knot, ch 5 (5)
- Row 2: Skip the chain on your hook, sc 4 (4)
- Row 3: (Working on the other side of the chain) inc in first ch, 2 sc, inc (6)
- Row 4: (Working in the round) inc in corner, 4 sc (6)
Slip stitch and leave a long tail. Sew the top of the nose from the bottom of Row 5 to the top of Row 8, centered between the eyes. Try to maintain 1 single crochet space between the nose and each eye for proper spacing. Many crocheters prefer to wait until the head is attached to the body before adding the nose, horns, and ears to ensure perfect placement.
Arms (make 2)
Start with Arm Accent Color:
- Row 1: Make a magic circle, ch 1 (doesn’t count), 8 sc in mc (8)
- Row 2: sc around (8)
Switch to Main Body Color for the next 4 rows. This is an excellent time to tie your ends and use the excess yarn to stuff the arm. Polyester stuffing is optional for the arms.
- Rows 3-6: sc around for 4 rows, 1 sc (This extra single crochet will hide your color change on the back of the arm) (8)
Do not fasten off yet. You can single crochet the arms onto the neck of the body before finishing them, which makes sewing on the head much easier. Another option is to attach the arms as you crochet the last row of the body.
Feet (make 2) and Cow Body
Start with Foot Accent Color:
- Row 1: Make a magic circle, ch 1 (doesn’t count), 11 sc in mc (11)
- Rows 2-3: sc around for 2 rows (11)
Do not finish the last stitch of the first foot. Remove your hook and leave a tail long enough to tie. Create your second foot, then continue with Row 4.
Switch to Main Body Color:
- Row 4 (part 1): 11 sc, ch 1…
- Remove your hook from your work and place the last stitch from your first foot onto your hook. Insert your hook into the loop of your ch 1 and pull through. Continue working around your first foot.
- Row 4 (part 2): …11 sc around first foot (22 sc, 1 ch)
- Row 5: (1 sc in ch space, 11 sc around foot) x 2 (24)
This is a perfect time to tie your ends. If using lighter weight yarn, you may want to stuff as you go. With Bernat Blanket and a 6.5mm hook, stuffing after completing the body works well.
- Row 6: (5 sc, inc) x 4 (28)
- Rows 7-9: sc around for 3 rows (28)
- Row 10: (5 sc, inv dec) x 4 (24)
- Row 11: (4 sc, inv dec) x 4 (20)
- Row 12: (3 sc, inv dec) x 4 (16)
Slip stitch to fasten off and leave a tail long enough to tie.
Attaching Arms to Body
To single crochet the arms onto the body: Do not fasten off the arm. Insert your hook through both sides of Row 6 of the arm and through the top of your cow’s neck. Pull a loop through, then pull through both loops on your hook to finish the sc. Work 2 sc to secure, though you can still adjust positioning when sewing. Line up the front of the arms with the sides of the eyes so they angle forward, creating a more animated appearance.
Attaching Head to Body

When sewing the head onto the body, sew through Row 6 of the arms, not into the 2 single crochets used to attach them. Secure the front and back of the head first before lining up the stitches and sewing around each stitch. If using delicate chenille yarn, consider using cotton or acrylic worsted weight yarn for sewing to ensure durability.
Accessories
Note: Switch to a 5.5mm hook while making accessories for tighter stitches.
Daisy Necklace
- Step 1: Chain the appropriate amount to fit around your cow’s neck. Work in multiples of 3, then add 4. (Approximately 25 chains, but adjust as needed)
- Step 2: Skip the chain on your hook and slip stitch into the next.
- Step 3: In the next chain, work 4 double crochet into the same chain, slip stitch 2 over.
- Step 4: Repeat Step 3 until end.
- Step 5: Straighten out the necklace and sew the two ends together around the cow’s neck. Tie the ends and hide the knot inside the plushie.
Sunflower Necklace
- Step 1: Chain the appropriate amount to fit around your cow’s neck. Work in multiples of 3, then add 4. (Approximately 25 chains, but adjust as needed)
- Step 2: Slip stitch in the 2nd chain from the hook.
- Step 3: In the next chain, work (2 dc, ch 2, sl st into the first chain, 2 dc) all together in the same chain, slip stitch 2 over.
- Step 4: Repeat Step 3 until end.
- Step 5: Straighten out the necklace and sew the two ends together around the cow’s neck. Tie the ends and hide the knot in the plushie.
Wavy Necklace
- Step 1: Chain the appropriate amount to fit around your cow’s neck. (Approximately 25 chains, but adjust as needed)
- Step 2: Chain 2, double crochet in the 3rd chain.
- Step 3: Double crochet increase in each chain until end.
- Step 4: Straighten out the necklace and sew the two ends together around the cow’s neck. Tie the ends and hide the knot in the plushie.
Frill Necklace
- Step 1: Chain the appropriate amount to fit around your cow’s neck. (Approximately 30 chains, but adjust as needed)
- Step 2: Slip stitch into the 6th chain from your hook.
- Step 3: (Chain 4, slip stitch into the next)
- Step 4: Repeat until end.
- Step 5: Straighten out the necklace and sew the two ends together around the cow’s neck. Tie the ends and hide the knot in the plushie.
Simple Chain Necklace
Chain the appropriate amount and sew closed around the neck.
Daisy Dress
- Step 1: Slip stitch onto Row 8 or 9 on the back of your cow with its feet facing up. Single crochet around the cow’s body, switching over a few stitches before you complete the round so that your stitches meet.
- Step 2: Single crochet around.
- Step 3: (Slip stitch, chain 2, double crochet, chain 2, slip stitch) all in the same stitch, slip stitch 1 over. Repeat around.
- Step 4: Chain 3, 2 single crochet into the top of the double crochet, chain 3, slip stitch into the slip stitch between your petals. Repeat around.
- Step 5: Tie the ends and hide the knot in the plushie.
Sunflower Dress
- Step 1: Slip stitch onto Row 8 or 9 on the back of your cow with its feet facing up. Single crochet around the cow’s body, switching over a few stitches before you complete the round so that your stitches meet.
- Step 2: Single crochet around.
- Step 3: (Slip stitch, chain 2, double crochet, chain 2, slip stitch) all in the same stitch, slip stitch 1 over. Repeat around.
- Step 4: Chain 3, 1 single crochet into the top of the double crochet, chain 2, 1 single crochet into the top of the double crochet, chain 3, slip stitch into the slip stitch between your petals. Repeat around.
- Step 5: Tie the ends and hide the knot in the plushie.
How to Single Crochet Onto the Cow to Add a Dress
Method 1: Slip stitch onto Row 8 or 9 on the back of your cow with its feet facing up so that the right side of your stitches will be the front-facing side of the petals. Single crochet around the cow’s body, switching over a few stitches before you complete the round so that your stitches meet. This creates a foundation row of single crochets for your flower petals.
Method 2: Make Row 8 all back loop only single crochets while crocheting the cow’s body, then work the foundation of the dress into the front loops. Both methods work beautifully—try each to discover your preference!
Color Changing Technique
- Step 1: Do not finish your last stitch before the color change.
- Step 2: Drop the color you were using behind and pull your new color to the top.
- Step 3: Pull through with your new color to finish the stitch and continue working.
There are many color-changing techniques available online. Use whichever method you’re most comfortable with to ensure you’re having fun with your project!
Design Ideas and Color Combinations

Marigold
- Main Body: Vintage White
- Body Accent/Ears: Bernat Baby Blanket Sparkle, Sunshine
- Horns: Sun Soaked
- Nose: Sunsoaked
- Arms: Bernat Baby Blanket Sparkle, Sunshine
- Feet: Sun Soaked
- Necklace: Sun Soaked
Begonia
- Main Body: Vintage White
- Body Accent/Ears: Bernat Baby Blanket, Peachy
- Horns: Bernat Baby Blanket Sparkle, Hot Pink
- Nose: Bernat Baby Blanket Sparkle, Rose Glow
- Arms: Bernat Baby Blanket, Peachy
- Feet: Bernat Baby Blanket Sparkle, Hot Pink
- Necklace: Bernat Baby Blanket Sparkle, Hot Pink
Lavender
- Main Body: Vintage White
- Body Accent/Ears: Bernat Baby Blanket, Baby Lilac
- Horns: Bernat Blanket Brights, Pow Purple
- Nose: Bernat Blanket Brights, Pow Purple
- Arms: Bernat Baby Blanket, Baby Lilac
- Feet: Bernat Blanket Brights, Pow Purple
- Necklace: Purple Sunset
Dandelion
- Main Body: Bernat Baby Blanket, Sea and Sand
- Body Accent/Ears: None (Solid Color)
- Horns: Sun Soaked
- Nose: Vintage White
- Arms: Vintage White
- Feet: Vintage White
- Necklace: Sun Soaked
Morning Glory
- Main Body: Overcast
- Body Accent/Ears: None (Solid Color)
- Horns: Twilight
- Nose: Country Blue
- Arms: Country Blue
- Feet: Country Blue
- Necklace: Twilight
Mushroom
- Main Body: Bernat Blanket Twist, Cream
- Body Accent/Ears: None (Solid Color)
- Horns: Crimson with Vintage White details
- Nose: Crimson
- Arms: Harvest
- Feet: Harvest
- Necklace: Bernat Baby Blanket, Baby Sand
Autumn Sunflower
- Main Body: Yarn Bee, Cozy Traditions, Honey Wheat
- Body Accent/Ears: None (Solid Color)
- Horns: Gold
- Nose: Pumpkin Spice
- Arms: Pumpkin Spice
- Feet: Pumpkin Spice
- Necklace: Gold
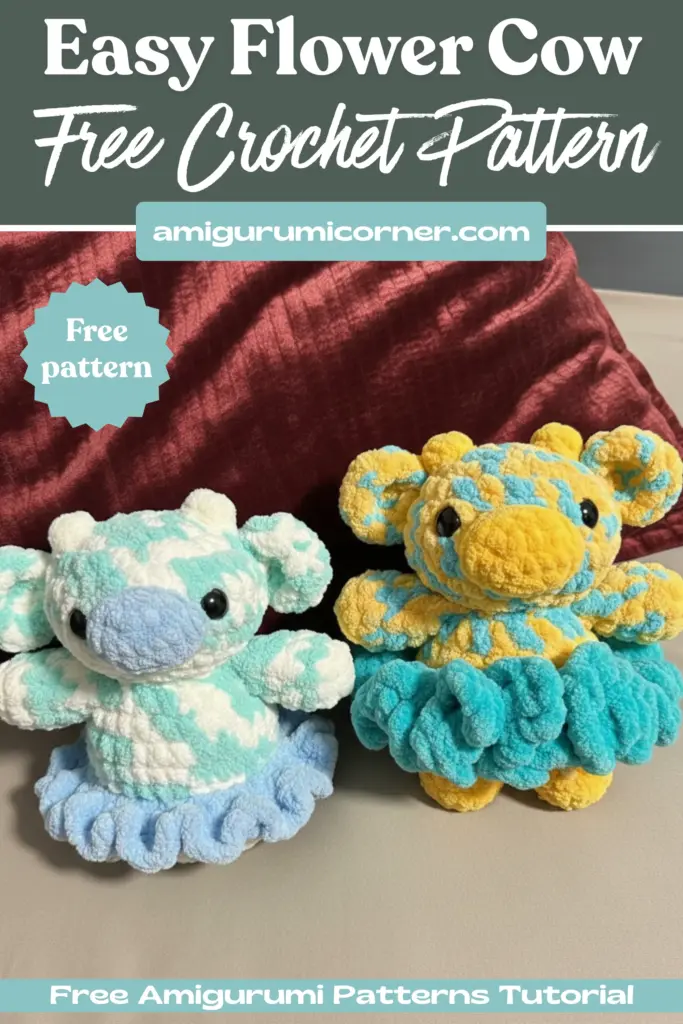
Sunflower Dress Variation
- Main Body: Gold
- Body Accent/Ears: None (Solid Color)
- Horns: Pumpkin Spice
- Nose: Pumpkin Spice
- Arms: Fall Leaves
- Feet: Fall Leaves
- Dress: Pumpkin Spice
Pretty Daisy
- Main Body: Blush Pink
- Body Accent/Ears: Bernat Baby Blanket Sparkle, Rose Glow
- Horns: Vintage White
- Nose: Vintage White
- Arms: Bernat Baby Blanket Sparkle, Rose Glow
- Feet: Bernat Baby Blanket Sparkle, Rose Glow
- Necklace: Vintage White
Daisy Dress Variation
- Main Body: South Seas
- Body Accent/Ears: None (Solid Color)
- Horns: Bernat Baby Blanket, Baby Lilac
- Nose: Bernat Baby Blanket, Baby Lilac
- Arms: Bernat Baby Blanket, Baby Lilac
- Feet: Bernat Baby Blanket, Baby Lilac
- Dress: Vintage White
Tips for Success
- Stuff the head firmly before adding horns and ears to ensure they’re positioned straight
- The nose is the most important feature—add it last for perfect placement
- Line up arms with the sides of the eyes, angled forward for a more animated look
- Switch to a smaller hook (5.5mm) for accessories to create tighter stitches
- When working with delicate chenille yarn, consider using stronger cotton or acrylic yarn for sewing
The little flower cows are approximately 8 inches tall when made with Bernat Blanket yarn and a 6.5mm hook. The final size will vary depending on your yarn choice, hook size, and tension.
Yes! This pattern is very flexible. You can use any yarn you like, though bulky or chunky weight yarns work best. Just remember to use a smaller hook size than recommended for your yarn to prevent holes in your work. Different yarn weights will create different sized plushies.
Stuffing the arms is optional. Many crafters prefer to use only the excess yarn ends to lightly stuff the arms rather than adding polyester stuffing. This creates a softer, more flexible arm that poses nicely.
Insert the 14mm safety eyes between Row 5 and Row 6, positioned 6 visible stitches apart. It’s recommended to stuff the head firmly before adding the horns and ears to ensure proper positioning. Many crafters wait until the head is attached to the body before adding the nose for perfect placement.
Conclusion
These charming little flower cow plushies are perfect companions for spring and beyond. With multiple variation options including solid, spotted, and mushroom designs, plus an array of flower dresses and necklaces, each cow you create will have its own unique personality. Whether you’re making them for craft markets, gifts, or your personal collection, these adorable 8-inch plushies are sure to bring smiles wherever they go.
Don’t be afraid to experiment with different color combinations and accessories to make each cow truly special. The beauty of this pattern lies in its flexibility—every variation will turn out beautifully! Share your creations and connect with fellow crafters to celebrate the joy of handmade art. Happy crocheting!

Remember it later!
Planning to try this soon? Pin it for a quick find later!