Table of contents
- Materials You’ll Need
- Important Tips Before You Begin
- The Upper Paws (Make 2)
- The Bottom Paws (Make 2)
- Joining the Paws
- Body Completion and Upper Paw Attachment
- Head Construction
- Head Sculpting
- Muzzle
- Nose
- Muzzle Design Details
- Ears (Make 2)
- Tail
- T-Shirt Construction
- Sleeves (Make 2)
- Honey Pot
- Honey Topping
- Honey Drip Fringes
- Finishing the Honey Pot
- Frequently Asked Questions
- Bringing Your Bear to Life
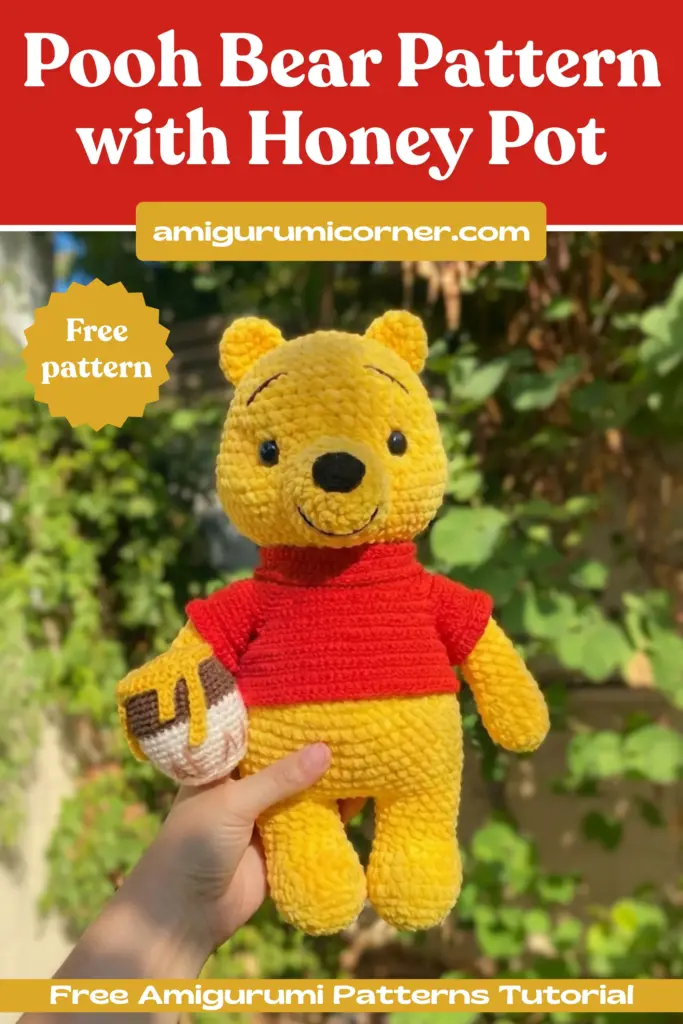
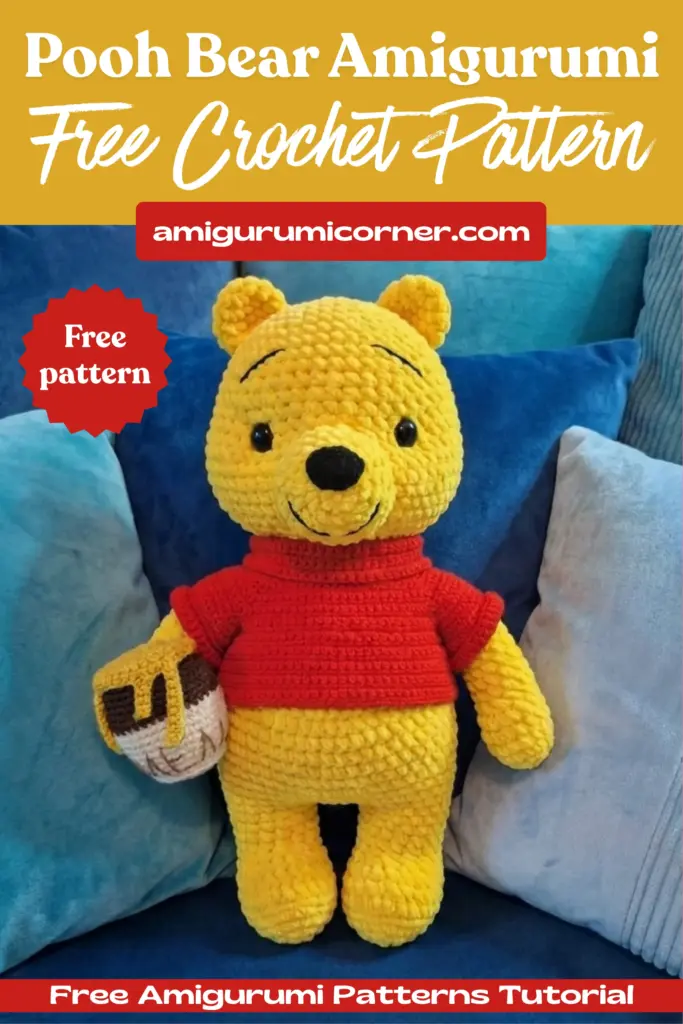
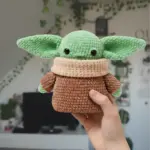
If you’ve been searching for the perfect crochet bear pattern that captures the timeless charm of everyone’s favorite honey-loving character, you’ve found it! This comprehensive guide will walk you through creating an endearing plush bear complete with a delightful honey pot accessory. Standing approximately 11.8 inches tall, this cuddly creation is perfect for both experienced crocheters looking for a rewarding project and adventurous intermediate crafters ready to expand their skills.
Whether you’re making this as a heartfelt gift, a nursery decoration, or simply adding to your handmade toy collection, this pattern delivers professional results with clear, detailed instructions for every component.
Materials You’ll Need
Before diving into your crochet adventure, gather these essential supplies:
Yarn Requirements:
- Plush yarn Wolans Bunny Baby in Yellow 100-44 (main color): 1.5 skeins
- YarnArt Jeans DK weight yarn in multiple colors:
- Yellow 88 (for muzzle sculpting and honey)
- Black 53 (for eyebrows and nose)
- Red 90 (for T-shirt): 1 skein
- Brown 40 (for pot)
- Beige 07 (for pot)
Additional Supplies:
- One pair of 14mm safety eyes
- 3.75mm crochet hook (for plush yarn)
- 1.75mm crochet hook (for cotton yarn)
- Polyester fiberfill stuffing
- Scissors
- Stitch markers
- Tapestry needle for sculpting
- Long needle for detail work
- Optional: fabric glue for securing embroidered details

Important Tips Before You Begin
Tension and Hook Size: When working with different yarn types in one project, maintaining consistent tension is crucial. The plush yarn requires a 3.75mm hook, while the cotton details need a 1.75mm hook. Your stitches should be tight enough that stuffing won’t show through—this creates a professional finish and ensures your bear maintains its shape over time.
Working Method: This pattern is worked in continuous spiral rounds unless otherwise specified. Use stitch markers liberally to track your rounds and important placement points. If starting with a magic ring feels challenging, you can chain 2 and work into the first chain instead.
Stuffing Strategy: Stuff as you go, but don’t overstuff. The goal is firm but huggable. Pay special attention to shaping as you stuff—the head should have defined cheeks and a squared top, while the body should maintain smooth, even proportions.
The Upper Paws (Make 2)
Crochet the paws with yellow plush yarn.
- Rnd 1: 6 sc into MR
- Rnd 2: (inc) * 6 (12)
- Rnd 3: (2 sc, inc) * 4 (16)
- Rnds 4-6: 16 sc (3 rounds)
- Rnd 7: (dec) * 3, 10 sc (13)
- Rnd 8: 1 sc, dec, 10 sc (12)
- Rnds 9-18: 12 sc (10 rounds)
Stuff the lower half of the paw. Make 3 shift stitches and flatten the paw along the decreases. Crochet 6 sc through both loops to close. Fasten off and break yarn on the first paw. Leave the working yarn attached on the second paw.
The Bottom Paws (Make 2)
Crochet the paws with yellow plush yarn.
- Rnd 1: Chain 8 and start crocheting 6 sc to the chain, 3 sc in the last chain. Continue crocheting on the other side of the chain foundation 6 sc, 3 sc in the last chain (you’ll create an oval shape with increases on the roundings and 6 sc on both sides). Place a stitch marker. (18)
- Rnd 2: 6 sc, (inc) * 3, 6 sc, (inc) * 3 (24)
- Rnd 3: 6 sc, (inc, 1 sc) * 3, 6 sc, (inc, 1 sc) * 3 (30)
- Rnd 4: 30 sc through the back loops only
- Rnd 5: Crochet with sc as usual, but do not complete the row to the end (about three sc). Stop in the middle of the heel and place a marker.
Important Note: The six decreases in rounds 6 and 8 should be positioned exactly on the heel. Make shift stitches if needed to align properly.
- Rnd 6: 9 sc, (dec) * 6, 9 sc (24)
- Rnd 7: 24 sc
- Rnd 8: 6 sc, (dec) * 6, 6 sc (18)
- Rnds 9-12: 18 sc (4 rounds)
Stuff the paw carefully, ensuring the toe and heel are well-shaped. Break yarn on one paw and secure. Leave the working yarn on the second paw to begin joining.
Joining the Paws
The working yarn should be on the inner side when joining the paws. Make shift stitches as needed to align properly.
- Rnd 13: Chain 2 on the second paw and attach to the first paw. Place a stitch marker on the back. Crochet 18 sc to the first paw, (inc) * 2 to the chain (on the front), 18 sc to the second paw, (inc) * 2 to the chain (on the back). (44)
- Rnd 14: 18 sc, (inc) * 4 (on the front), 18 sc, (inc) * 4 (on the back) (52)
- Rnds 15-24: 52 sc (10 rounds)
Place two markers in the center on the front side at a distance of 8 stitches. The decreases will be worked on the belly area.
- Rnd 25: Crochet with sc as usual, (dec) * 4 on the front (48)
- Rnd 26: Work (dec) * 4 on the front as in round 25 (44)
Stuff the body as you crochet to maintain proper shaping.
- Rnds 27-28: 44 sc (2 rounds)
Adjust the position of the marker to ensure it’s centered on the back.
- Rnd 29: 2 sc, (18 sc, dec) * 2, 2 sc (42)
- Rnd 30: 42 sc
- Rnd 31: (5 sc, dec) * 6 (36)
- Rnd 32: 36 sc
Body Completion and Upper Paw Attachment

- Rnd 33: In this round, you’ll attach the upper paws. Mark 10 sc on the front (the distance between the paws) with two additional markers. Start crocheting from the main marker: 7 sc, 6 sc with the first paw together, 10 sc to the front, 6 sc with the second paw, and complete with 7 sc to the end. (36)
- Rnd 34: (4 sc, dec) * 6 (30)
- Rnd 35: (3 sc, dec) * 6 (24)
Stuff the body and neck thoroughly. Do not cut yarn—continue directly into the head.
Head Construction
- Rnd 36: (3 sc, inc) * 6 (30)
- Rnd 37: (4 sc, inc) * 6 (36)
Place a marker at any point between rounds 36 and 37 for easy reference when positioning eyes and sculpting the muzzle.
- Rnd 38: (5 sc, inc) * 6 (42)
- Rnd 39: (6 sc, inc) * 6 (48)
- Rnd 40: (7 sc, inc) * 6 (54)
- Rnd 41: (8 sc, inc) * 6 (60)
- Rnds 42-46: 60 sc (5 rounds)
- Rnd 47: (8 sc, dec) * 6 (54)
- Rnd 48: 54 sc
- Rnd 49: (7 sc, dec) * 6 (48)
- Rnds 50-53: 48 sc (4 rounds)
Eye Placement: Install the safety eyes between rounds 47 and 48. The distance between the eye stems should be 9 sc. Count the distance in round 48 for accuracy. Fasten the washers securely on the wrong side.
- Rnd 54: (6 sc, dec) * 6 (42)
- Rnd 55: (5 sc, dec) * 6 (36)
- Rnd 56: (4 sc, dec) * 6 (30)
- Rnd 57: (3 sc, dec) * 6 (24)
- Rnd 58: (2 sc, dec) * 6 (18)
- Rnd 59: (1 sc, dec) * 6 (12)
- Rnd 60: (dec) * 6 (6)
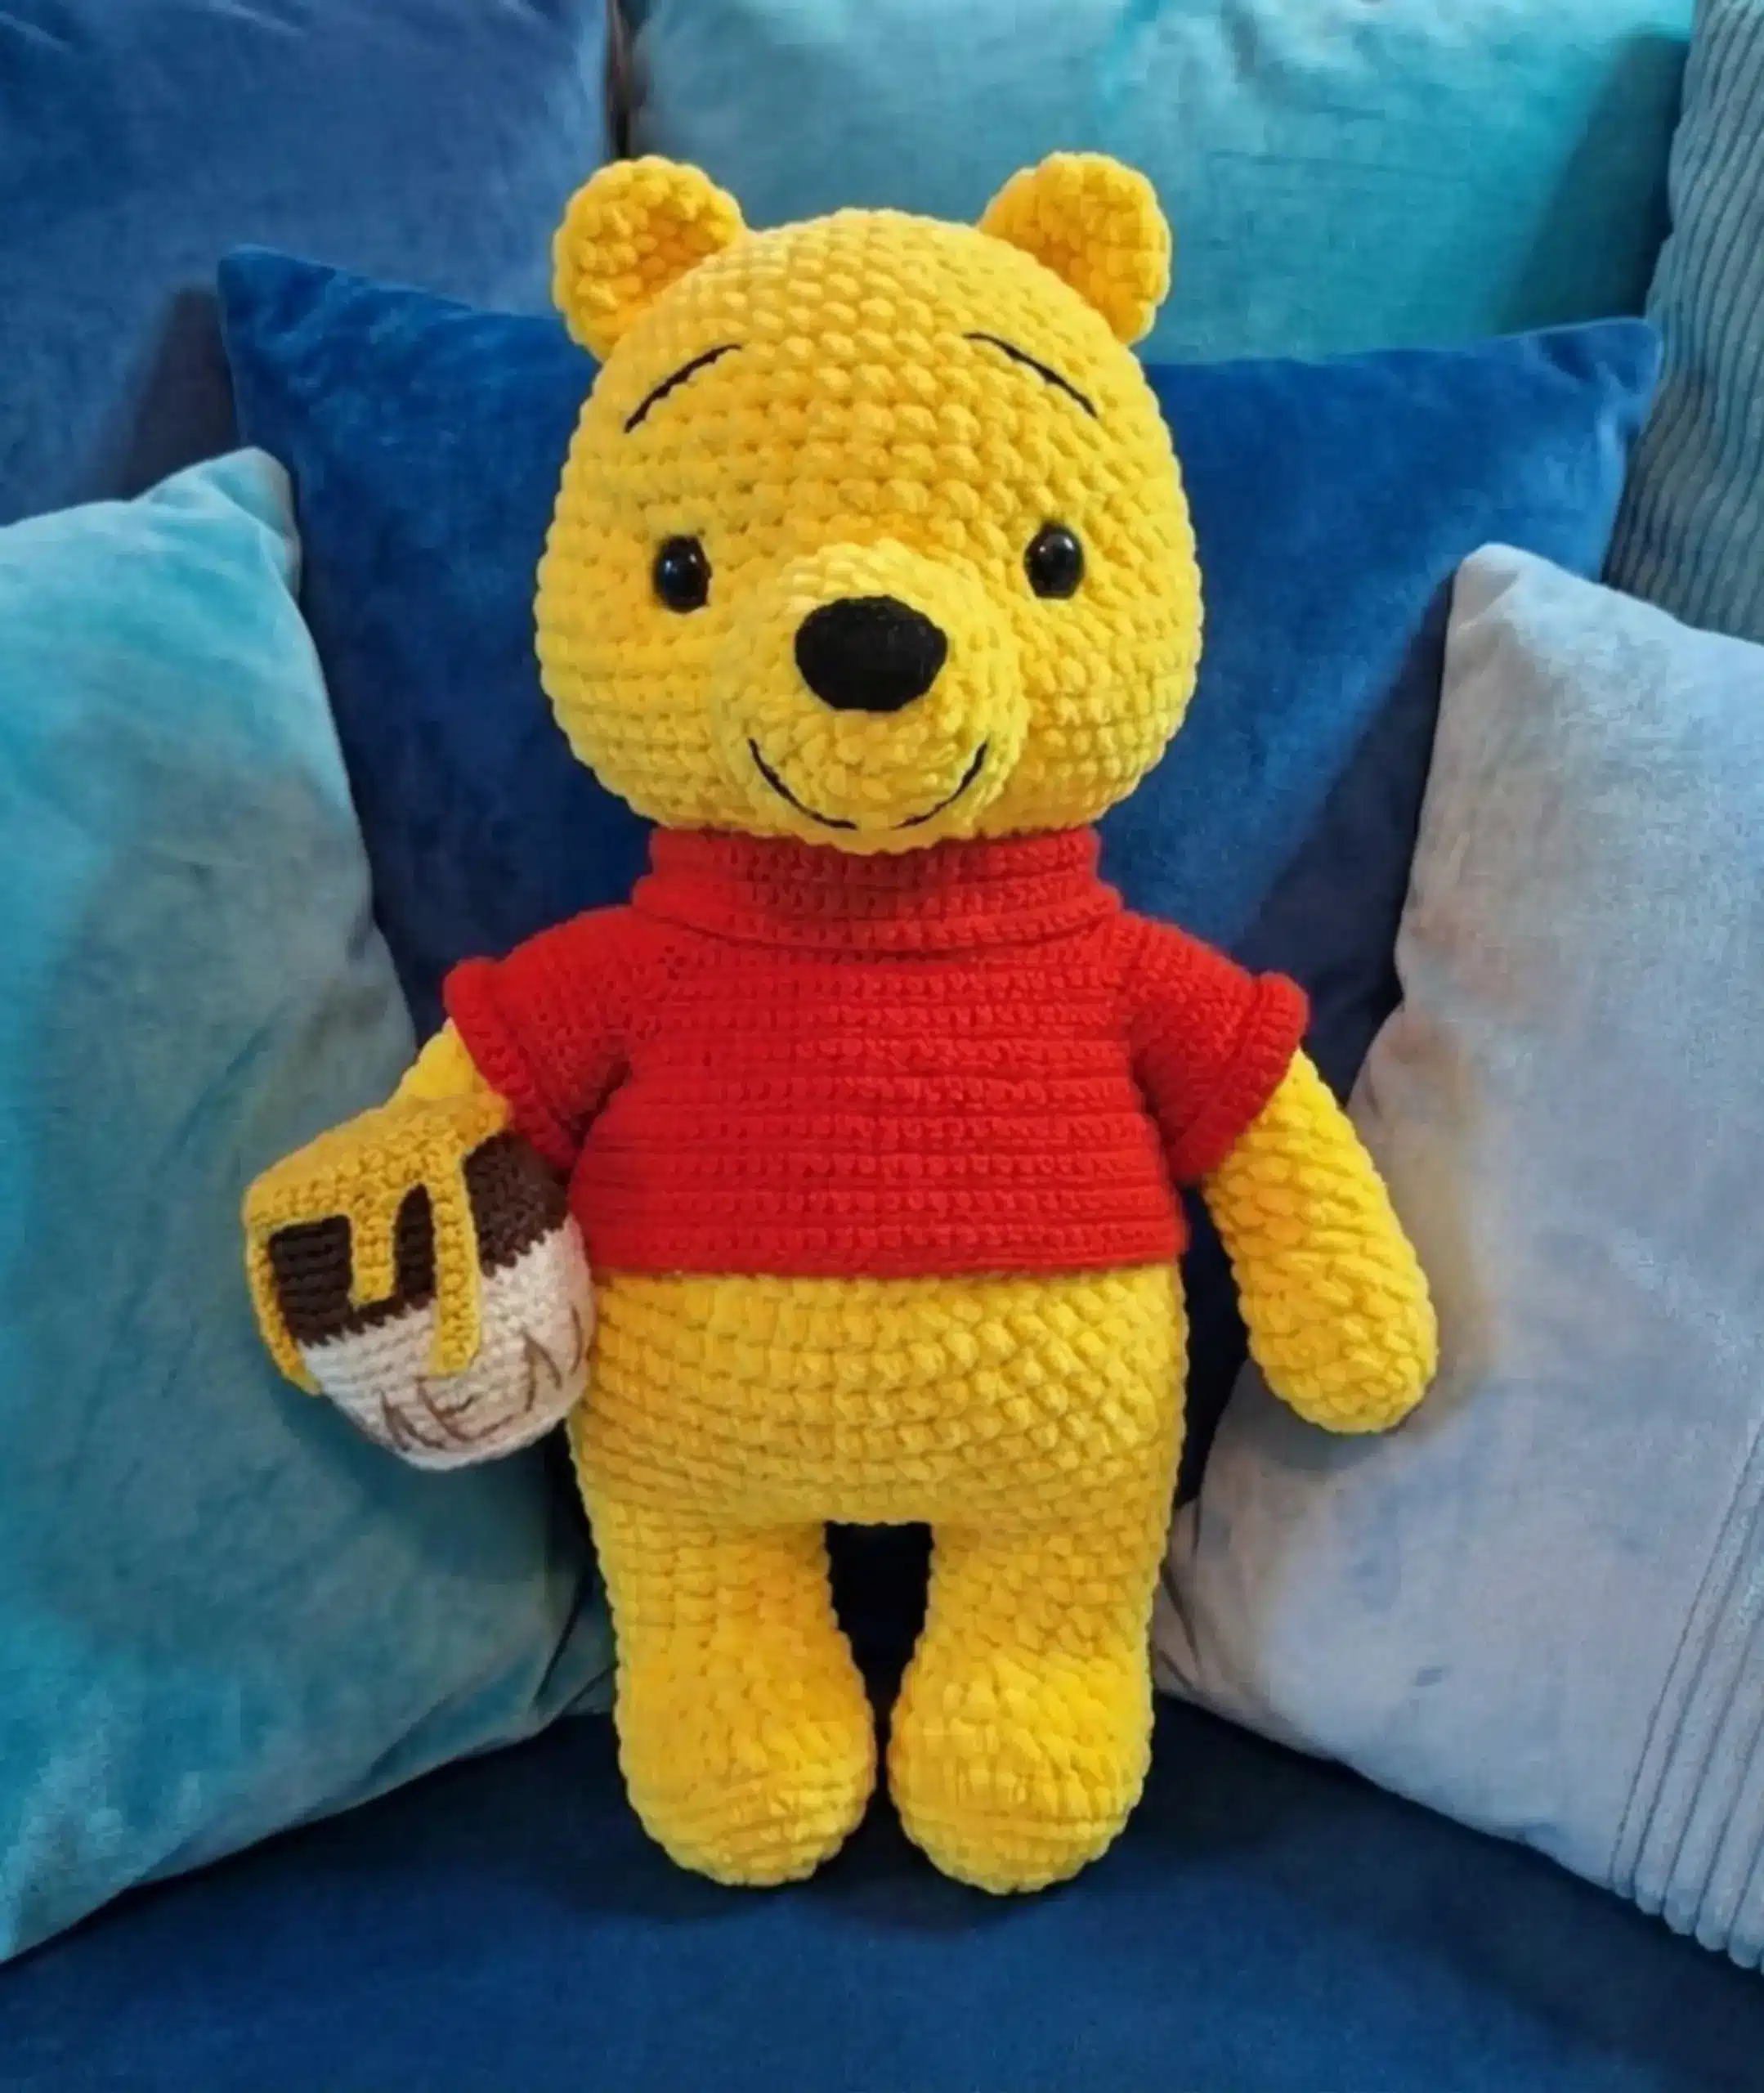
Critical Stuffing Note: The head should be square on top with nice plump cheeks. Use a long needle to distribute fiberfill to the lower sides for cheeks and push stuffing to the forehead corners for volume. This shaping step dramatically affects the final appearance—take your time here! Complete stuffing, then fasten off and break yarn.
Head Sculpting
Use a double strand of yellow YarnArt Jeans yarn for head sculpting.
Thread a long needle and insert at P1 on the bottom of the head parallel to the right eye between rounds 36 and 37, leaving a tail. Draw the needle out to the top of the eye at P2 (at half-eye level). Grab the stuffing firmly, insert the needle on the other side of the eye at P3, and draw out at P4. The distance between P1 and P4 should be two stitches.
Tighten firmly and tie a secure knot. Repeat the tightening through the same points on the second side. Fasten off and hide the tail inside the head. This creates the distinctive eye sockets and facial definition.
Muzzle
Crochet the muzzle with yellow plush yarn.
- Rnd 1: 6 sc into MR
- Rnd 2: (inc) * 6 (12)
- Rnd 3: (1 sc, inc) * 6 (18)
- Rnd 4: (2 sc, inc) * 6 (24)
- Rnd 5: 24 sc
Leave a long yarn tail for sewing. Pin the muzzle under the eyes and sew through each loop carefully. Stuff with fiberfill as you sew. Fasten off and break yarn.
Nose
Crochet the nose with black yarn and a 1.75mm crochet hook.
- Rnd 1: Chain 5 and start crocheting 3 sc, 3 sc in the last chain, continue on the other side of the chain foundation 3 sc, 3 sc in the last chain (creating an oval) (12)
- Rnd 2: 3 sc, (inc) * 3, 3 sc, (inc) * 3 (18)
Measure a yarn piece approximately 19.6 inches long—you’ll use this to sew the nose and embroider the smile and eyebrows. Pin the nose in the center, starting from the third round to the end of the muzzle. Sew through each loop carefully.
Muzzle Design Details
Using the same black thread, embroider the smile without tightening too firmly—you want a gentle, friendly curve. Apply fabric glue to the middle of the smile if needed to keep it in position.
Mark the eyebrow positions with pins first, ensuring they’re straight and at the same level. Embroider the eyebrows, then fasten the yarn at the base of the head or under the shoulder where it won’t be visible.
Ears (Make 2)
Crochet the ears with yellow plush yarn.
- Rnd 1: 6 sc into MR
- Rnd 2: (inc) * 6 (12)
- Rnd 3: (1 sc, inc) * 6 (18)
- Rnd 4: 18 sc
- Rnd 5: (1 sc, dec) * 6 (12)
Leave a long yarn tail for sewing. Pin the ears on the top of the head from the 3rd round to the top. Sew through each loop carefully. Fasten off and break yarn.
Tail
Crochet the tail with yellow plush yarn.
- Rnd 1: 6 sc into MR
- Rnd 2: (inc) * 6 (12)
- Rnd 3: (1 sc, inc) * 6 (18)
- Rnds 4-6: 18 sc (3 rounds)
- Rnd 7: (1 sc, dec) * 6 (12)
Leave a long tail for sewing. Pin the tail in the center on the back. Sew carefully through each loop. Stuff as you sew. Fasten off and break yarn.
T-Shirt Construction
Crochet the T-shirt with red yarn and a 1.75mm crochet hook. Work in back-and-forth rows. Chain 1 at the end of each row.
- Row 1: Chain 61, start crocheting in the second chain from hook: 60 sc
- Row 2: 10 sc, (3 sc in one stitch), 10 sc, (3 sc in one stitch), 16 sc, (3 sc in one stitch), 10 sc, (3 sc in one stitch), 10 sc (68)
- Row 3: 68 sc
- Row 4: 11 sc, (3 sc in one stitch), 12 sc, (3 sc in one stitch), 18 sc, (3 sc in one stitch), 12 sc, (3 sc in one stitch), 11 sc (76)
- Row 5: 76 sc
- Row 6: 12 sc, (3 sc in one stitch), 14 sc, (3 sc in one stitch), 20 sc, (3 sc in one stitch), 14 sc, (3 sc in one stitch), 12 sc (84)
- Row 7: 84 sc
- Row 8: 13 sc, (3 sc in one stitch), 16 sc, (3 sc in one stitch), 22 sc, (3 sc in one stitch), 16 sc, (3 sc in one stitch), 13 sc (92)
Creating Sleeve Openings:
- Row 9: Crochet 14 sc, chain 14, count 19 stitches from the previous row and attach the chain, 26 sc (the distance between sleeves on the front), chain 14, count 19 stitches from the previous row and attach the chain, complete with 14 sc to the end of the row (82)
- Row 10: 82 sc
- Row 11: 1 sc, (7 sc, inc) * 10, 1 sc (92)
- Rows 12-21: 92 sc (10 rows)
Crochet around the entire T-shirt with sc.
Collar Construction:
- Row 1: Crochet 60 sc to the collar, chain 1
- Rows 2-9: 60 sc, chain 1 at the end of each row (8 rows)
Fasten off and break yarn.

Sleeves (Make 2)
Attach yarn to the armhole and crochet 35 sc around (ensure exactly 35 sc, as 1 sc could be increased at joint points). Work 11 rounds total. Fasten off and break yarn. Turn the sleeves inside out.
Crochet the second sleeve identically. Put the T-shirt on the bear and sew both sides with thin red thread for a seamless finish.
Honey Pot
Start crocheting with beige yarn and a 1.75mm crochet hook.
- Rnd 1: 6 sc into MR
- Rnd 2: (inc) * 6 (12)
- Rnd 3: (1 sc, inc) * 6 (18)
- Rnd 4: (2 sc, inc) * 6 (24)
- Rnd 5: (3 sc, inc) * 6 (30)
- Rnd 6: 30 sc through back loops only
- Rnd 7: (4 sc, inc) * 6 (36)
- Rnd 8: 36 sc
- Rnd 9: (5 sc, inc) * 6 (42)
- Rnds 10-14: 42 sc (5 rounds)
- Rnd 15: Change to brown yarn and crochet 42 sc
- Rnds 16-20: 42 sc (5 rounds)
- Rnd 21: (5 sc, dec) * 6 (36)
- Rnd 22: 36 sc
- Rnd 23: (4 sc, dec) * 6 (30)
Fasten off and break yarn. Stuff the pot with fiberfill.
Honey Topping
Crochet with yellow yarn and a 1.75mm crochet hook.
- Rnd 1: 6 sc into MR
- Rnd 2: (inc) * 6 (12)
- Rnd 3: (1 sc, inc) * 6 (18)
- Rnd 4: (2 sc, inc) * 6 (24)
- Rnd 5: (3 sc, inc) * 6 (30)
Attach the honey to the pot without breaking the working yarn and crochet 30 sc around, holding the bottom of the pot facing toward you.
Honey Drip Fringes
Create decorative honey drips with the same yellow yarn:
First fringe: Chain 8, crochet 7 sc to the chain, join with 1 sc in the same stitch where you started
Second fringe: Crochet 9 sc, chain 10, crochet 9 sc to the chain, join in the same stitch where you started
Third fringe: Crochet 2 sc, chain 5, crochet 4 sc to the chain, join in the same stitch where you started
Fourth fringe: Crochet 6 sc, chain 7, crochet 6 sc to the chain, join in the same stitch where you started
Fifth fringe: Crochet 1 sc, chain 8, crochet 7 sc to the chain, join in the same stitch where you started
Complete with 7 sc to the end of the round (30). Leave a long tail for sewing to the pot. You can use a sewing needle to attach the five fringes with short, secure stitches.
Finishing the Honey Pot
Attach beige yarn to the bottom of the pot in the 6th round and crochet 30 sc through the front loops only. Fasten off and break yarn.
Embroider “Hunny” with a double strand of brown thread. Split the yarn into two threads and sew carefully with a sewing needle for neat lettering. Fasten off and break yarn.
Frequently Asked Questions
You’ll need two different hook sizes: a 3.75mm hook for the plush yarn when making the bear’s body, and a 1.75mm hook for the cotton yarn used in the T-shirt, honey pot, and facial details. Using the correct hook sizes ensures proper tension and professional-looking results.
Yes, you can substitute yarns, but make sure to maintain consistent weight and tension. If you choose different plush yarn, adjust your hook size accordingly to ensure tight stitches that don’t show stuffing. The finished size will vary depending on your yarn choice—thicker yarn creates a larger bear, while thinner yarn makes a smaller one.
The square head shape comes from careful stuffing and the sculpting technique. Push fiberfill to the corners of the forehead and distribute it to the sides for plump cheeks. The head sculpting with double yarn between rounds 36 and 37 creates the eye sockets and helps define the facial structure. Take your time with this step—it significantly impacts the bear’s character.
This pattern is best suited for intermediate crocheters who are comfortable with basic stitches, working in rounds, and joining pieces. You should be familiar with single crochet, increases, decreases, and magic ring techniques. The pattern includes detailed instructions but assumes you know fundamental crochet methods. If you’re adventurous and have completed a few simpler projects, you can certainly attempt it with patience.
Bringing Your Bear to Life
Congratulations on completing your adorable Pooh bear! This charming creation represents hours of dedicated crafting and attention to detail. The combination of soft plush yarn, carefully sculpted features, and the delightful honey pot accessory makes this bear a truly special handmade treasure.
Whether you’ve made this bear for a child’s room, as a thoughtful gift, or to add to your collection of handcrafted toys, you’ve created something that will be cherished for years to come. The techniques you’ve learned—from head sculpting to garment construction—will serve you well in future amigurumi projects.
Share your finished bear with fellow crafters in crochet communities, and don’t hesitate to experiment with color variations or additional accessories. Each bear you create will have its own unique personality and charm. Happy crocheting, and may your bear bring as much joy to others as it brought you in the making!
Remember it later!
Planning to try this soon? Pin it for a quick find later!