Table of contents
- What Makes This Pattern Special
- Materials You’ll Need
- Understanding the Special Techniques
- Creating the Fins (Make 4)
- Crafting the Head
- Building the Shell and Body
- The Assembly Process
- Finishing Touches
- Why This Pattern Works for Beginners
- Customization Ideas
- Troubleshooting Common Issues
- The Joy of Handmade Gifts
- Final Thoughts
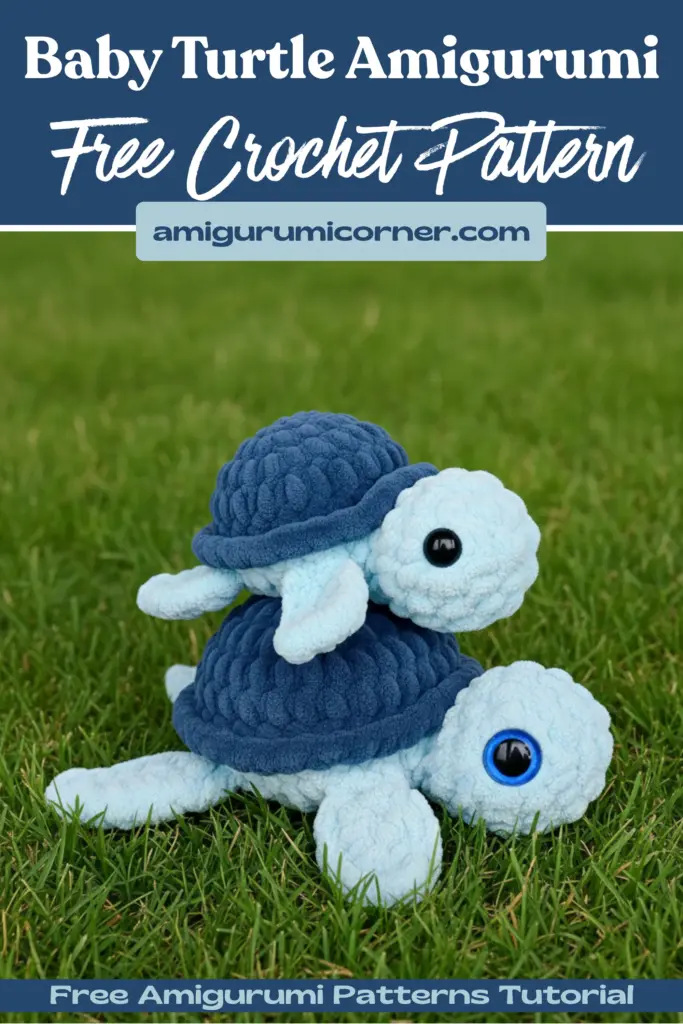
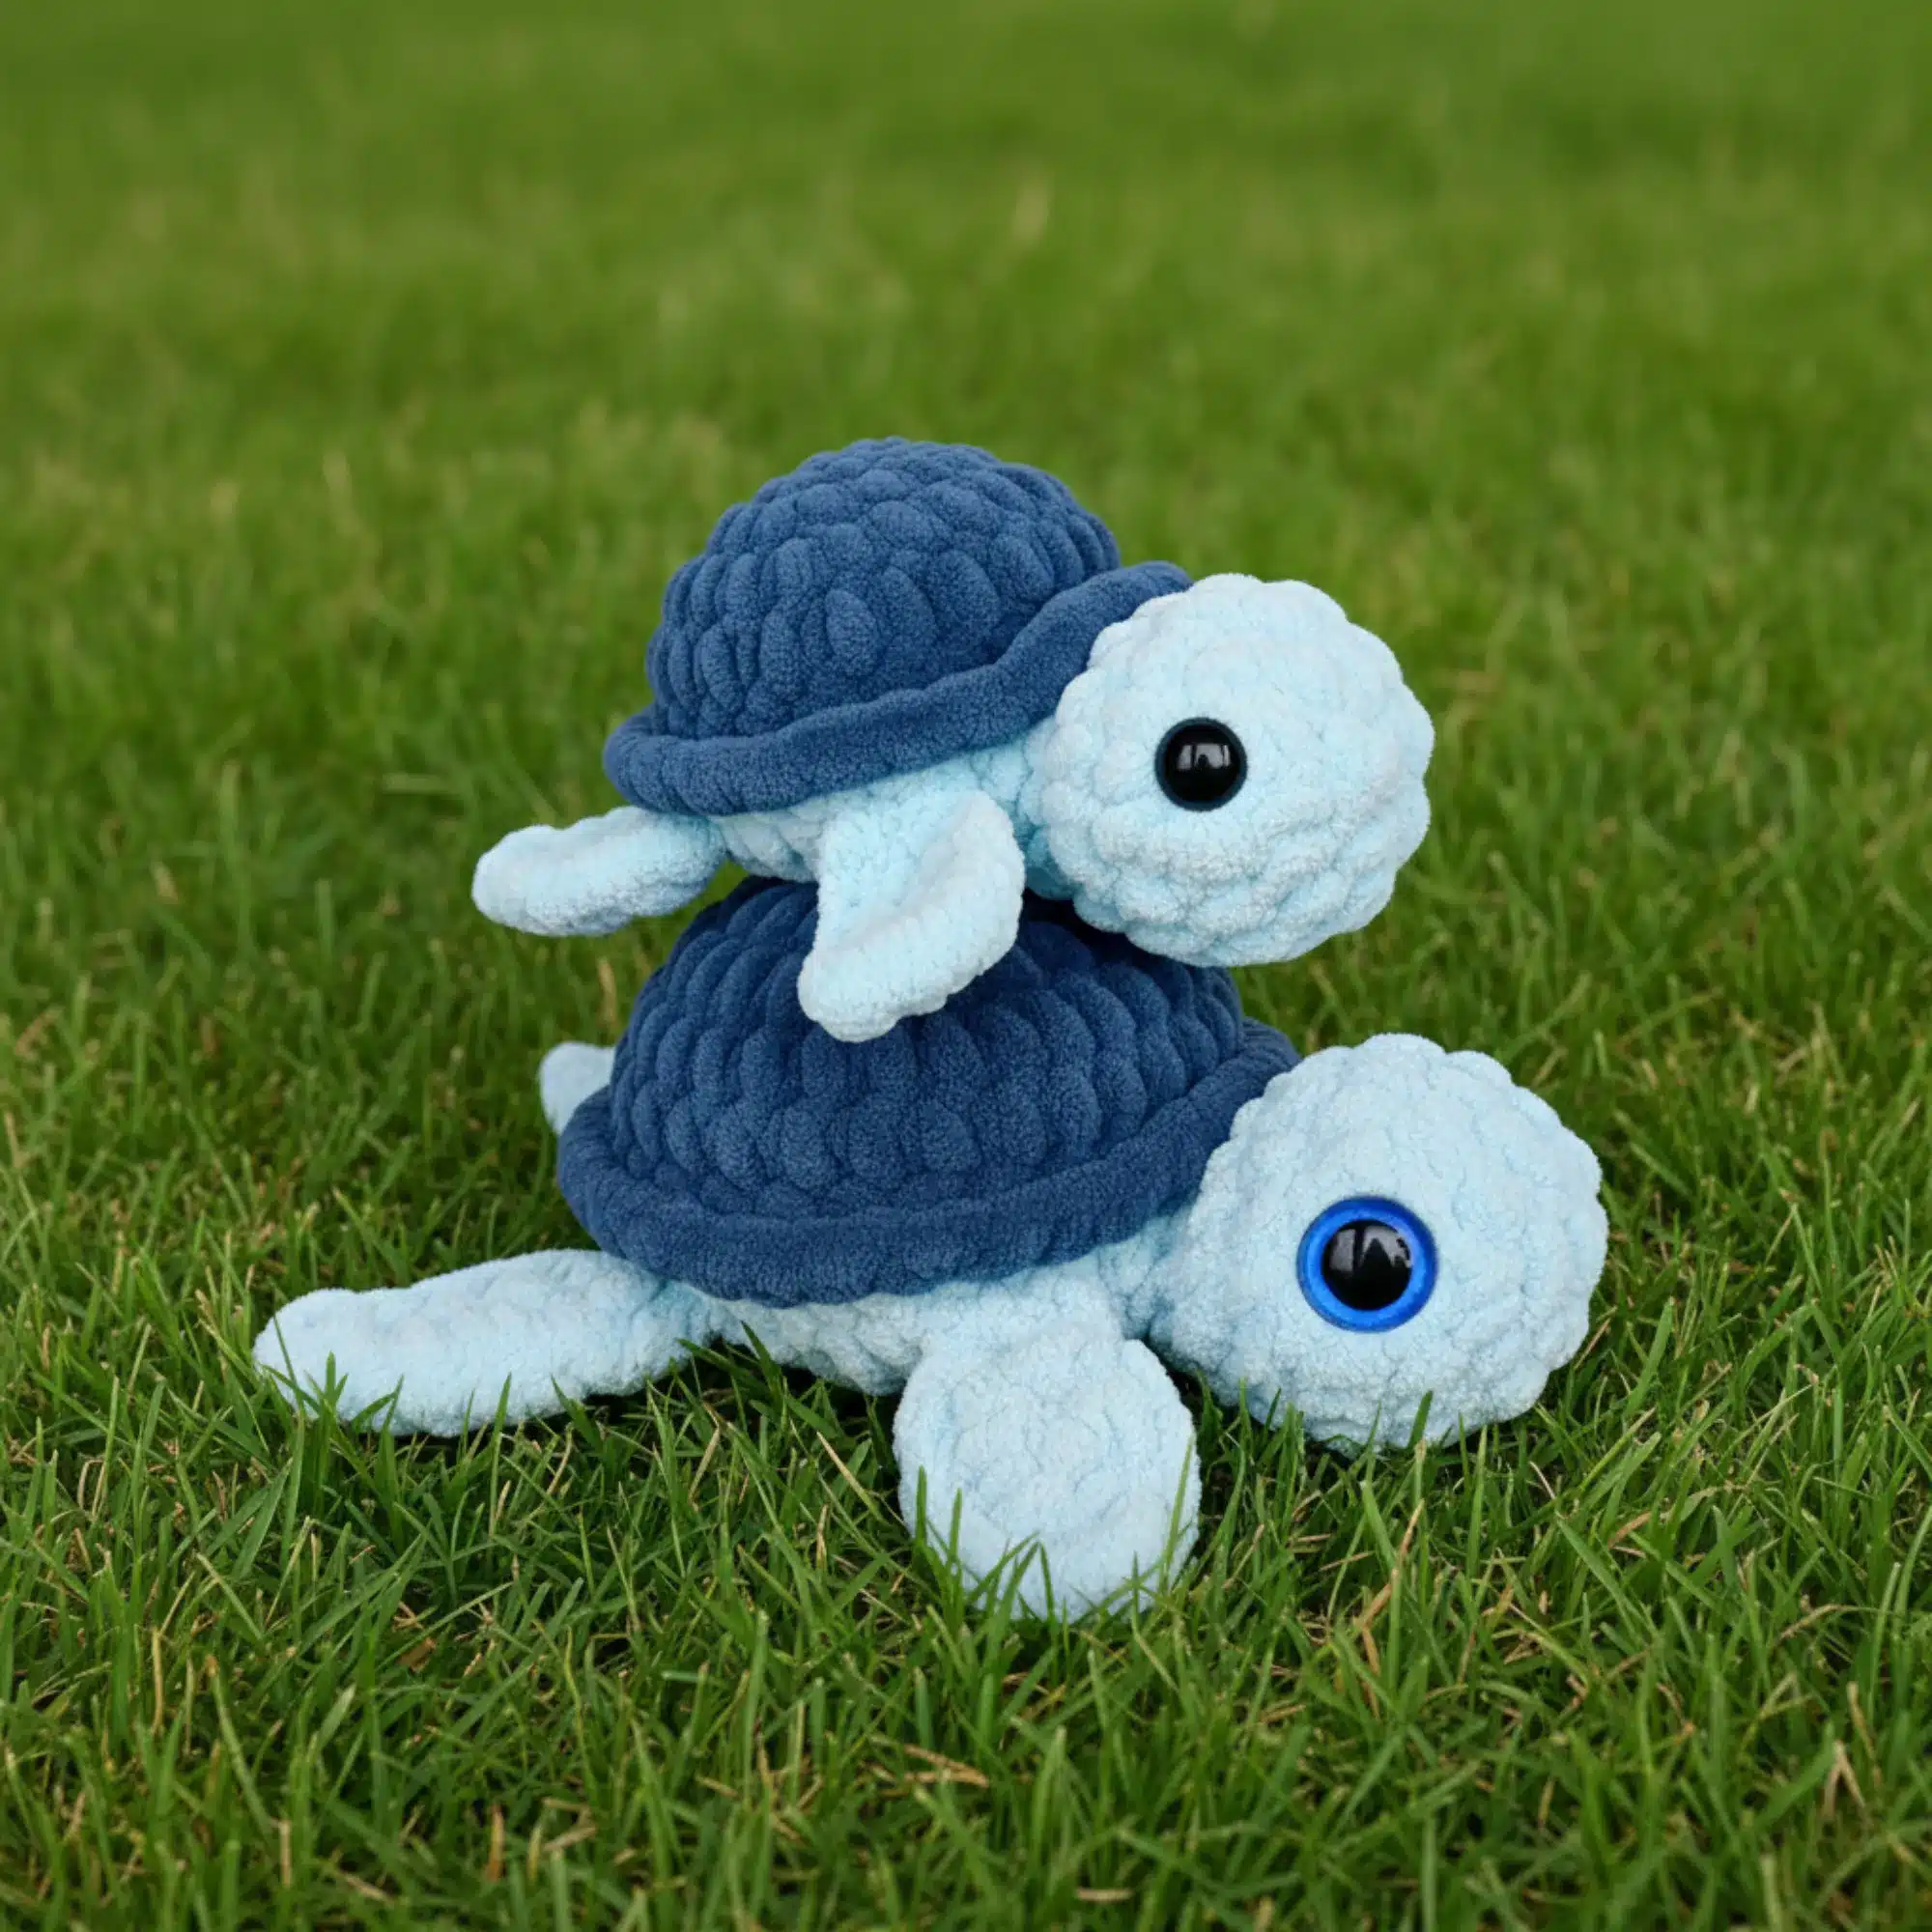
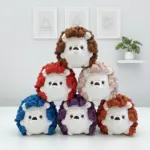
If you’ve been searching for a quick and satisfying crochet project, this charming baby turtle amigurumi is exactly what you need. Designed to be completed in just one hour with no sewing required, this plush toy is perfect for beginners looking to expand their skills or experienced crocheters wanting a fast, cute project.
What Makes This Pattern Special
Unlike traditional amigurumi patterns that require tedious sewing of separate pieces, this innovative design attaches all components—fins and head—as you crochet the shell and body. The pattern uses soft blanket yarn, creating a cuddly 6-inch turtle that’s perfect for gifting or adding to your handmade collection.
Materials You’ll Need
Before starting your turtle, gather these essential supplies:
- 12g shell color blanket yarn (for the turtle’s back)
- 30g body color blanket yarn (for the head, fins, and belly)
- 4.5mm crochet hook (adjust size based on your tension and yarn brand)
- Tapestry needle
- Polyfil or preferred stuffing
- 12mm safety eyes
- Stitch marker
Understanding the Special Techniques
Invisible Decrease (INV DEC)
This technique creates a seamless decrease:
- Insert your hook into the front loop of the first stitch
- Insert hook into the front loop of the second stitch
- Pull up a loop
- Yarn over and pull through both loops to complete the stitch
Color Change Method
To change colors smoothly:
- On the last single crochet before switching, insert your hook into the stitch
- Pull up a loop
- Yarn over with the new color
- Pull through both loops to complete the stitch
Creating the Fins (Make 4)
Start with your body color yarn:
Round 1: Create a magic circle and single crochet 5 stitches. Do not join the round.
Round 2: Chain 1 and turn. Single crochet increase in each stitch across, then fasten off. You should have 10 stitches.
Important tail weaving tip: For two fins, weave the middle tail from the magic circle to the end where the finished tail sits. For the other two fins, weave both ends to the opposite side. These ends will be tucked inside the turtle during attachment.

Remember it later!
Planning to try this soon? Pin it for a quick find later!
Crafting the Head
Using your body color:
- Round 1: Single crochet 8 stitches into a magic circle (note: this differs from the typical 6-stitch start due to the plush yarn).
- Round 2: Single crochet increase in each stitch around for a total of 16 stitches.
- Rounds 3-5: Single crochet in each stitch around, maintaining 16 stitches per round.
- Attaching the eyes: Position your 12mm safety eyes between rounds 2 and 3, spacing them approximately 5-6 stitches apart.
- Round 6: Invisible decrease in each stitch around, reducing to 8 stitches.
- Round 7: Single crochet in each stitch around, maintaining 8 stitches.
Fasten off and weave the end inside. Lightly stuff the head before attaching it to the body.
Building the Shell and Body
Begin with your shell color:
- Round 1: Single crochet 8 stitches into a magic circle.
- Round 2: Single crochet increase in each stitch around for 16 total stitches.
- Round 3: Single crochet in the first stitch, single crochet increase in the next. Repeat around for 24 stitches.
- Rounds 4-5: Single crochet in each stitch around, maintaining 24 stitches.
- Round 6: Working in the front loop only, single crochet in each stitch around. This creates the distinctive ridge where the shell meets the body. Change to your body color before beginning the next round.
The Assembly Process
Attaching the Neck (Round 7)
Working in the back loop only:
- Single crochet in the first 10 stitches
- Attach the upper half of the turtle’s neck using slip stitches through the top 4 stitches
- Single crochet in the remaining 10 stitches
Pro tip: Flatten the neck opening so it’s level with the eyes before attaching. The top four stitches should position the eyes level and facing upward.
Attaching Fins and Head (Round 8)
This round requires careful attention to placement:
- Single crochet in the next 2 stitches
- Attach the first fin (right back) through the next 2 stitches
- Single crochet in the next 3 stitches
- Attach the second fin (left back) through the next 2 stitches
- Single crochet in the next stitch
- Attach the head through the bottom 4 stitches using single crochet
- Single crochet in the next stitch
- Attach the third fin (right front) through the next 2 stitches
- Single crochet in the next 3 stitches
- Attach the fourth fin (left front) through the next 2 stitches
- Finish with the last 2 single crochet stitches
Stuffing checkpoint: Begin stuffing at this point. Ensure the head and neck are well-stuffed before filling the body. Continue adding stuffing as you close up the turtle.
Fin Attachment Tips
- The flat edge of each fin should face the turtle’s tail
- The rounded edge faces forward
- Single crochets should sit underneath the fin
- When attaching, go through the fin first, then through the body
- On the right side: attach through the second fin stitch, then the first body stitch
- On the left side: attach through the first fin stitch, then the second body stitch
Finishing Touches
- Round 9: Single crochet in the first stitch, invisible decrease in the next. Repeat around for 16 total stitches.
- Round 10: Invisible decrease in each stitch around for 8 final stitches.
Sew the remaining hole closed, fasten off, and weave in all ends securely.


Why This Pattern Works for Beginners
This baby turtle pattern offers several advantages for crocheters at any level:
- No sewing required: All pieces attach as you work, eliminating the most intimidating part of amigurumi for many crafters
- Quick completion: One hour from start to finish means instant gratification
- Simple shaping: The basic increases and decreases create adorable proportions without complex techniques
- Forgiving yarn: Plush blanket yarn hides minor tension inconsistencies
- Versatile sizing: Adjust your hook size to create larger or smaller turtles
Customization Ideas
Once you’ve mastered the basic pattern, try these creative variations:
- Use variegated yarn for a multicolored shell
- Create a family of turtles in different sizes
- Add embroidered details like a smile or shell pattern
- Experiment with textured yarns for unique effects
- Try ocean-inspired color combinations
Troubleshooting Common Issues
Fins not sitting flat? Check that you’ve woven the tails to the correct side and that you’re crocheting underneath the fin, not on top of it.
Head tilting at an odd angle? Ensure you flattened the neck opening level with the eyes before attaching and that you’ve stuffed the neck firmly.
Uneven shell shape? Verify your stitch count at each round and maintain consistent tension throughout.
The Joy of Handmade Gifts
This adorable baby turtle makes a perfect gift for:
- Baby showers and newborns
- Children who love ocean animals
- Friends who appreciate handmade items
- Yourself, as a stress-relief project
- Craft fair inventory
Final Thoughts
This one-hour baby turtle pattern proves that creating beautiful amigurumi doesn’t have to be time-consuming or complicated. The innovative no-sew design removes a major barrier for many crocheters, while the quick completion time means you can make multiple turtles in an afternoon. Whether you’re crafting for pleasure, gifts, or even small-scale selling, this pattern delivers adorable results every single time.
Grab your hook and yarn, and in just sixty minutes, you’ll have created a charming plush companion that’s sure to bring smiles. The combination of soft blanket yarn, simple techniques, and clever construction makes this pattern a must-try for anyone interested in amigurumi. Happy crocheting!

Remember it later!
Planning to try this soon? Pin it for a quick find later!