Table of contents
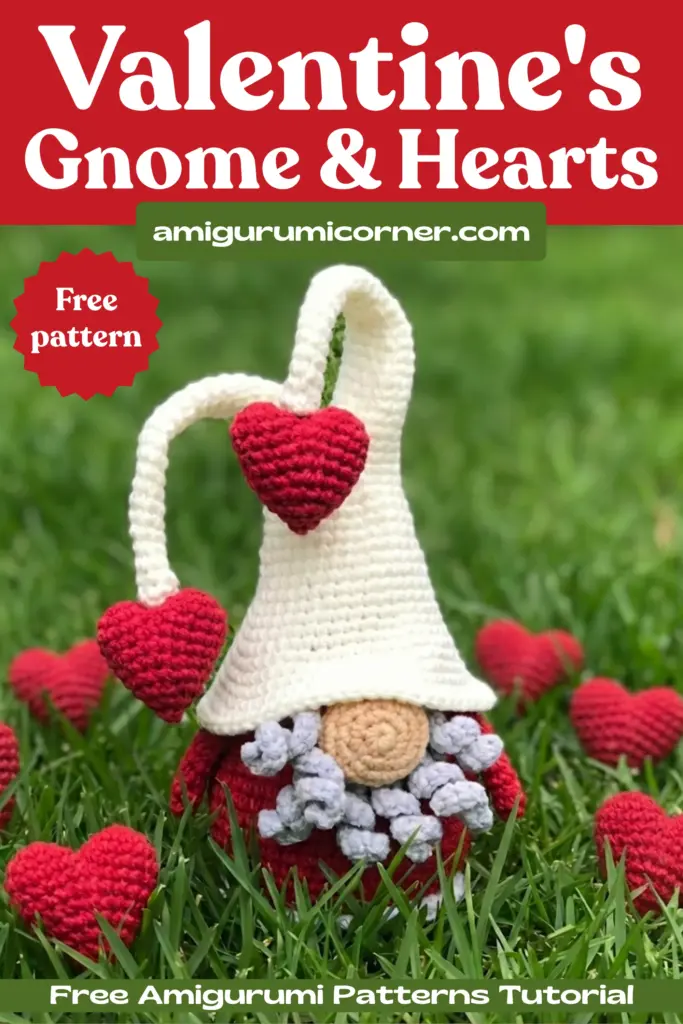
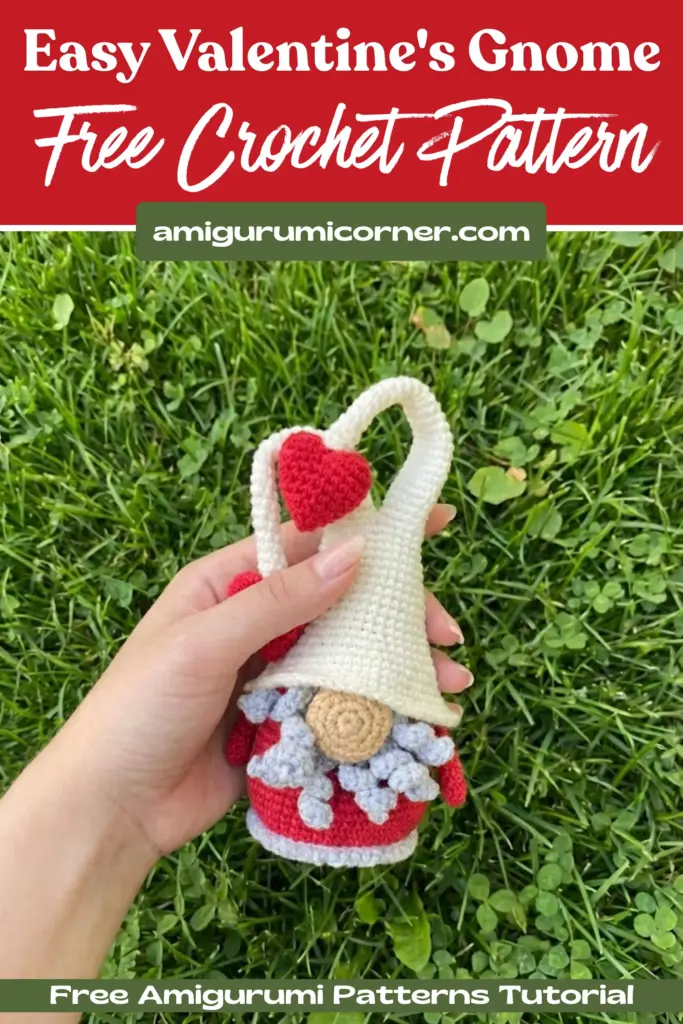
Welcome to the enchanting world of amigurumi! If you’re searching for the perfect handmade Valentine’s Day gift, or simply want to add a touch of whimsy to your crochet collection, then this adorable Valentine’s Gnome with Hearts pattern is exactly what you need. Furthermore, this charming little character features a distinctive long beard, a cozy pointed hat adorned with tiny hearts, and an ideal blend of rustic charm and romantic flair.
Whether you’re an experienced amigurumi crocheter or, alternatively, looking to expand your skills, this pattern will gently guide you through creating a delightful gnome that stands approximately 22 cm (9 inches) tall. Additionally, the combination of soft cotton yarn in traditional Valentine’s colors not only creates a timeless piece but also ensures it can be treasured year after year. In other words, you’ll be creating a gift that lasts. Finally, let’s dive into creating this adorable bearded companion!
Designer: natty.toys
Materials You’ll Need
First, to create your Valentine’s Gnome, gather the following supplies:
Yarn:
- Cotton yarn – Yarn Art Jeans (160m/50g or 174 yds/50g) or similar weight yarn in:
- Color A: Red for body, arms, and hearts
- Color B: Light beige for hat
- Color C: Beige for nose
- Color D: Gray for beard
- Fiber filler for stuffing
Tools:
- 2 mm crochet hook
- Large needle for sewing parts
- Scissors
- Knitting markers (to mark the beginning of rounds)
")
Remember it later!
Planning to try this soon? Pin it for a quick find later!
Understanding the Pattern Abbreviations
Before we begin, first familiarize yourself with these common crochet terms:
- R – rounds
- MR – magic (amigurumi) ring
- sc – single crochet
- inc – increase, 2 sc in one stitch
- dec – decrease, 2 sc together
- sl st – slip stitch
- ch – chain
Crochet Instructions
Head and Body
Using yarn color A and 2 mm crochet hook, create the head and body as one continuous piece. Place a marker at the beginning of each round.
- R 1: MR (6)
- R 2: (inc) * 6 (12)
- R 3: (inc) * 12 (24)
- R 4: (3sc, inc) * 6 (30)
- R 5: (4sc, inc) * 6 (36)
- R 6: (5sc, inc) * 6 (42)
- R 7: (6sc, inc) * 6 (48)
- R 8-19: 48 sc (12 rounds)
- R 20: (6sc, dec) * 6 (42)
- R 21-22: (42) (2 rounds)
- R 23: (5sc, dec) * 6 (36)
- R 24-25: (36) (2 rounds)
- R 26: (4sc, dec) * 6 (30)
- R 27-28: (30) (2 rounds)
Begin to stuff the toy with fiber filler.
- R 29: (3sc, dec) * 6 (24)
- R 30-31: (24) (2 rounds)
- R 32: (2sc, dec) * 6 (18)
- R 33-34: (18) (2 rounds)
- R 35: (1sc, dec) * 6 (12)
- R 36: (dec) * 6 (6)
First, stuff the toy completely. Next, draw the yarn through the remaining 6 loops and pull tightly until, finally, the hole is closed. Then, cut and securely fasten the thread.
Nose
Use yarn color C and 2mm crochet hook.
- R 1: MR (6)
- R 2: inc * 6 (12)
- R 3: (1 sc, inc) * 6 (18)
- R 4: (2 sc, inc) * 6 (24)
- R 5: (3 sc, inc) * 6 (30)
- R 6: dec * 15 (15)
Leave a long tail for sewing and cut the thread. Stuff the piece with fiber filler.
Arms (Make 2)
Use yarn color A and 2 mm crochet hook.
- R 1: MR (6)
- R 2-9: (6) (8 rounds)
Leave a long thread for sewing and cut.
Beard
Use yarn color D and 2 mm hook.
Create a chain of 15 loops. Continue in the second loop from the hook: inc, 1sc, and continue this pattern to the end of the chain. Don’t cut the thread. Repeat this entire process 8 times to create the full bushy beard effect. Leave thread for sewing and cut.

The Bottom of the Body
Use yarn color D and 2 mm hook. Begin to crochet between rounds 8-9 of the lower torso.
- R 1: sc to the end of round
- R 2: Decorate with a pattern (crochet in the opposite direction) — first, ch, then insert the hook between the stitches of the previous round, after that, draw out the loop and pull it through the loop on the hook. Finally, repeat this process to the end of the round.
Hat
Use yarn color B and 2 mm crochet hook. Place a marker at the beginning of each round.
- R 1: MR (6)
- R 2-6: 6 sc (5 rounds)
- R 7: inc, 5 sc (7)
- R 8-10: 7 sc (3 rounds)
- R 11: inc, 6 sc (8)
- R 12-13: 8 sc (2 rounds)
- R 14: inc, 7 sc (9)
- R 15: 9 sc
- R 16: inc, 8 sc (10)
- R 17: 10 sc
- R 18: inc, 9 sc (11)
- R 19: 11 sc
- R 20: inc, 10 sc (12)
- R 21: 12 sc
- R 22: inc, 11 sc (13)
- R 23: 13 sc
- R 24: inc, 12 sc (14)
- R 25: 14 sc
Cut the thread. Crochet two identical pieces.
Don’t cut the thread on the second piece; continue working with both details together.
- R 1: Connect both details, sc in the next st by detail 1, 11sc, skip 2 st on detail 1 and 2 st on detail 2, 12 sc (24)
- R 2-3: 24 sc (2 rounds)
With a sewing needle and the tail of detail, sew the hole between details in the middle.
- R 4: (5 sc, inc)*4 (28)
- R 5: (6 sc, inc)*4 (32)
- R 6: 32 sc
- R 7: 8 sc, inc, 15 sc, inc, 7 sc (34)
- R 8: 9 sc, inc, 16 sc, inc, 7 sc (36)
- R 9-10: 36 sc (2 rounds)
- R 11: 10 sc, inc, 17 sc, inc, 7 sc (38)
- R 12: 38 sc
- R 13: 11 sc, inc, 18 sc, inc, 7 sc (40)
- R 14: 12 sc, (inc, 9 sc)* twice, inc, 7 sc (43)
- R 15: 13 sc, (inc, 10 sc)* twice, inc, 7 sc (46)
- R 16: inc, (4 sc, inc)*9 (56)
- R 17: 56 sc
- R 18: (6sc, inc)*7 (63)
- R 19-21: 63 sc (3 rounds)
Cut and secure the thread.
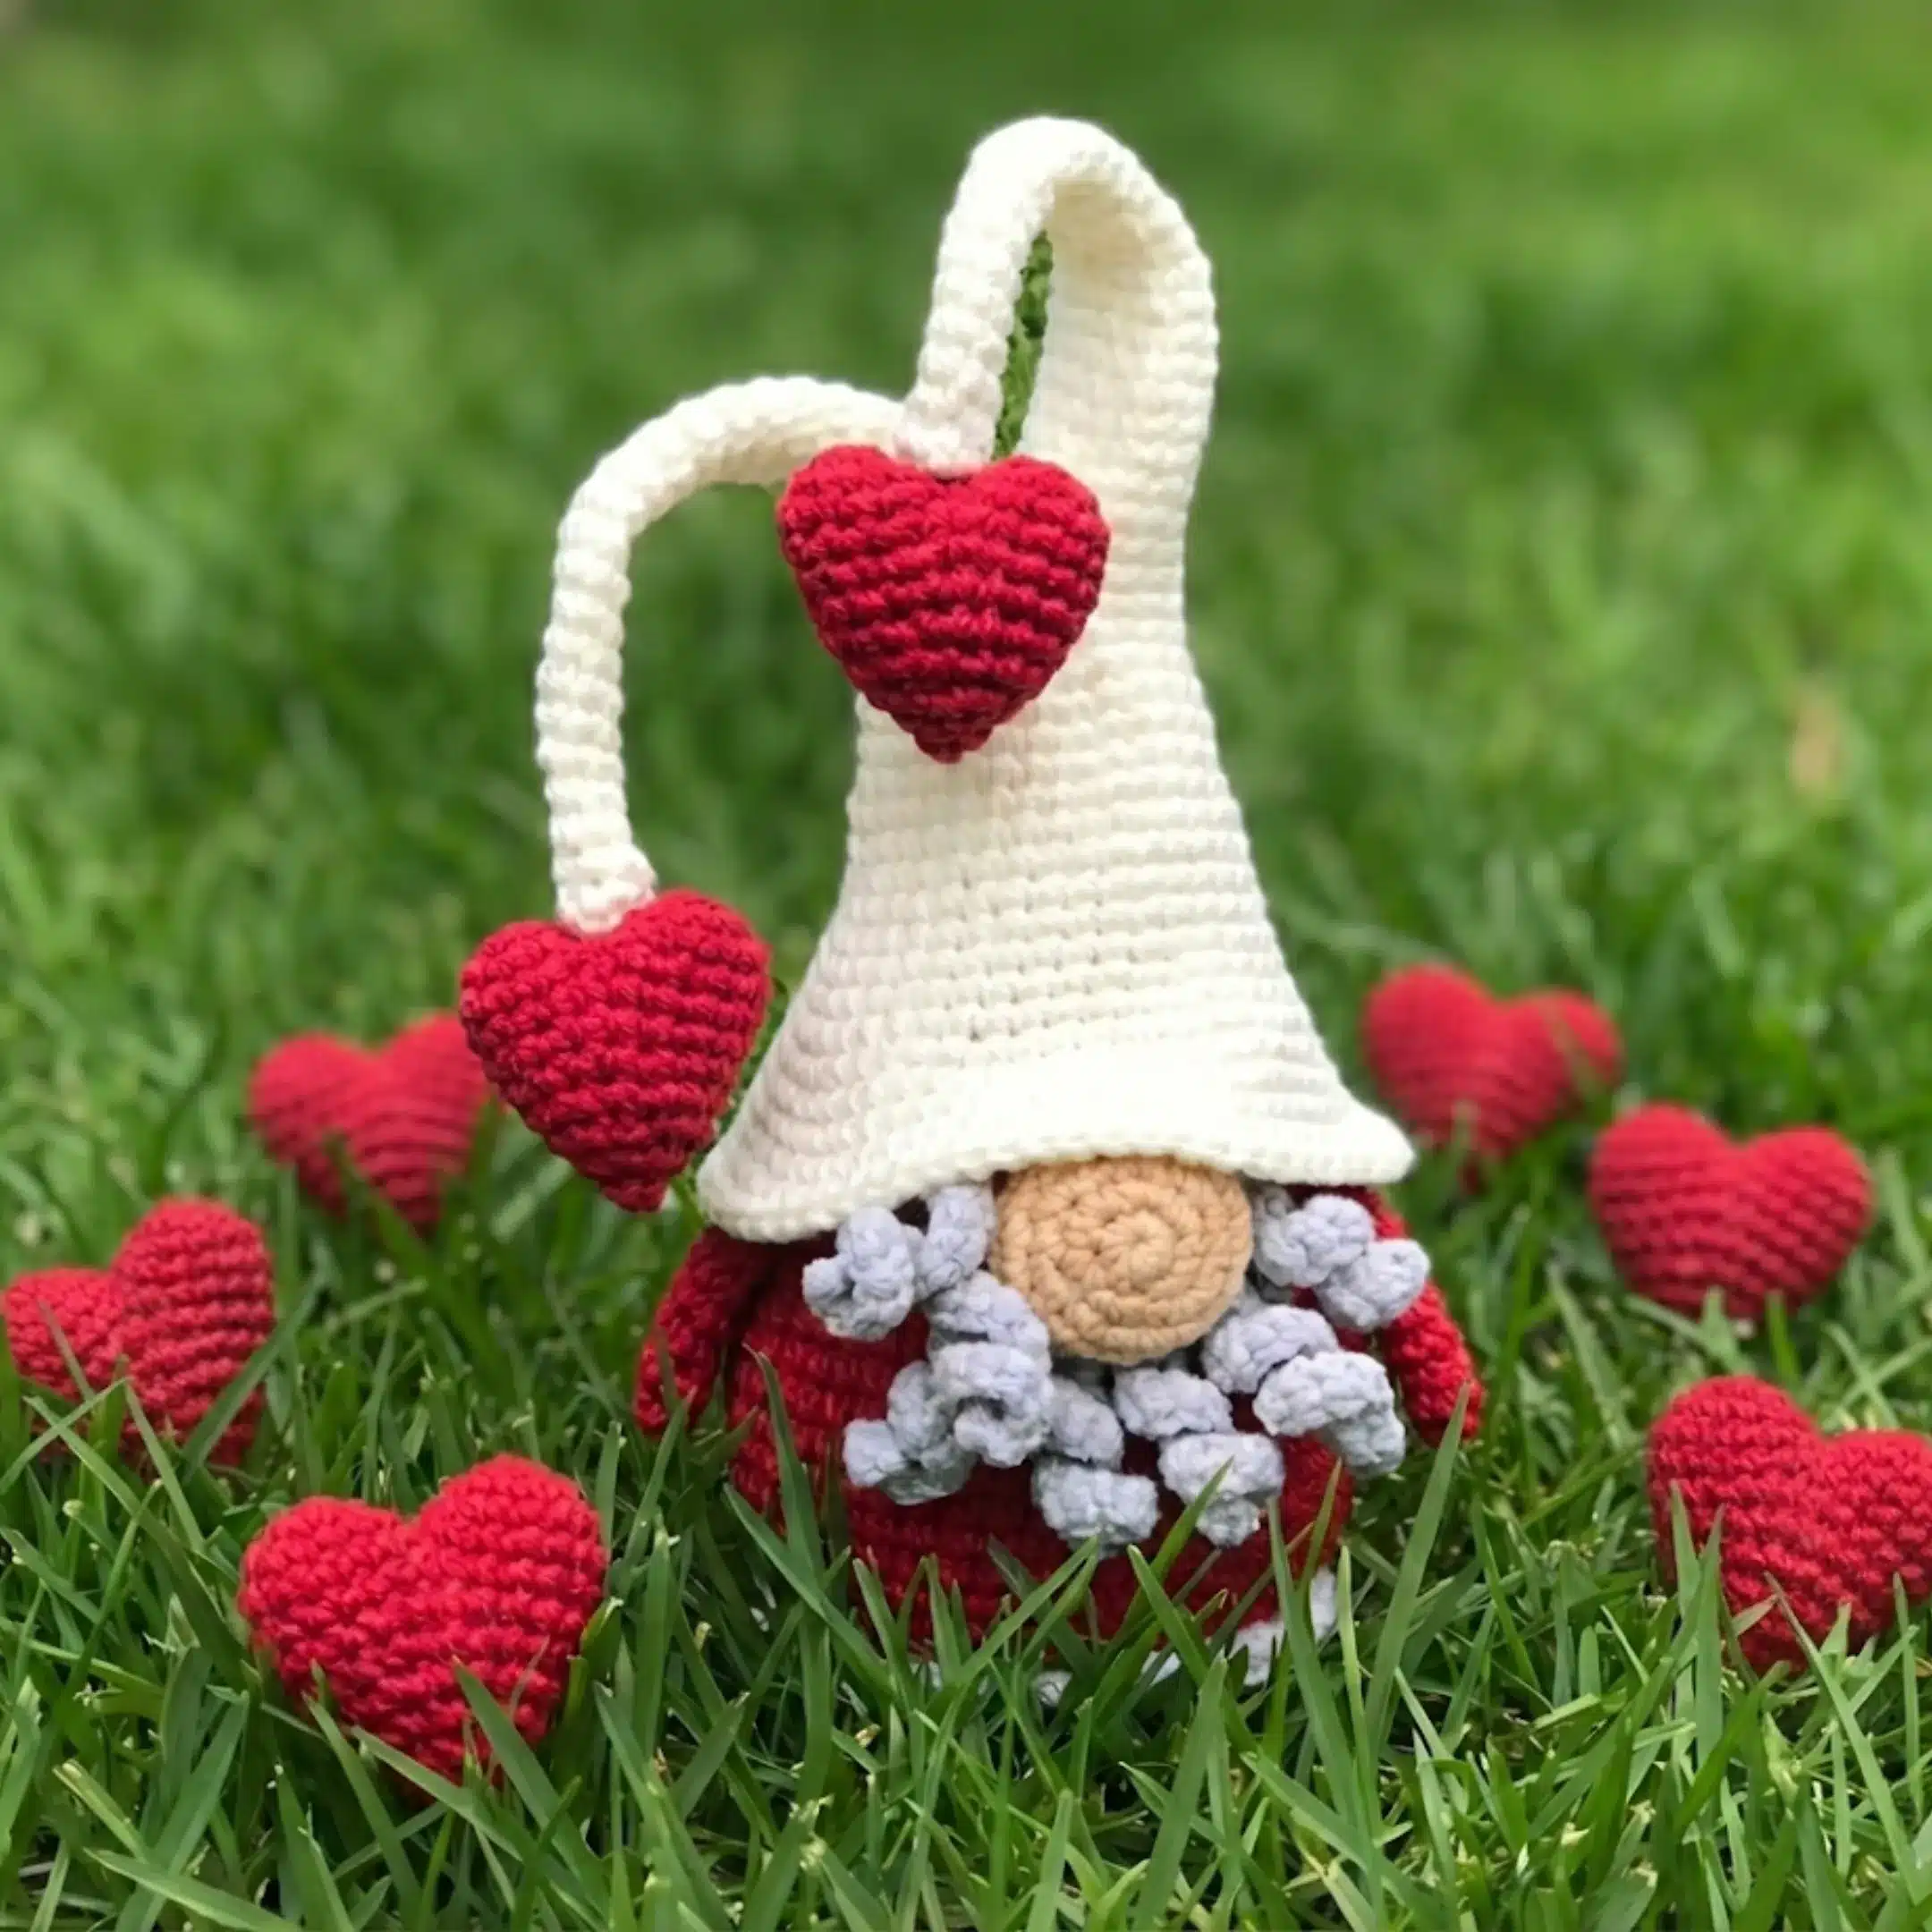
Hearts (Make 2)
Use yarn color A and 2 mm crochet hook. Place a marker at the beginning of each round.
- R 1: MR (6)
- R 2: inc*6 (12)
- R 3: 12 sc
Cut the thread, leaving a tail approximately 15 cm (6 inches). Crochet two identical pieces.
Don’t cut the thread on the second piece; continue working with both details together.
- R 1: Connect both details, sc in the next st by detail 1, 9sc, skip 2 st on detail 1 and 2 st on detail 2, 10 sc (20)
- R 2: 20 sc (20)
With a sewing needle and the tail of detail, sew the hole between details in the middle.
- R 3: 4 sc, dec, 8 sc, dec, 4 sc (18)
- R 4: 4 sc, dec, 6 sc, dec, 4 sc (16)
- R 5: 3 sc, dec, 6 sc, dec, 3 sc (14)
- R 6: (dec, sc)* 4, dec (9)
- R 7: sc, 4 dec (5)
Cut and secure the thread. Crochet two hearts and sew them to the hat.

Assembly Instructions
Follow these steps to bring your Valentine’s Gnome to life:
Attach the nose: Sew the nose between rounds 11-16, positioning it just above the gray line of the body.
Add the beard: Carefully sew the beard around the nose, creating a full, fluffy appearance that frames the face.
Attach the arms: Position and sew the arms on both sides of the body at an appropriate height.
Place the hat: Gently dress your gnome in the completed hat, adjusting for the perfect fit.
Your Valentine’s Gnome is now complete!
Frequently Asked Questions
This pattern is designed for DK weight cotton yarn like Yarn Art Jeans. Using the recommended yarn weight with a 2mm hook will give you a gnome approximately 22 cm (9 inches) tall. If you substitute with a different yarn weight, your finished gnome will be proportionally larger or smaller.
Absolutely! While the pattern calls for light beige, you can customize the hat in any color you prefer. Red and white stripes, pink, or even traditional Christmas colors would work beautifully. Just maintain the same stitch counts for proper fit.
Use a 2mm hook as specified to create tight, even stitches. Work with consistent tension throughout, and avoid overstuffing the body and nose. If stuffing still shows through, try using a slightly smaller hook or working tighter stitches.
This pattern requires knowledge of basic amigurumi techniques including magic ring, increases, decreases, and joining pieces. If you’re comfortable with these fundamentals, you should be able to complete this project. The pattern provides detailed round-by-round instructions to guide you through each step.
Conclusion
Creating this charming Valentine’s Gnome is not only a wonderful way to celebrate the season of love but also an excellent opportunity to practice your amigurumi skills. Moreover, the combination of a whimsical design, romantic heart accents, and that adorable fluffy beard makes this pattern a true delight to crochet. Whether you’re making one for yourself, for example, gifting it to someone special, or even creating several to sell, ultimately, this gnome is sure to bring smiles wherever it goes.
The beauty of handmade items lies in the love and care woven into every stitch. Take your time, enjoy the process, and don’t be afraid to add your own creative touches. Happy crocheting, and may your Valentine’s Gnome bring joy to all who see it!


Remember it later!
Planning to try this soon? Pin it for a quick find later!