Table of contents
- What You’ll Need to Get Started
- Mastering the Fundamentals
- Essential Tips for Success
- Understanding Your Pattern
- Building Your Cat: Step-by-Step Overview
- Design Variations
- Finishing Touches
- Learning Resources
- Why Amigurumi Cats Make Perfect Projects
- Common Questions Addressed
- Taking Your Project Further
- Final Thoughts
If you’ve been searching for the perfect crochet project that combines cuteness with achievable techniques, look no further than amigurumi cats. These charming miniature felines have captured the hearts of crafters worldwide, and with the right guidance, you can create your own adorable companion in just a few hours.
What You’ll Need to Get Started
Before diving into your crochet journey, gathering the right materials is essential for success. Here’s what you’ll need:
Essential Materials and Tools
Yarn Selection:
- Super bulky weight yarn (120m/100gr recommended)
- Popular options include soft, plush-style yarns perfect for huggable toys
- Choose colors based on your preferred cat design: solid, bicolor, or tricolor
Tools and Accessories:
- 4mm crochet hook for the main body
- 7mm toy safety eyes for that perfect wide-eyed expression
- Yarn needle for finishing touches
- Fiberfill stuffing for a cuddly result
- Stitch markers to keep track of your progress
- Sharp scissors for clean cuts
- Powder blush for adorable rosy cheeks

Mastering the Fundamentals
Understanding Basic Stitches
Success in amigurumi starts with mastering fundamental techniques. The core stitches you’ll use include:
- Chain stitch (ch): The foundation of most crochet work
- Single crochet (sc): Your primary stitch for dense, sturdy fabric
- Double crochet (dc): Used for texture variations
- Slip stitch (sl st): Perfect for invisible joins
- Bobble stitch: Creates dimensional details for facial features
The Importance of Tension
Maintaining consistent tension throughout your project is crucial. Your stitches should be tight enough to prevent stuffing from showing through, yet loose enough to work comfortably. Avoid gripping your hook and yarn too tightly, as this leads to hand fatigue and uneven stitches.
Essential Tips for Success
Count Your Stitches Regularly
One of the most common pitfalls in amigurumi is losing track of stitch counts. Use stitch markers at the beginning of each round to maintain accuracy.
Master the Invisible Decrease
This technique creates smoother, more professional-looking decreases that blend seamlessly into your work.
Read Patterns Thoroughly
Before starting, read through the entire pattern to understand the construction process and identify any techniques you may need to practice.
Embrace Mistakes
Don’t fear “frogging” (unraveling your work). It’s a natural part of learning and leads to better results in the long run.

Understanding Your Pattern
Abbreviation Guide
Familiarize yourself with these common crochet abbreviations:
- MR: Magic ring
- st(s): Stitch(es)
- inc: Increase (2 single crochet stitches into the same stitch)
- dec: Decrease (crochet together 2 single crochet stitches)
- bo4: Bobble stitch (4 double crochets in the same stitch)
- BLO: Back loop only
- FLO: Front loop only
- rnd(s): Round(s)
Project Specifications
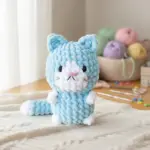
Your finished amigurumi cat will measure approximately 10cm (3.9 inches) tall, making it perfect as a desk companion, gift, or addition to your handmade collection.
Building Your Cat: Step-by-Step Overview
Creating the Tail
Start with a magic ring and work in spiral rounds. The tail begins narrow and maintains a consistent width throughout. Color changes (if creating a bicolor or tricolor design) add visual interest and personality to your creation.
Constructing the Head and Body
The head and body are worked as one continuous piece, starting from the top of the head. This seamless construction method eliminates the need for attaching separate pieces and creates a sturdy structure.
Key Features:
- Bobble stitches create dimensional cheek details
- Safety eyes are positioned between specific rounds for proper facial proportions
- The tail is joined to the body during construction for a secure attachment
- Strategic decreases shape the body naturally
Adding the Ears
The ears are worked directly onto the head using a simple technique that creates perfectly positioned triangular shapes. The placement on rounds 2, 3, and 4 ensures proper proportions and that signature cat-like appearance.

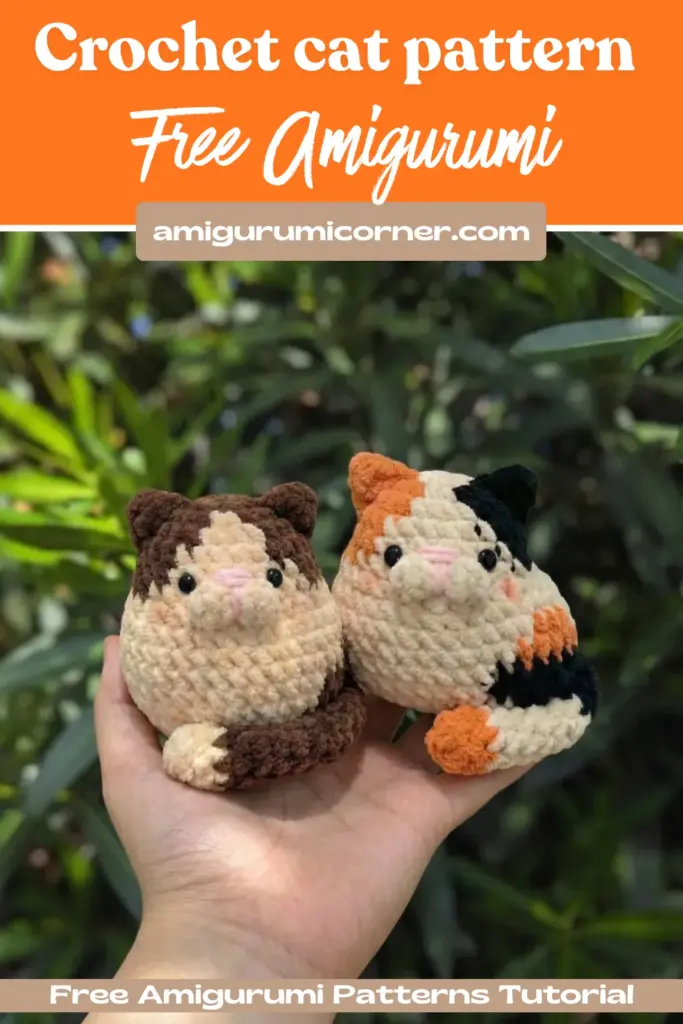
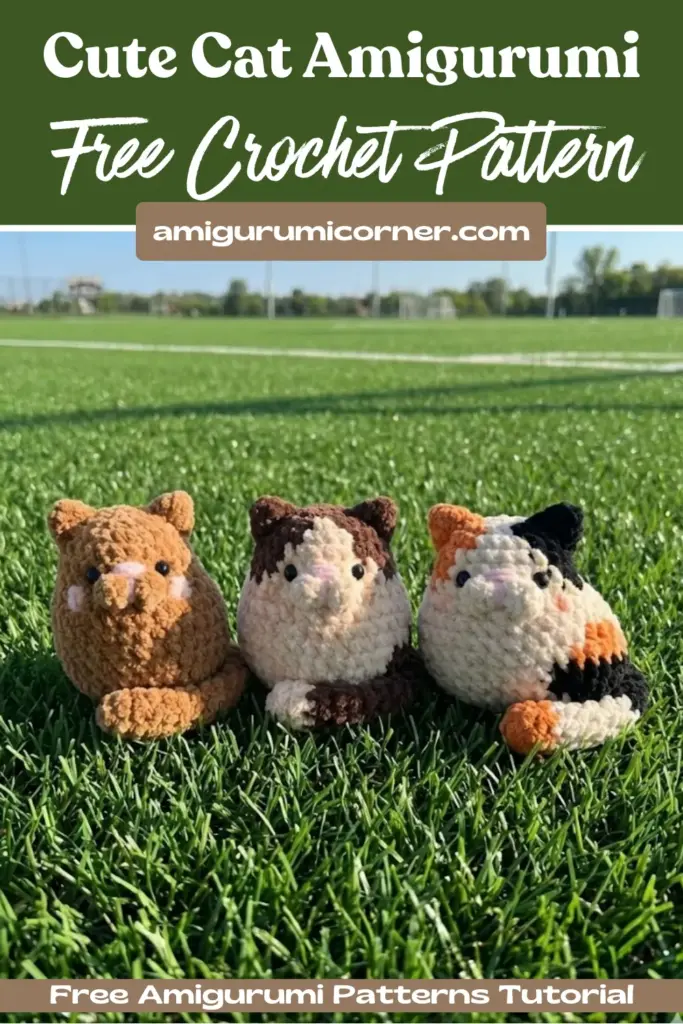
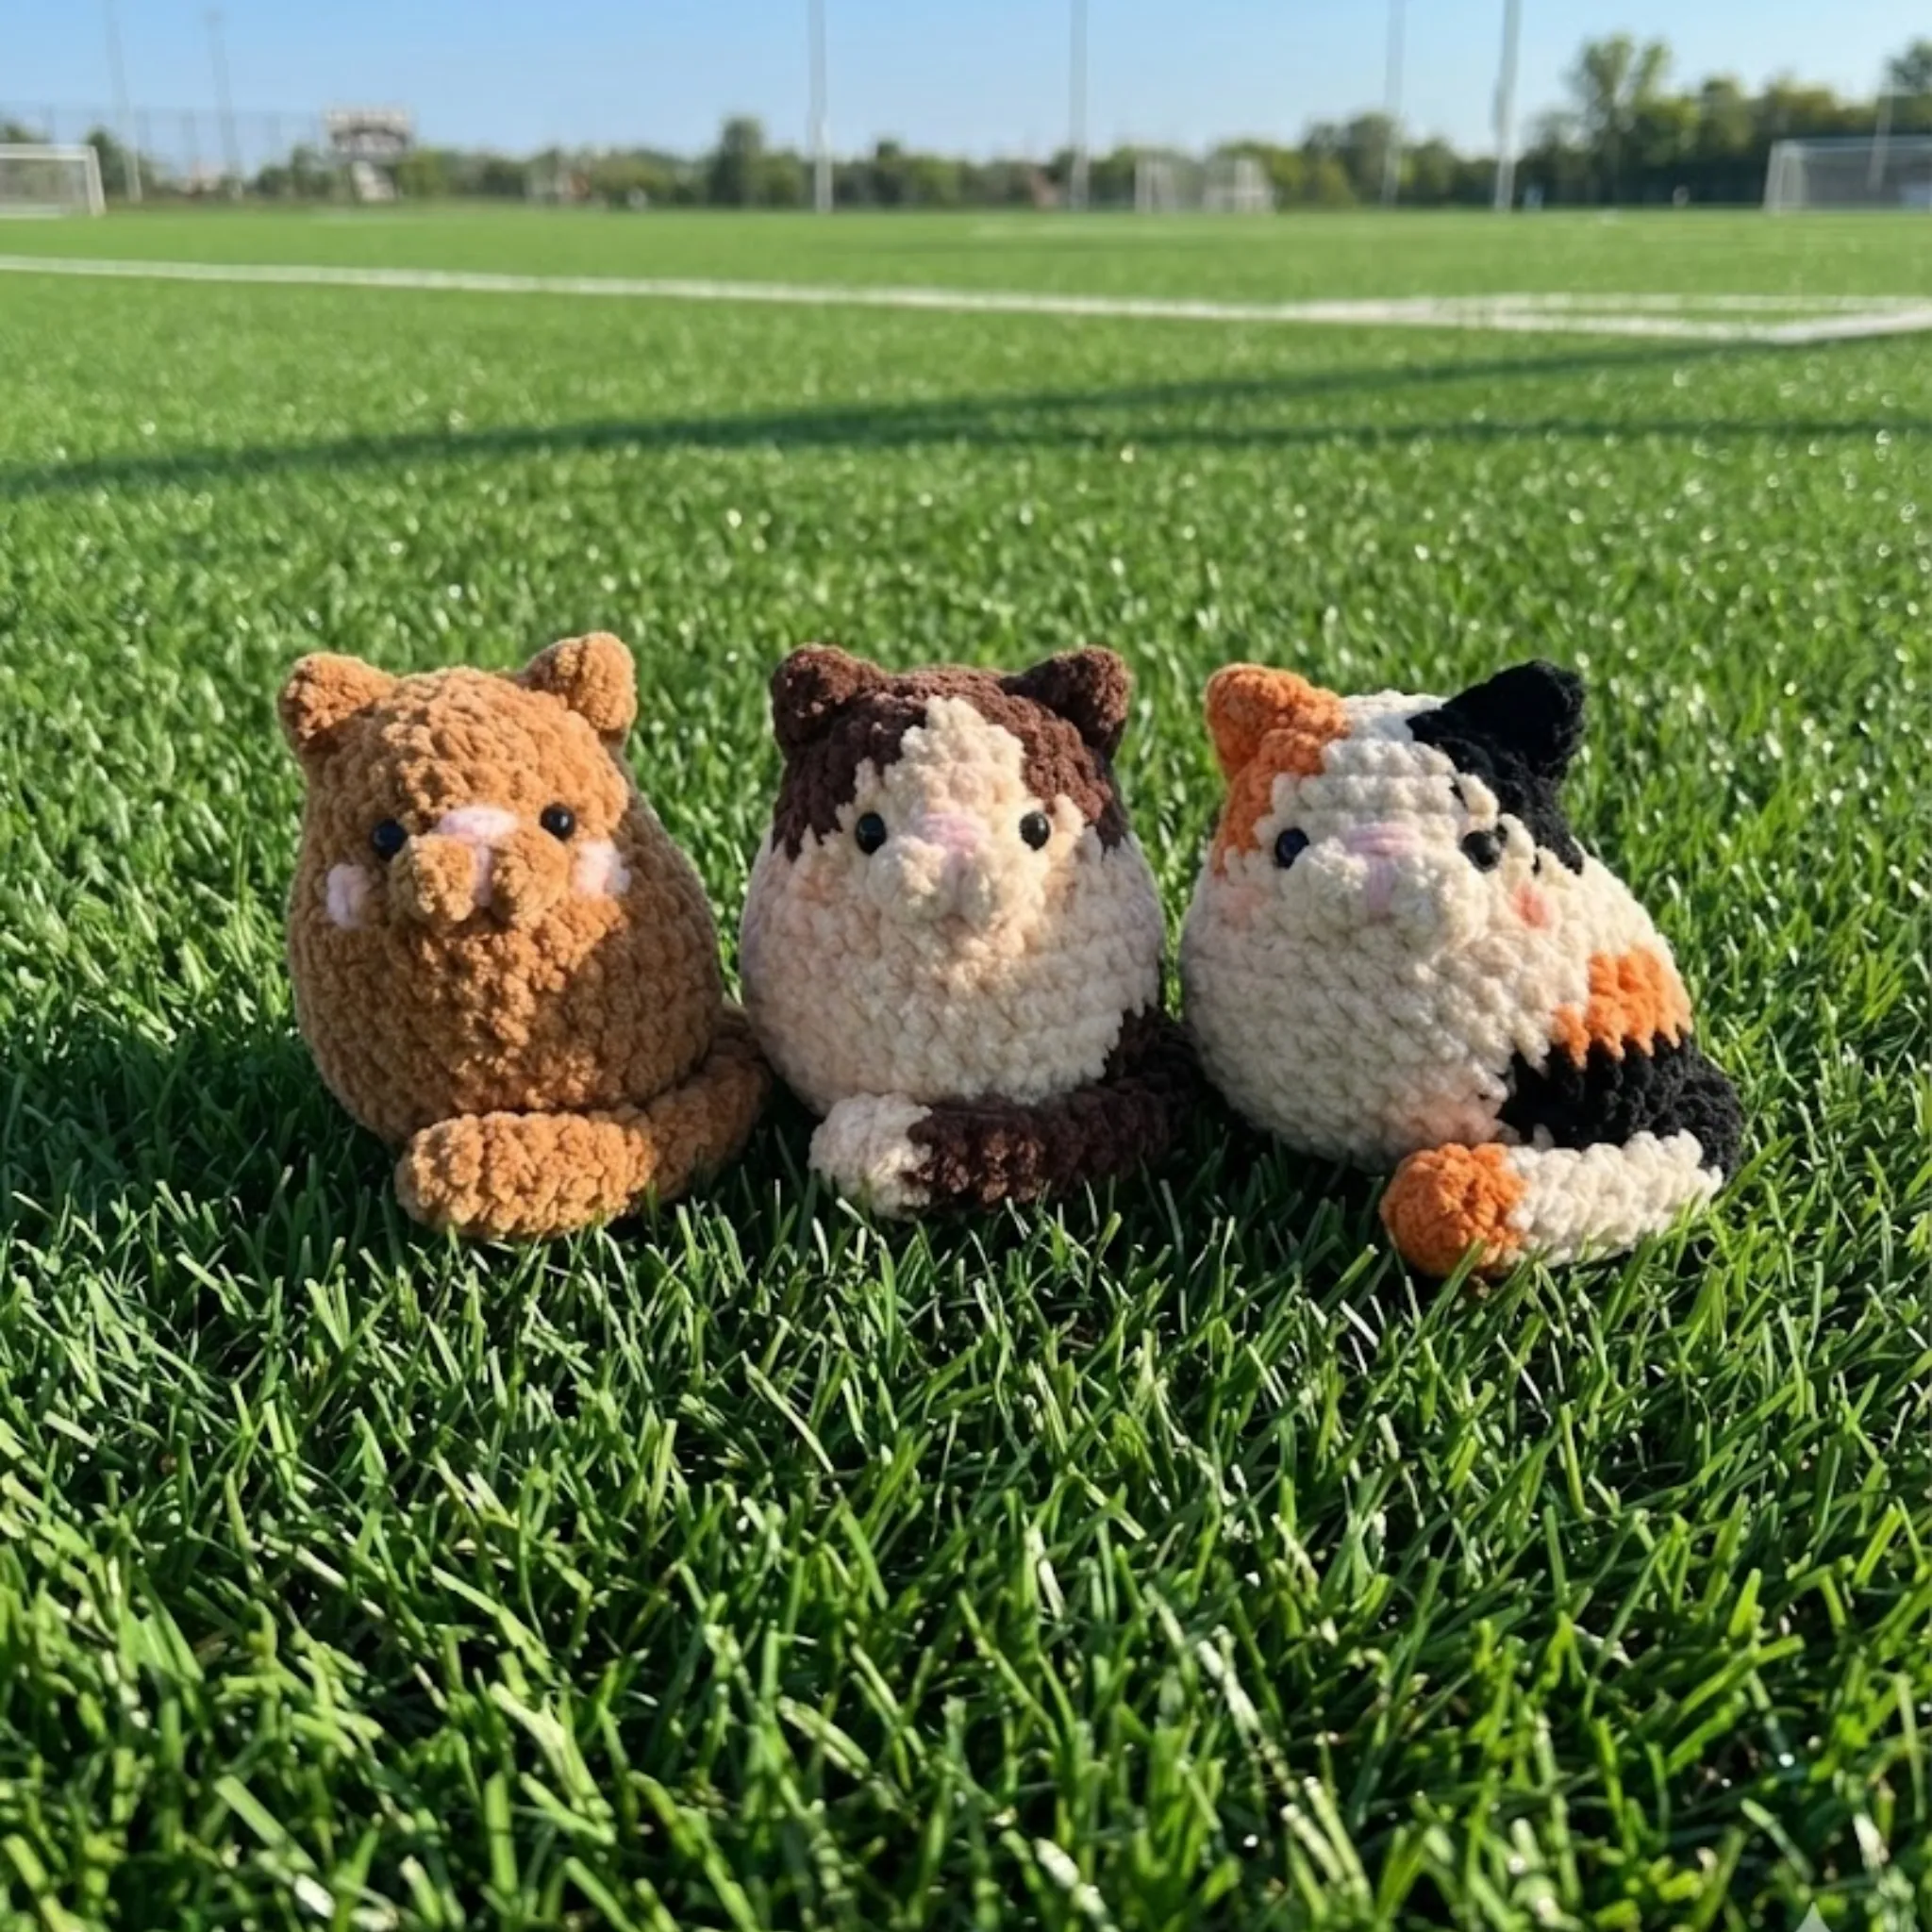
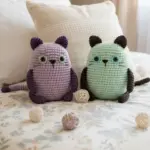
Design Variations
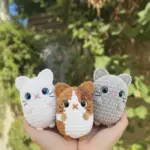
Solid Color Cat
Perfect for beginners, this single-color version focuses on mastering techniques without the complexity of color changes. Choose any color that speaks to you—classic orange tabby, sleek black, pristine white, or playful pink.
Bicolor Cat
Add visual interest with a two-color design featuring distinctive markings. This variation teaches color-changing techniques while creating a more realistic or personalized appearance.
Tricolor Cat
For those ready for a challenge, the tricolor cat incorporates three different yarn colors for complex, eye-catching patterns. This version teaches advanced color-changing techniques and creates truly unique results.
Finishing Touches
Assembly and Details
Once the main body is complete, proper finishing makes all the difference:
- Secure Closing: Fold the bottom opening and weave the yarn tail through opposing stitches for an invisible closure
- Tail Attachment: Sew the tail securely around the body for added stability
- Facial Embroidery: Add a simple embroidered nose using yarn for expressive character
- Blush Application: Apply powder blush to the cheeks for an adorable, lifelike touch
Learning Resources
Visual learners will benefit from video tutorials demonstrating specific techniques like bobble stitches, color changes, ear construction, and finishing methods. These supplementary resources can clarify any confusing written instructions.
Why Amigurumi Cats Make Perfect Projects
Portable and Quick
At only 10cm tall, these projects are portable and can be completed in an evening or weekend.
Skill Development
Working in spiral rounds, practicing increases and decreases, and managing color changes all build essential crochet skills applicable to larger projects.
Gift-Worthy Results
Handmade amigurumi cats make thoughtful, personalized gifts that show the time and care you’ve invested.
Creative Expression
Choose colors and variations that reflect your personality or create custom designs for friends and family.
Common Questions Addressed
Do I need prior crochet experience?
Basic crochet skills are recommended before starting this project. Familiarity with fundamental stitches and reading patterns will make the process more enjoyable.
Can I use different yarn weights?
While possible, changing yarn weight will affect the finished size. Maintain proportional hook size to yarn weight for best results.
How do I prevent stuffing from showing through?
Work with tight, consistent tension and use quality fiberfill designed for amigurumi projects.

Taking Your Project Further
Once you’ve mastered the basic cat pattern, consider these creative extensions:
- Experiment with different facial expressions by varying eye placement
- Add accessories like tiny bows, collars, or scarves
- Create a whole family of cats in different sizes using various yarn weights
- Design your own color combinations and patterns
Final Thoughts
Creating an amigurumi cat combines technical skill with artistic expression, resulting in a charming handmade treasure. Whether you’re crafting for yourself or as a gift, the process itself is as rewarding as the finished product. Remember that every crocheter started as a beginner, and each project improves your skills and confidence.
Take your time, enjoy the rhythmic motion of crochet, and watch as your adorable cat takes shape, stitch by stitch. The satisfaction of completing a handmade amigurumi project is unmatched, and the skills you develop will serve you in countless future crafting adventures.
Happy crocheting, and may your hooks create many adorable companions!
Remember it later!
Planning to try this soon? Pin it for a quick find later!