Table of contents
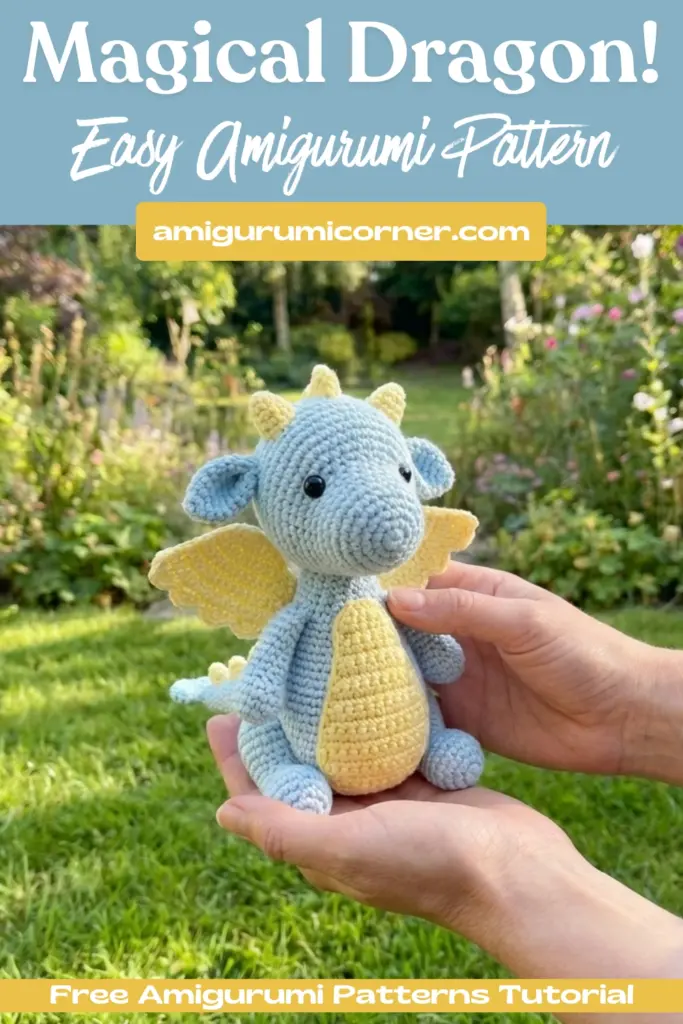
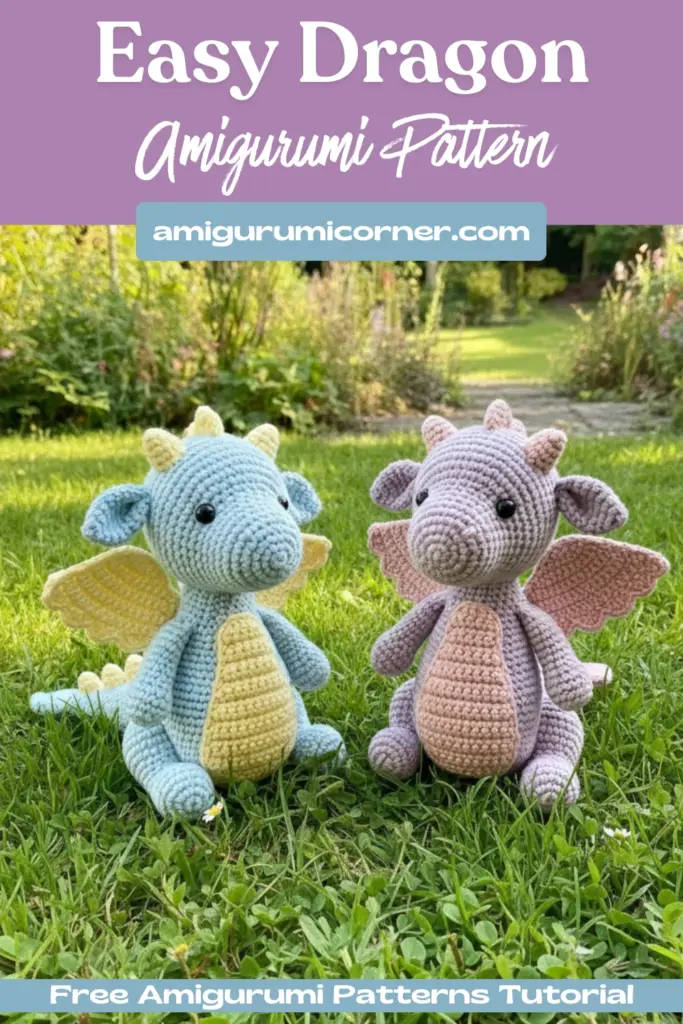
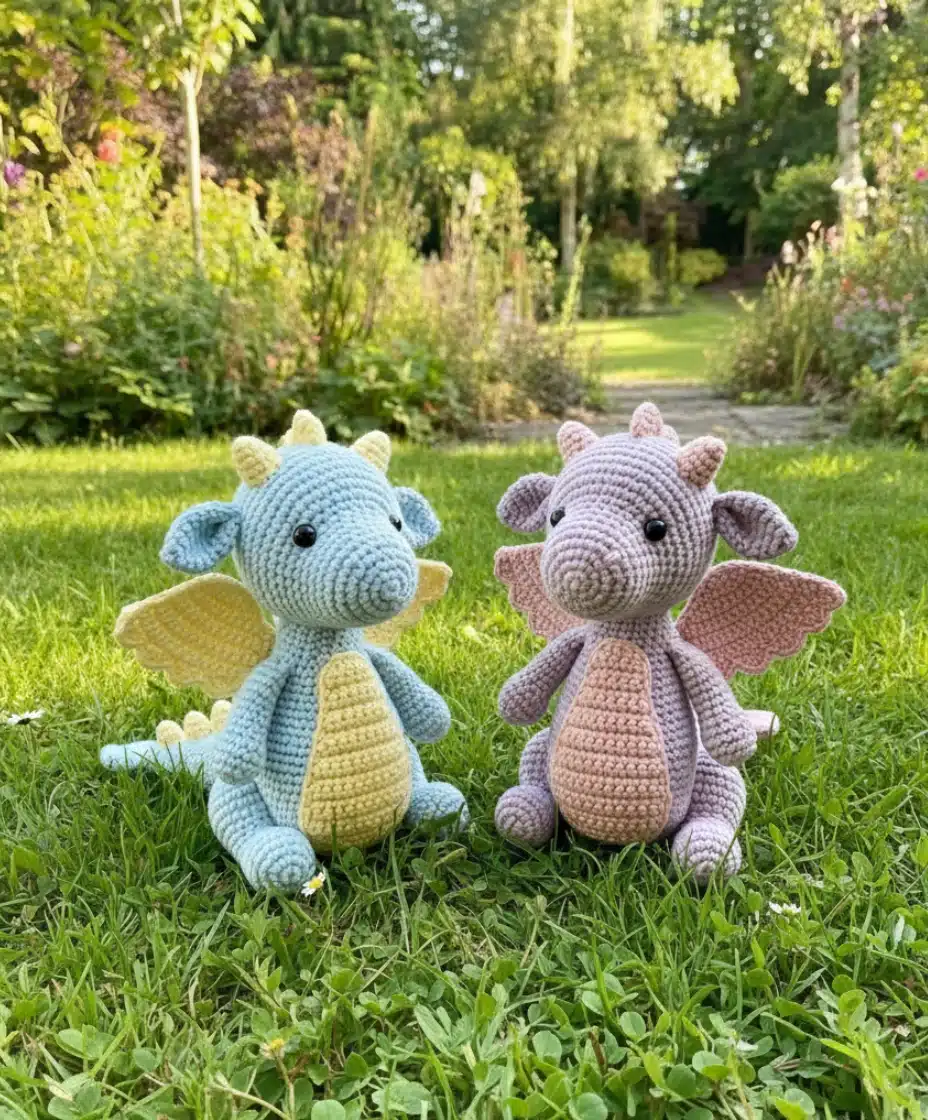
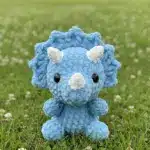
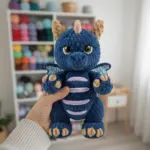
Looking for an enchanting crochet project that will captivate crafters of all skill levels? This detailed crochet Dragon Amigurumi Pattern combines whimsical charm with practical construction techniques to create an adorable amigurumi friend. Whether you’re an experienced crocheter or looking to expand your amigurumi skills, this comprehensive guide will walk you through every step of creating your very own cuddly dragon companion.
This Dragon Amigurumi Pattern uses continuous rounds construction and features careful facial sculpting techniques that bring your dragon to life with personality and character. The finished piece showcases delightful details including textured spikes along the back, graceful wings, and perfectly positioned features that give your dragon an irresistible expression.
Remember it later!
Planning to try this soon? Pin it for a quick find later!
Materials You’ll Need
To create this charming Dragon Amigurumi Pattern, gather the following supplies:
Yarn:
- Gazzal Baby Cotton 3445 (Beige) – 50g, 165m (60% cotton, 40% acrylic)
- Gazzal Baby Cotton 3444 (Pink) – 50g, 165m (60% cotton, 40% acrylic)
- Gazzal Baby Cotton 3468 (Grey) – 50g, 165m (60% cotton, 40% acrylic)
- Gazzal Baby Cotton 3432 (White) – 50g, 165m (60% cotton, 40% acrylic)
Additional Materials:
- 6mm black safety eyes
- 2.00mm crochet hook
- Fiber filler (polyester stuffing)
- Scissors
- Long tapestry needle
- Stitch markers
- Nylon thread or strong thread for facial sculpting

Crochet Abbreviations Guide
- MR – Magic Ring
- sc – Single crochet
- inc – Increase (2 sc in same stitch)
- dec – Decrease (single crochet 2 stitches together)
- sl st – Slip stitch
- TRN – Turn
- FLO – Front loops only
- ch – Chain
- dc – Double crochet
Important Pattern Notes
Before you begin, please note these essential details:
- This dragon amigurumi pattern uses US crochet terminology
- Work in continuous rounds throughout (no joining unless specified)
- Use a stitch marker to track the beginning of each round
- Final size may vary based on yarn choice and personal tension
- This pattern is for personal use only
Head & Body Instructions
The head and body are worked as one continuous piece, which creates a seamless construction and reduces finishing work.
- Row 1: 6sc in an MR (6)
- Row 2: 6 inc (12)
- Row 3: (inc, sc) x 6 (18)
- Row 4: (inc, 2sc) x 6 (24)
- Row 5-7: 24sc
- Row 8: (inc, 3sc) x 6 (30)
- Row 9-12: 30sc
Now you need to mark where to place the safety eyes. Insert a stitch marker into the 8th and 15th stitches of the 12th row.
- Row 13: 9sc, FLO(inc, 2sc) x 6, Then for both loops 3sc (36)
- Row 14: 4sc, (inc, 2sc) x 7, 11sc (43)
- Row 15: 4sc, (inc, 3sc) x 6, 15sc (49)
Now insert the safety eyes in place of the markers.
- Row 16-22: 49sc
- Row 23: 9sc, (dec, 3sc) x 6, 10sc (43)
- Row 24: 8sc, (dec, 2sc) x 6, 11sc (37)
- Row 25: 8sc, (dec, sc) x 6, 11sc (31)
- Row 26: 8sc, 6dec, 11sc (25)
- Row 27-29: 25sc
- Row 30: 7sc, (inc, 2sc) x 4, 6sc (29)
- Row 31: 7sc, (inc, 3sc) x 4, 6sc (33)
- Row 32: 3sc, (inc, 4sc) x 6 (39)
- Row 33-36: 39sc
Begin stuffing the head.
- Row 37: 6sc, (inc, 5sc) x 5, 3sc (44)
- Row 38: 44sc
- Row 39: 11sc, (inc, 3sc) x 7, 5sc (51)
- Row 40-50: 51sc
- Row 51: 17sc, (dec, 4sc) x 5, 4sc (46)
- Row 52: 17sc, (dec, 3sc) x 5, 4sc (41)
- Row 53: 17sc, (dec, 2sc) x 5, 4sc (36)
- Row 54: 17sc, (dec, sc) x 5, 4sc (31)
- Row 55-64: 31sc
Continue stuffing the body.
- Row 65: Skip the next loop and knit with 2 loops (dec, 3sc) x 6 (24)
- Row 66-69: 24sc
- Row 70: (dec, 2sc) x 6 (18)
- Row 71-77: 18sc
- Row 78: (dec, sc) x 6 (12)
- Row 79-80: 12sc
Leave a long tail for sewing, pull the yarn through the remaining loops with your needle, and weave in the ends securely.
Horns (Make 2)
Use grey yarn for these adorable little horns that give your dragon character.
- Row 1: 6sc in an MR (6)
- Row 2: 6sc (6)
- Row 3: 6inc (12)
- Row 4-5: 12sc
Leave a long tail for sewing. Sew the horns between rows 19 and 23, spacing them 7 stitches apart (measured from the center of each horn).
Ears (Make 2)
Use beige yarn to create the dragon’s expressive ears.
- Row 1: 6sc in an MR (6)
- Row 2: 6 inc (12)
- Row 3: (inc, sc) x 6 (18)
- Row 4: (inc, 2sc) x 6 (24)
Leave a long tail for sewing. Fold each ear in half and sew them between rows 20 and 21, spacing them 20 stitches apart.
Arms & Legs (Make 4 Total)
Use beige yarn to create matching limbs for your dragon.
- Row 1: 6sc in an MR (6)
- Row 2: 6 inc (12)
- Row 3: (inc, sc) x 6 (18)
- Row 4-7: 18sc
- Row 8: 5sc, (dec, sc) x 4, sc (14)
- Row 9: 5sc, 4dec, sc (10)
- Row 10-16: 10sc
Leave a long tail for sewing. Stuff the limbs lightly.
Attachment:
- Sew the arms between rows 36 and 37, spacing them 13 stitches apart
- Sew the legs between rows 53 and 54, spacing them 13 stitches apart
Back Studs (Make 5)
These pink spikes add a playful touch running down your dragon’s spine.
Use pink yarn.
- Row 1: 6sc in an MR (6)
- Row 2: 6sc (6)
- Row 3: 6inc (12)
- Row 4: 12sc
- Row 5: (inc, sc) x 6 (18)
Leave a long tail for sewing. Distribute the studs evenly along the dragon’s back, positioning them to your preference for a natural look.
Wings (Make 2)
These charming wings are worked in rows and give your dragon the ability to take flight in imagination.
Use pink yarn.
- Row 1: ch3, into 2nd ch from hook 2inc (4)
- Row 2: ch1, TRN, inc, 2sc, inc (6)
- Row 3: ch1, TRN, inc, 4sc, inc (8)
- Row 4: ch1, TRN, inc, 6sc, inc (10)
- Row 5: ch1, TRN, inc, 8sc, inc (12)
- Row 6: ch1, TRN, inc, 10sc, inc (14)
- Row 7: ch1, TRN, inc, 12sc, inc (16)
- Row 8: ch1, TRN, inc, 14sc, inc (18)
- Row 9: ch1, TRN, inc, 16sc, inc (20)
- Row 10-12: ch1, TRN, 20sc (20)
- Row 13: ch1, TRN, sl st, (2inc-dc, 2slst) x 4, 2inc-dc, slst (18)
Crochet around the edges of the wings with slip stitches for a finished look. Fasten off and weave in ends. Sew the wings parallel to the back studs for proper positioning.
Tail
Complete your dragon with this simple tapered tail.
Use pink yarn.
- Row 1: 6sc in an MR (6)
- Row 2: 6sc (6)
- Row 3: 6 inc (12)
- Row 4: 12sc
- Row 5: (inc, sc) x 6 (18)
- Row 6-7: 18sc
Leave a long tail for sewing and attach the tail securely to the back of the body.

Facial Sculpting Assembly
This crucial step brings personality and dimension to your dragon’s face. The sculpting technique creates defined cheeks and eye sockets that make your dragon truly come alive.
Materials needed: Long needle and strong nylon thread
Instructions:
- Thread your long needle with nylon thread
- Insert the needle at point A (row 4) and bring it out at point B (next to one eye)
- Insert the needle at point C (also next to the same eye) and bring it out at point D (2-3mm above point A)
- Insert the needle back into point A and bring it out at point I (next to the other eye)
- Insert the needle at point F (next to the second eye) and return to point A
- Hold both thread ends and gently pull while pressing your fingers on the eyes and muzzle area
- Continue tightening until you achieve the desired facial definition
- When satisfied with the appearance, tie several secure knots
- Weave the thread ends into the head and trim
The more you tighten the thread, the more pronounced your dragon’s cheeks will become. Take your time with this step as it significantly impacts the final expression.
Frequently Asked Questions
This pattern is suitable for intermediate crocheters who are comfortable with basic amigurumi techniques including working in continuous rounds, increasing, decreasing, and basic assembly. The facial sculpting technique may be new to some crafters but detailed instructions are provided.
While the pattern is designed for Gazzal Baby Cotton with a 2.00mm hook, you can use different yarn weights. Keep in mind that changing yarn weight will significantly alter the final size of your dragon. Use a hook size appropriate for your chosen yarn and adjust safety eye size accordingly.
Firm stuffing is key to maintaining the dragon’s head shape. Stuff the head gradually as you work through the pattern, adding small amounts of fiber fill frequently. The facial sculpting technique also helps create structure and definition that supports the head shape.
Using the recommended Gazzal Baby Cotton yarn with a 2.00mm hook, the finished dragon measures approximately 8-10 inches tall. The exact size will vary based on individual tension and how tightly you stuff the piece.
Conclusion
Congratulations on completing your adorable crochet Dragon Amigurumi Pattern! This charming amigurumi showcases your growing skills in continuous round construction, facial sculpting, and detailed assembly work. The combination of textured elements, from the spiky back studs to the delicate wings, creates a toy with wonderful visual and tactile appeal.
Your handmade dragon makes a perfect gift for children and dragon enthusiasts alike, or a delightful addition to your own amigurumi collection. The techniques you’ve practiced in this pattern particularly the facial sculpting method will serve you well in future amigurumi projects.
Ready to create more magical creatures? Explore additional amigurumi patterns to continue developing your crochet skills and building your handmade menagerie. Share photos of your finished dragon with fellow crafters and inspire others to take on this rewarding project!

Remember it later!
Planning to try this soon? Pin it for a quick find later!