Table of contents
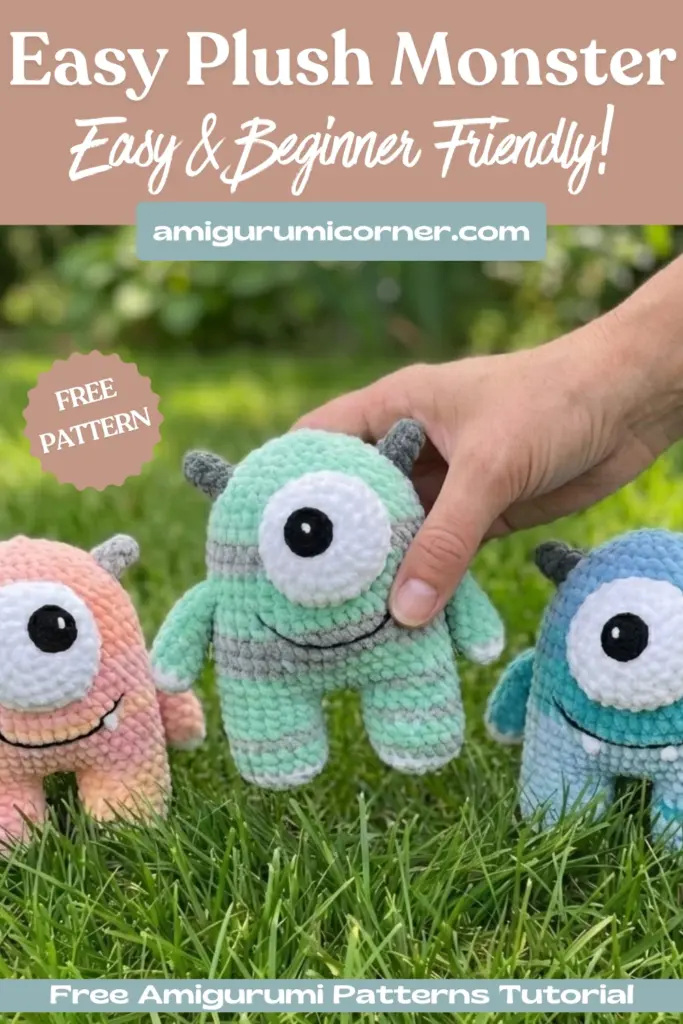
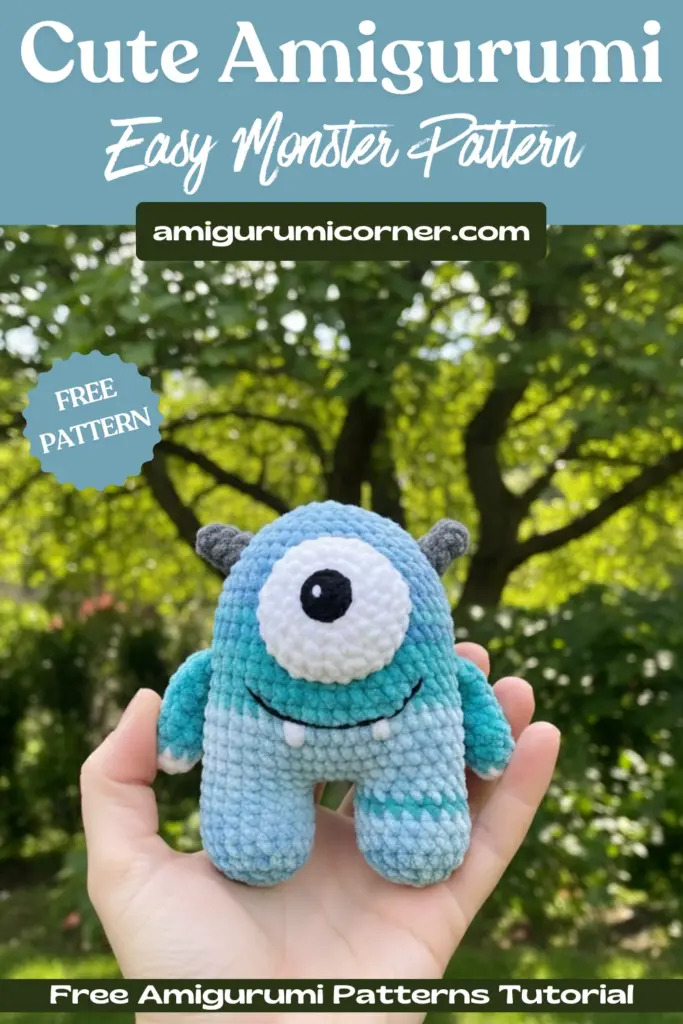
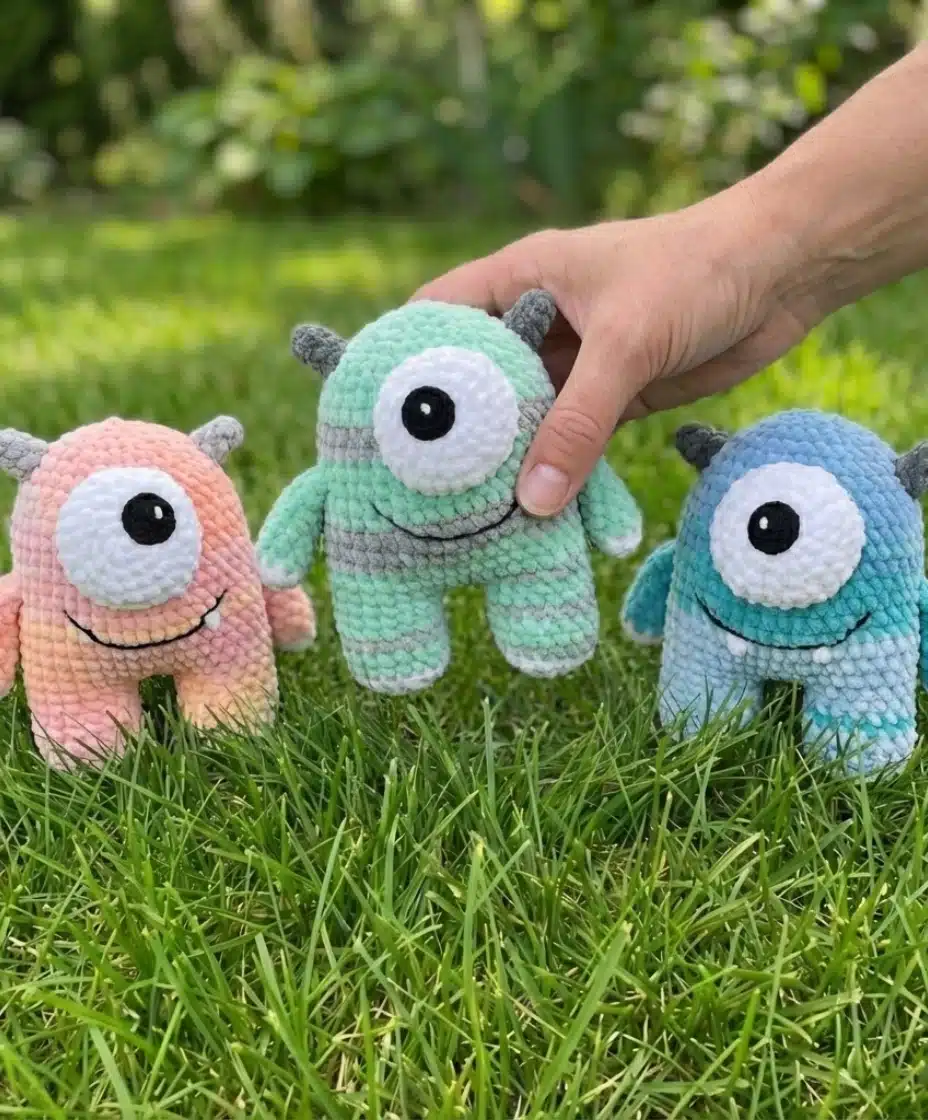
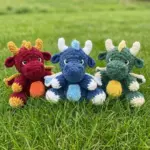
There’s something absolutely delightful about creating a friendly little monster one that’s cuddly instead of scary, charming instead of frightening. This amigurumi monster pattern is the perfect weekend project that transforms simple yarn into a personality-packed companion. Standing at about 15 cm tall (5.9 inches), this sweet plush creature is just the right size for little hands to hold or for perching on a bookshelf as a cheerful desk buddy.
What makes this amigurumi monster pattern truly special is its versatility and accessibility. It’s an excellent way to destash those leftover yarns you’ve been saving, turning odds and ends into something wonderful. Whether you’re working with plush Himalaya Dolphin Baby or soft YarnArt Dolce, you’ll love how quickly this little monster comes to life under your hook. The pattern works up beautifully for beginners looking to practice their amigurumi skills, while experienced makers will appreciate the quick, satisfying project that’s perfect for gift-giving or charity donations.
Ready to create your own lovable monster? Let’s gather your supplies and dive into this fun, rewarding pattern that’s sure to bring smiles to everyone who sees it.
Remember it later!
Planning to try this soon? Pin it for a quick find later!

Materials
- Yarn: Himalaya Dolphin Baby or YarnArt Dolce
- Hook: 4.0 mm
- For Pupil: Black YarnArt Jeans yarn and 2.5-3.0 mm crochet hook
- For Details: Black yarn for embroidering mouth
- Sewing Supplies: Thin thread in the tone of yarn for sewing arms and horns
- Notions: Sewing needle and scissors
- Stuffing: Fiberfill
Yarn Substitution Tip: This amigurumi monster pattern works beautifully with any plush or chenille-style yarn. Feel free to raid your stash for fun color combinations—monsters can be any color of the rainbow!
Abbreviations
- R = row
- mc = magic circle
- ch = chain
- sl st = slip stitch
- sc = single crochet
- inc = 2 sc in the next stitch
- dec = single crochet 2 stitches together
- (12) = number of stitches you should have at the end of the round/row
- **(…)6* = repeat whatever is between the brackets the number of times stated
Pattern Instructions
Legs and Body-Head
Your Amigurumi Monster begins from the ground up, literally! You’ll create two sturdy little legs and then join them to work the body and head all in one continuous piece. This construction method creates a seamless, professional finish.
Legs (make 2)
- R 1: 6 sc in mc (6)
- R 2: (inc)*6 (12)
- R 3: (1 sc, inc)*6 (18)
- R 4-8: 18 sc (5 rows)
Sl st and fasten off.
Important: Don’t cut the yarn when you finish the second leg! You’ll use it to continue directly into the body.
Joining the Legs
From second leg: 4 ch, join with the first leg.
Continue crocheting the body in the round:
Body
- R 1: 8 sc on the first leg, 4 sc in 4 ch, 8 sc on the second leg, 4 sc in 4 ch (opposite side) (24)
- R 9: 18 sc on the first leg, 4 sc in 4 ch, 18 sc on the second leg, 4 sc in 4 ch (opposite side) (44)
- R 10-20: 44 sc (11 rows)
- R 21: 10 sc, dec, 20 sc, dec, 10 sc (42)
- R 22: 42 sc
- R 23: (5 sc, dec)*6 (36)
- R 24: 36 sc
- R 25: (4 sc, dec)*6 (30)
- R 26: (3 sc, dec)*6 (24)
- R 27: (2 sc, dec)*6 (18)
- R 28: (1 sc, dec)*6 (12)
- R 29: (dec)*6
Sl st and fasten off.
Stuffing Tip: As you work through the decreases, stuff your Amigurumi Monster firmly but not too tightly. You want a cuddly finish that holds its shape beautifully.
Eye
This adorable cyclops design gives your monster tons of personality! The large white eye with a smaller black pupil creates that perfect sweet, surprised expression.
With white yarn:
- R 1: 6 sc in mc (6)
- R 2: (inc)*6 (12)
- R 3: (1 sc, inc)*6 (18)
- R 4: (2 sc, inc)*6 (24)
- R 5: 24 sc
Sl st and fasten off.
Pupil
With black yarn:
- R 1: 6 sc in mc (6)
- R 2: (inc)*6 (12)
- R 3: (1 sc, inc)*3 (15)
Fasten off and leave a long tail for sewing.
Assembly Tip: Position the pupil slightly off-center on the white eye before sewing for extra character. A little asymmetry adds charm!
Horns (make 2)
These tiny horns add just the right amount of “monster” to your creation without being scary. They’re quick to make and add wonderful dimension.
- R 1: 4 sc in mc (4)
- R 2: 4 sc
- R 3: inc, 3 sc (5)
- R 4: inc, 4 sc (6)
Fasten off.
Arms (make 2)
The arms work up quickly and end with a flat finish that makes sewing them onto the body a breeze.
- R 1: 6 sc in mc (6)
- R 2: (inc)*6 (12)
- R 3-4: 12 sc (2 rows)
- R 5: dec, 10 sc (11)
- R 6: dec, 9 sc (10)
- R 7: dec, 8 sc (9)
- R 8: 9 sc
Fold top of arm flat and 4 sc through both sides across.

Final Touches
Embroidering the Face
Embroider mouth with black yarn. Embroider teeth with white yarn.
Get creative here! A simple curved line creates a friendly smile, while adding a few small white teeth gives your monster a playful, toothy grin. There’s no wrong way to give your monster personality let your creativity guide you!
Frequently Asked Questions
This pattern is designed for plush or chenille-style yarns like Himalaya Dolphin Baby or YarnArt Dolce, which are typically classified as bulky weight (5). However, you can use any similar weight yarn you have in your stash. The plush texture creates an extra cuddly finish that’s perfect for a huggable monster!
Most makers can complete this adorable monster in 3-4 hours, making it perfect for a weekend afternoon project. Because you’re working with bulky yarn and a larger hook (4.0 mm), the pattern works up quickly. Beginners might take a bit longer as they practice their stitches, but the straightforward construction makes this an achievable project for all skill levels.
Absolutely! This is an excellent beginner-friendly amigurumi pattern. You’ll practice fundamental techniques like working in the round, increases, decreases, and basic assembly. The use of plush yarn is actually forgiving for newer crocheters, as slight variations in tension are less noticeable. If you can make a magic circle and basic single crochet stitches, you can definitely make this monster!
Yes, customization is part of the fun! Try different color combinations for the body, experiment with eye placement for different expressions, add more or fewer horns, or embroider different mouth shapes. Some makers add spots, stripes, or even tiny accessories like bow ties. Since monsters come in all varieties, there’s no limit to how you can make this pattern uniquely yours!
Bringing Your Monster to Life
Congratulations on creating your very own amigurumi monster! This little character is proof that the best monsters are the ones that make us smile. Whether you’ve chosen bright, bold colors or soft, subtle shades, your finished creation is perfectly unique and wonderfully you.
We’d love to see your friendly monster come to life! The amigurumi community thrives on sharing creativity and inspiring one another, so don’t be shy about showing off your work. Consider making several in different colors they look adorable displayed together as a cheerful monster family.
Happy crocheting, and may your hook bring many more smiles and cuddly creations into the world!
Remember it later!
Planning to try this soon? Pin it for a quick find later!