Table of contents
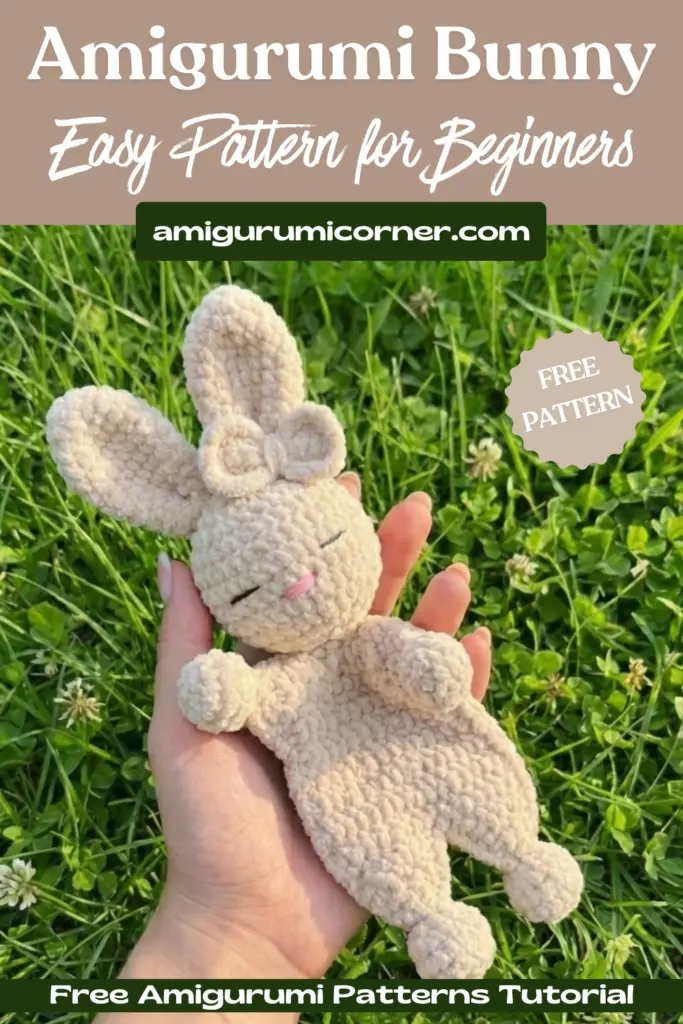
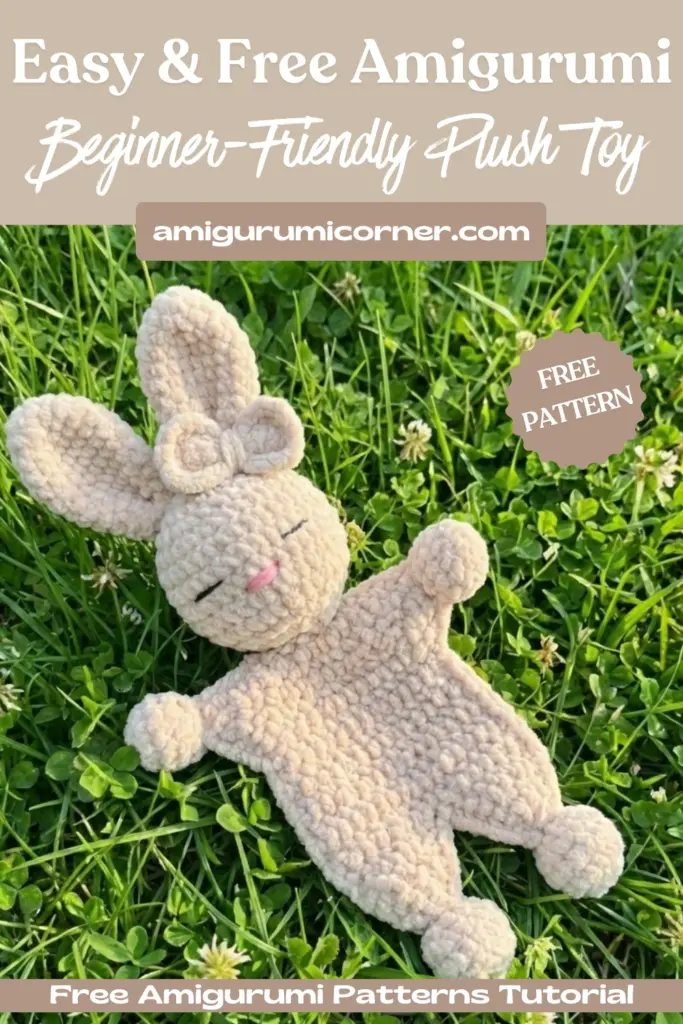
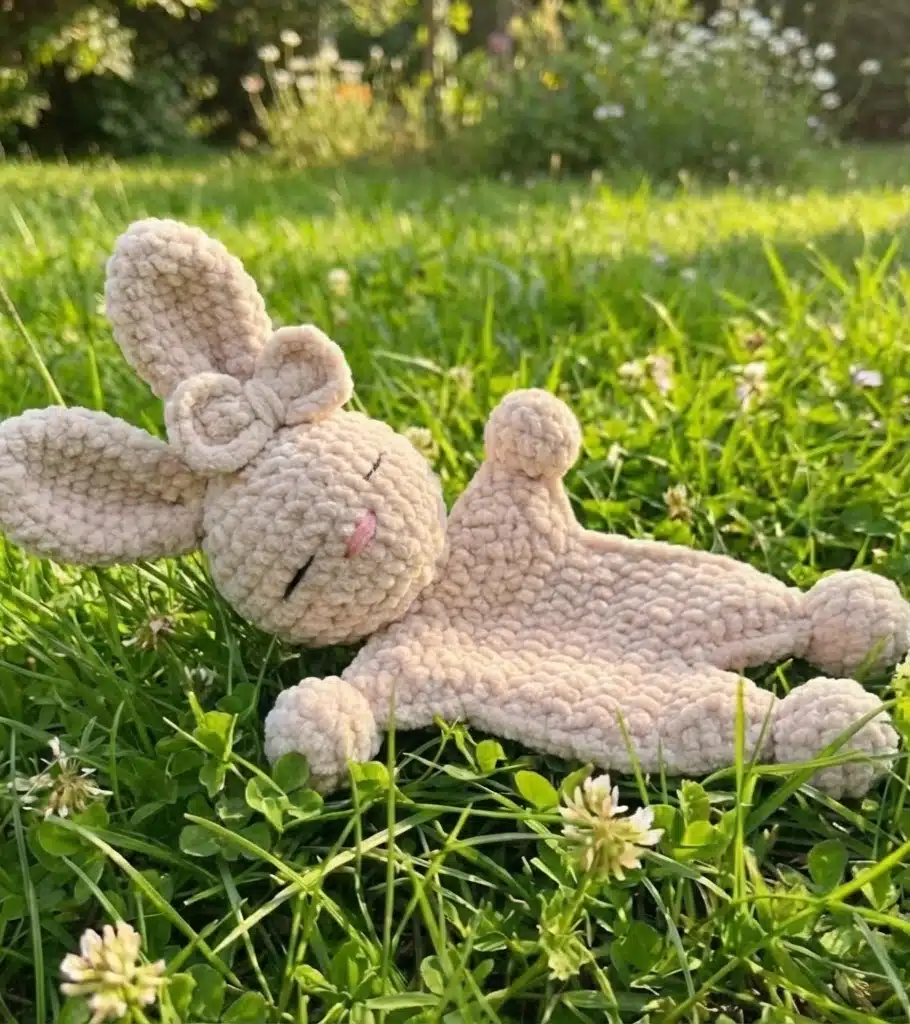
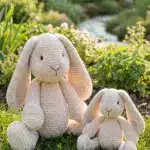
Have you ever watched someone’s face light up when they receive a handmade amigurumi? There’s something genuinely magical about these tiny crocheted creatures, and this sweet Amigurumi Bunny Crochet Pattern is about to become your new favorite creation. With its plump Beige paw pads, oversized ears, and charming bow accent, this little friend embodies everything we love about amigurumi personality, cuteness, and that irresistible huggable quality.
This Amigurumi Bunny Crochet Pattern works up beautifully with smooth baby yarn in classic white and soft Beige, creating a clean, modern look that’s perfect for nursery décor or as a cherished gift. The construction is thoughtfully designed with a flat body style that gives your bunny a distinctive vintage toy appearance. Don’t let the detailed instructions intimidate you each section builds logically on the last, and you’ll find yourself getting into a wonderful rhythm as you work through the rows.
Whether you’re making this for a new baby, adding to your amigurumi collection, or simply craving a satisfying weekend project, this bunny delivers on all fronts. The combination of smaller and larger hook sizes creates lovely texture variation, while those adorable Beige paw pads add just the right touch of whimsy.
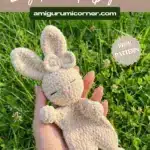
Remember it later!
Planning to try this soon? Pin it for a quick find later!

What You’ll Need For Amigurumi Bunny Crochet Pattern
Yarn:
- White color yarn
- Beige color yarn
- Black and pink thread (GAZZAL Baby Cotton acrylic yarn works beautifully) for facial features
Tools & Notions:
- 3.0 mm crochet hook (for head, ears, paw pads, and tail)
- 4.0 mm crochet hook (for body and bow)
- Holofiberfill or polyester stuffing
- Scissors
- Embroidery needle for assembly and embroidering features
Pattern Abbreviations
- sc – single crochet
- cs – chain stitch/air loop
- inc – increase
- dec – decrease
- sl st – slip stitch
- dtr – double treble crochet
- (18) – number of loops at end of row
- *6 – repeat number of times
Creating Your Bunny
Head
(White color, Hook: 3.0 mm)
The head works in continuous rounds from the magic ring, creating that perfect sphere shape:
- Row 1: 6 sc in the magic ring (6)
- Row 2: 6 inc (12)
- Row 3: (1 sc, inc)*6 (18)
- Row 4: (2 sc, inc)*6 (24)
- Row 5: (3 sc, inc)*6 (30)
- Row 6: (4 sc, inc)*6 (36)
- Row 7: 36 sc (36)
- Row 8: 36 sc (36)
- Row 9: 36 sc (36)
- Row 10: 36 sc (36)
- Row 11: (4 sc, dec)*6 (30)
- Row 12: (3 sc, dec)*6 (24)
Add holofiberfill to the head now, while you still have good access.
- Row 13: (2 sc, dec)*6 (18)
- Row 14: (1 sc, dec)*6 (12)
Cut off the thread and hide it securely. Your bunny’s head is complete!
Body
(White color, Hook: 4.0 mm)
The body is worked flat in turned rows, creating that charming vintage toy silhouette:
- Row 1: 7 chain stitches, starting from the second loop crochet 6 sc, cs, turn the part over (6)
- Row 2: 6 sc, cs, turn the part over (6)
- Row 3: inc, 4 sc, inc, cs, turn the part over (8)
- Row 4: inc, 6 sc, inc, cs, turn the part over (10)
- Row 5: inc, 8 sc, inc, cs, turn the part over (12)
- Row 6: 12 sc, cs, turn the part over (12)
- Row 7: inc, 10 sc, inc, cs, turn the part over (14)
- Row 8: 14 sc, cs, turn the part over (14)
- Row 9: 14 sc, cs, turn the part over (14)
- Row 10: 14 sc, cs, turn the part over (14)
- Row 11: 14 sc, cs, turn the part over (14)
- Row 12: 14 sc, cs, turn the part over (14)
- Row 13: 14 sc, cs, turn the part over (14)
Now we divide it into two legs. We’re going to crochet one leg first:
- Row 14: 7 sc, cs, turn the part over (7)
- Row 15: dec, 3 sc, dec, cs, turn the part over (5)
- Row 16: 5 sc, cs, turn the part over (5)
- Row 17: 5 sc, cs, turn the part over (5)
- Row 18: dec, 1 sc, dec, cs, turn the part over (3)
- Row 19: 3 sc, cs, turn the part over (3)
- Row 20: dec (Make a decrease of three loops)
Cut off the thread.
Crochet the second leg near the first leg, following the same pattern starting from Row 14. Pay attention to your starting point—reference the original pattern’s photo guidance for proper placement.

Upper Paws
Now we’ll add those adorable little arms! Look for the edge of the body and begin crocheting:
- Row 1: From the place where the loop was attached, crochet 6 sc, cs, turn the part over (6)
- Row 2: 6 sc, cs, turn the part over (6)
- Row 3: dec, 2 sc, dec, cs, turn the part over (4)
- Row 4: 4 sc, cs, turn the part over (4)
- Row 5: 2 dec, cs, turn the part over (2)
- Row 6: 2 sc, cs, turn the part over (2)
- Row 7: dec
Cut off the thread. Crochet the second paw similarly, starting from the edge on the other side following the same pattern.
Now crochet a second body piece using Beige yarn this will become the sweet little tummy!
Assembly Instructions
Connect the two body parts with your hook by crocheting in the round. Leave a hole of approximately 12 loops where you’ll attach the head later. Keep the body flat rather than stuffing it—this gives your bunny that distinctive flat-body charm. Hide all thread ends as you work. Once complete, attach the head using your embroidery needle.
Paw Pads (Make 4)
(Beige color, Hook: 3.0 mm)
These little Beige accents are what make your bunny extra special:
- Row 1: 6 sc in the magic ring (6)
- Row 2: 6 inc (12)
- Row 3: (1 sc, inc)*6 (18)
- Row 4: 18 sc (18)
- Row 5: (1 sc, dec)*6 (12)
Add a small amount of holofiberfill.
- Row 6: 6 dec
Leave a long thread and sew up the hole. Then sew each ball to the end of each limb.
Ears (Make 2)
(White color, Hook: 3.0 mm)
Those signature floppy bunny ears!
- Row 1: 6 sc in the magic ring (6)
- Row 2: 6 inc (12)
- Row 3: (1 sc, inc)*6 (18)
- Row 4: (2 sc, inc)*6 (24)
- Row 5: 24 sc (24)
- Row 6: 24 sc (24)
- Row 7: 24 sc (24)
- Row 8: (2 sc, dec)*6 (18)
- Row 9: 18 sc (18)
- Row 10: (1 sc, dec)*6 (12)
- Row 11: 12 sc (12)
- Row 12: 12 sc (12)
Fold the piece in half and crochet 6 sc to close. Sew the ears to the head, then embroider the eyes and nose using black and Pink thread.
Tail
(White color, Hook: 3.0 mm)
Every bunny needs a fluffy tail!
- Row 1: 6 sc in the magic ring (6)
- Row 2: 6 inc (12)
- Row 3: (1 sc, inc)*6 (18)
- Row 4: 18 sc (18)
- Row 5: (1 sc, dec)*6 (12)
Add a little holofiberfill.
- Row 6: 6 dec
Leave a long thread and sew up the hole. Sew the tail to the back of your bunny.
Bow
(Beige color, Hook: 4.0 mm)
The perfect finishing touch! This adorable bow adds personality and charm.
Pick up 6 chain stitches.
First half of the bow:
Make 3 yarn overs and crochet a double treble crochet in the last loop. Make 2 more double treble crochet in the same last loop. Pick up 5 chain stitches and crochet again in the last loop with sc.
Second half of the bow:
Pick up 6 chain stitches and follow the same pattern (crochet 3 dtr, then pick up 5 chain stitches and make a slip stitch in the last loop).
Leave a long thread and twist it between the two halves. Sew securely so the bow stays closed, then attach it to one ear for that sweet finishing detail.

Your Questions Answered
While the pattern specifies baby yarn with 3.0mm and 4.0mm hooks, you can adapt it to other weights! Just remember that changing yarn weight will affect your finished size. If you go with a heavier yarn and larger hooks, you’ll get a bigger bunny. Make sure to maintain the same hook-size difference between sections to preserve the proportions.
This pattern is best suited for intermediate crocheters who are comfortable with basic amigurumi techniques like working in the round, increasing and decreasing evenly, and flat construction. The body uses turned rows rather than continuous rounds, which requires attention to detail. If you’ve made a few amigurumi projects before, you’ll do great!
Take your time with the embroidery! Use the black thread for eyes and create small French knots or satin stitch ovals. For the nose, pink thread works beautifully in a small triangle or Y-shape. Pin or mark your placement first with stitch markers, step back, and check that everything looks balanced before committing to your stitches. Remember, slight asymmetry adds character!
The smaller 3.0mm hook creates tighter, more defined stitches perfect for the head, ears, and small details where you want a firm fabric. The larger 4.0mm hook gives the body and bow a slightly looser, softer texture. This size variation also helps create visual interest and the right proportions for each body part.
Make It Your Own
You’ve just created something absolutely precious a bunny that carries your care in every stitch. The flat body construction gives this little friend a wonderfully cuddly quality, while those Beige paw pads and bow add personality that makes it uniquely special. Whether this bunny finds a home in a nursery, becomes a beloved companion, or inspires you to create a whole family of variations, you’ve mastered a pattern that showcases your skill beautifully.
Consider experimenting with color combinations for your next one perhaps a gray bunny with yellow accents, or an all-white version with a pastel bow. Each bunny you make will have its own character!
Happy crocheting, and may your stitches always be as sweet as this little bunny!
Remember it later!
Planning to try this soon? Pin it for a quick find later!