Table of contents
- About This Giraffe Pattern
- Materials You’ll Need
- Understanding the Abbreviations
- Making the Legs (Make 4)
- Creating the Belly
- Joining the Legs to the Body
- Constructing the Body
- Crafting the Head
- Adding the Safety Eyes
- Creating the Neck Joint (Optional)
- Embroidering Facial Features
- Making the Nose
- Crafting the Ears (Make 2)
- Making the Horns (Make 2)
- Adding Decorative Spots
- Creating the Tail
- Final Assembly Tips
- Customization Ideas
- Conclusion
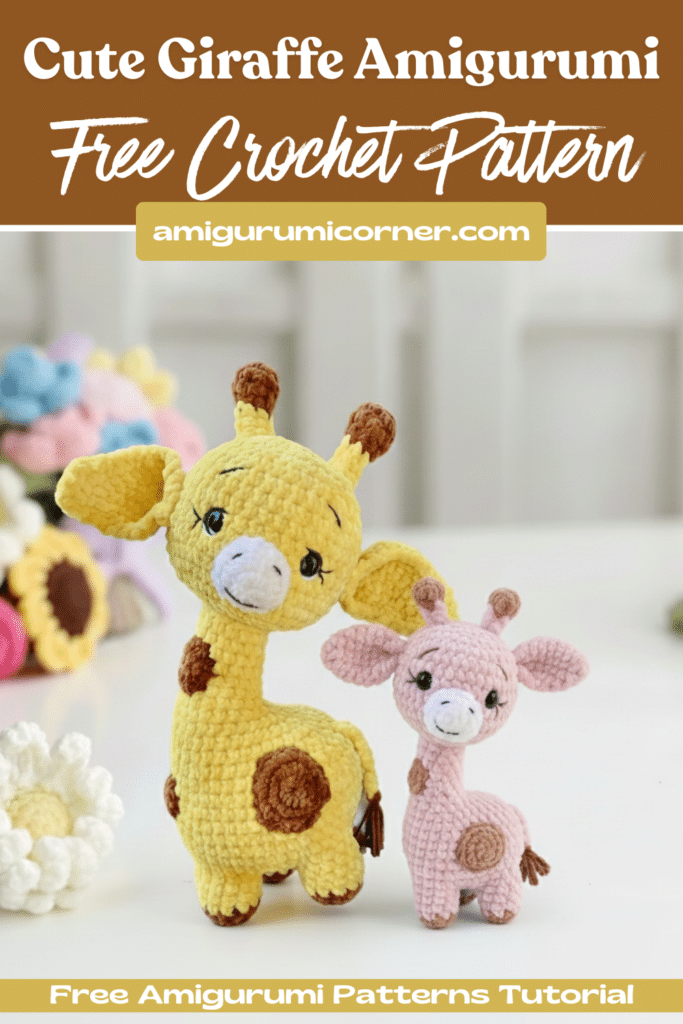
Looking to create an utterly charming handmade toy? This comprehensive crochet giraffe pattern will guide you through making a delightful stuffed animal that’s perfect for gifting or adding to your collection. Whether you’re a confident crocheter or looking to expand your skills, this medium-difficulty project offers a rewarding creative experience.

Remember it later!
Planning to try this soon? Pin it for a quick find later!
About This Giraffe Pattern
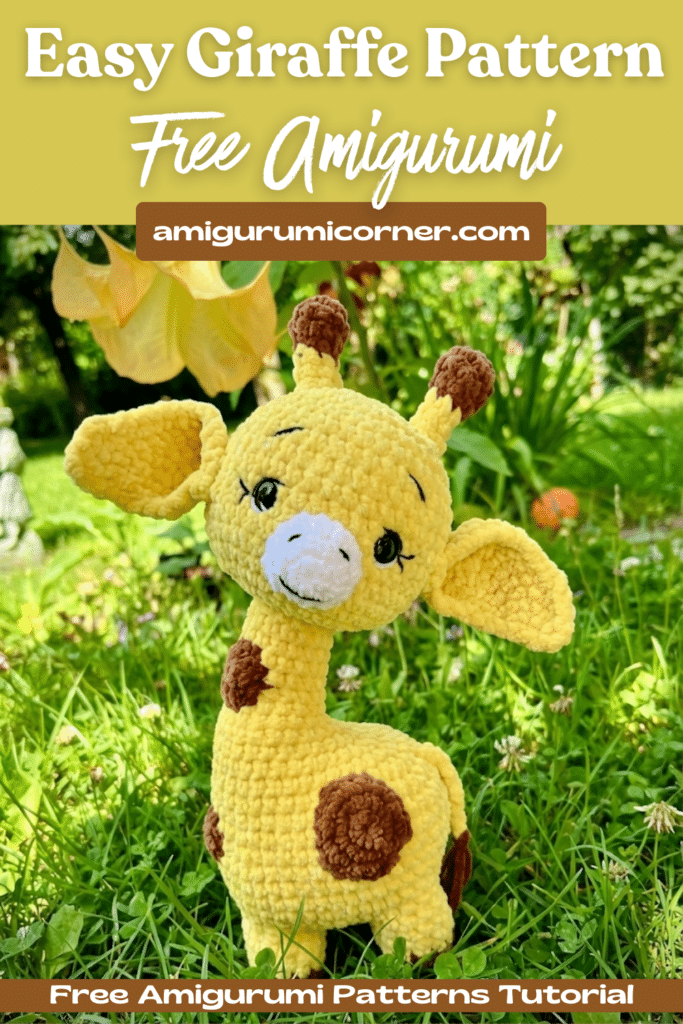
This enchanting giraffe stands approximately 22-24 cm tall (without horns) when made with plush yarn. One of the most appealing aspects of this pattern is its versatility – you can easily adapt it by using different yarn types, though this will affect the final size of your creation.
For instance, if you choose semi-cotton yarn like Alize Cotton Gold or Yarnart Jeans instead of plush yarn, your finished giraffe will be considerably smaller at 11-12 cm in height. This makes the pattern perfect for creating giraffes in various sizes to suit your needs.
A special feature of this pattern is the movable head joint at the neck, giving your giraffe an endearing, lifelike quality. If you prefer a simpler construction, you can skip the joint rounds and crochet a fixed head directly onto the body.
Materials You’ll Need
Yarn Requirements
- Yellow yarn: Himalaya Dolphin Baby 313 or Yarnart Dolce 761 (120m/100g), approximately 80g
- Brown yarn: Himalaya Dolphin Baby 337 or Yarnart Dolce 765 (120m/100g)
- White yarn: Himalaya Dolphin Baby 301 or Yarnart Dolce 741 (120m/100g)
Additional Supplies
- 14mm black safety eyes
- Black embroidery thread for facial details (eyelashes, eyebrows, mouth)
- Brown thread for tail hair
- Matching colored threads (white, yellow, and brown) for sewing parts together
- Polyester fiberfill or your preferred stuffing
- 3-4mm crochet hook (adjust based on your yarn thickness and tension)
- 8 stitch markers
- Pins for assembly
- Optional: felt or dense fabric for eye backing (for added security)
- Optional: plastic ring for neck reinforcement
Understanding the Abbreviations
Before we begin, familiarize yourself with these common crochet terms:
- ch – chain stitch
- sc – single crochet
- inc – increase (two stitches in one)
- dec – decrease (crochet two stitches together)
- hdc – half double crochet
- dc – double crochet
- sl st – slip stitch
Making the Legs (Make 4)
Work in a continuous spiral, using a stitch marker to track your rounds.
Starting with brown yarn:
- Chain 2, work 6 sc in the 2nd chain from hook (6)
- Inc in each stitch around (12)
- Work 12 sc
- Change to yellow yarn and work 12 sc, ending with a slip stitch in the previous round
- Rounds 5-6: Work 12 sc
Fasten off, leaving a long tail for sewing.
Creating the Belly
Work in a continuous spiral:
- Chain 2, work 8 sc in the 2nd chain from hook (8)
- Inc in each stitch around (16)
- (1 sc, inc) repeat 8 times (24)
Joining the Legs to the Body
This is where your giraffe starts taking shape. The joining process requires careful attention to ensure all four legs are securely and evenly attached.
Position the first leg on the belly and work 4 sc through both layers (leg and belly). Work 1 sc in the belly only, then attach the second leg with 4 sc through both layers. Continue this pattern for the remaining two legs, working belly stitches in between as specified in the pattern.

Constructing the Body
Work in a continuous spiral, marking the beginning of each round. The first round should be worked firmly – consider using a smaller hook if needed.
Rounds 1-7: Work 48 sc
Round 8: Begin shaping with strategic decreases (43)
Rounds 9-15: Continue decreasing gradually to shape the body (20)
Rounds 16-23: Work even on 16 stitches to form the neck
If you’re making a movable head, cut the yarn here. Otherwise, continue directly to the head section.
Crafting the Head
Begin with yellow yarn:
- Chain 16 and join with a slip stitch to form a ring (16)
- Chain 1, work 15 sc (16)
- Inc in each stitch around (32)
- (3 sc, inc) repeat 8 times (40)
- (19 sc, inc) repeat 2 times (42)
- Rounds 5-12: Work 42 sc
- (5 sc, dec) repeat 6 times (36)
- Round 14: 2 sc, dec, (4 sc, dec) repeat 5 times, 2 sc (30)
Don’t cut the yarn yet – it’s time to add the eyes!
Adding the Safety Eyes
Position the 14mm safety eyes between rounds 7 and 8, spacing them 8 stitches apart. For added security, especially if this toy is for a young child, create a small felt backing before securing the safety backs. This prevents the eyes from being pulled through the fabric.
Creating the Neck Joint (Optional)
Place the head onto the neck opening. For extra stability, you can insert a plastic ring into the neck before working the joint.
Continue working in the neck stitches:
- Round 24: Inc in each stitch (32)
- Rounds 25-26: Work 32 sc
- Round 27: Dec around (16)
- Round 28: Dec around (8)
- Round 29: Dec 4 times
Make the joint as tight as possible, then fasten off securely.
Fill the head firmly, paying special attention to the space between the joint and the head walls. Complete the top of the head:
- (3 sc, dec) repeat 6 times (24)
- (1 sc, dec) repeat 8 times (16)
- Dec around until closed (8)
Close the opening completely and weave in the end inside the head.
Embroidering Facial Features
Eyelashes
Using black embroidery thread, create delicate eyelashes on each side of the eyes. Insert your needle from the side, bringing it out at the tip of the first eyelash position. Work close to the eye, creating 2-3 eyelashes per side. Be careful not to catch the neck joint when embroidering.
Eyebrows
Mark the eyebrow positions: 4 rounds above the eyes at the top and 2 rounds at the bottom. Space the upper points 8 stitches apart. Each eyebrow should span approximately 3 stitches. Embroider the eyebrows with black thread, creating a friendly, expressive face.
Making the Nose
Work in a continuous spiral with white yarn:
- Chain 2, work 8 sc in the 2nd chain (8)
- (1 sc, inc) repeat 4 times (12)
- Work 12 sc, ending with a slip stitch
Position the nose between rounds 5-7 of the head. Sew it on, shaping it into an oval as you go. Use black embroidery thread to stitch a simple mouth beneath the nose.
Crafting the Ears (Make 2)
Work in rows with yellow yarn:
- Chain 4, work 3 sc in the 1st chain (4)
- Chain 2, work 1 sc in the same stitch as chain, 2 hdc inc, 1 hdc (7)
- Continue following the pattern to round 5, creating a triangular ear shape
- Finish the edges with slip stitches in alternating colors for a realistic effect
Fold the base of each ear to give it dimension before sewing. Attach the ears symmetrically between rounds 6-10 of the head, approximately 6 stitches from the eyes.
Making the Horns (Make 2)
Work in a continuous spiral:
With brown yarn:
- Chain 2, work 9 sc in the 2nd chain (9)
- Rounds 2-3: Work 9 sc
- (1 sc, dec) repeat 3 times (6)
Change to yellow yarn:
5. Work 6 sc
6. Rounds 6-7: Work 6 sc
Attach the horns between rounds 15-16, spacing them 4 rounds from the ears.

Adding Decorative Spots
Create brown spots in various sizes to give your giraffe its characteristic pattern:
Small spot: Chain 2, work 8 sc in 2nd chain, slip stitch to finish
Medium spot:
- Round 1: Chain 2, work 6 sc in 2nd chain (6)
- Round 2: Inc around, slip stitch to finish (12)
Large spot:
- Round 1: Chain 2, work 8 sc in 2nd chain (8)
- Round 2: Inc around, slip stitch to finish (16)
Position the spots randomly on the body and neck for a natural look, then sew them securely in place.
Creating the Tail
Cut 6 pieces of brown yarn, each 8 cm long. Cut one piece of yellow yarn 26-30 cm long. Using the yellow yarn, tie a knot in the middle of the brown yarn bundle. Create 10-12 additional knots down the length.
With a separate piece of brown yarn, secure the tail to the body at round 8. Tie two knots at the base to prevent unraveling. Trim the tail tip evenly and comb it out with a needle or fine-tooth comb for a fluffy finish.
Final Assembly Tips
- Symmetry is key: Take your time positioning ears, horns, and eyes symmetrically for the most professional appearance.
- Secure all parts firmly: Since this is a toy, ensure all sewn components are attached securely, especially if it’s intended for children.
- Stuff generously: A well-stuffed giraffe maintains its shape beautifully and feels more substantial.
- Block if needed: If your giraffe seems uneven, light steam blocking can help even out the stitches.
Customization Ideas
Once you’ve mastered the basic pattern, consider these creative variations:
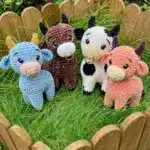
- Color combinations: Try unexpected color palettes like blue and purple for a fantasy giraffe
- Size variations: Experiment with different yarn weights to create a giraffe family
- Accessories: Add a bow tie, scarf, or small blanket for extra charm
- Facial expressions: Adjust eyebrow positioning and mouth embroidery for different personalities
Conclusion
Congratulations on completing your adorable crochet giraffe! This charming toy combines technical skill with creative expression, resulting in a unique handmade treasure. Whether you keep it for yourself, gift it to someone special, or add it to a nursery collection, your giraffe is sure to bring joy.
The beauty of this pattern lies not just in the finished product, but in the journey of creation. Each stitch represents a moment of mindfulness and creativity. As you become more comfortable with the pattern, you’ll find opportunities to make it your own, developing your personal style and technique.
Remember, every crocheter works differently – don’t worry if your giraffe looks slightly different from the example. These individual variations are what make handmade items so special and cherished. Happy crocheting!

Remember it later!
Planning to try this soon? Pin it for a quick find later!