Table of contents
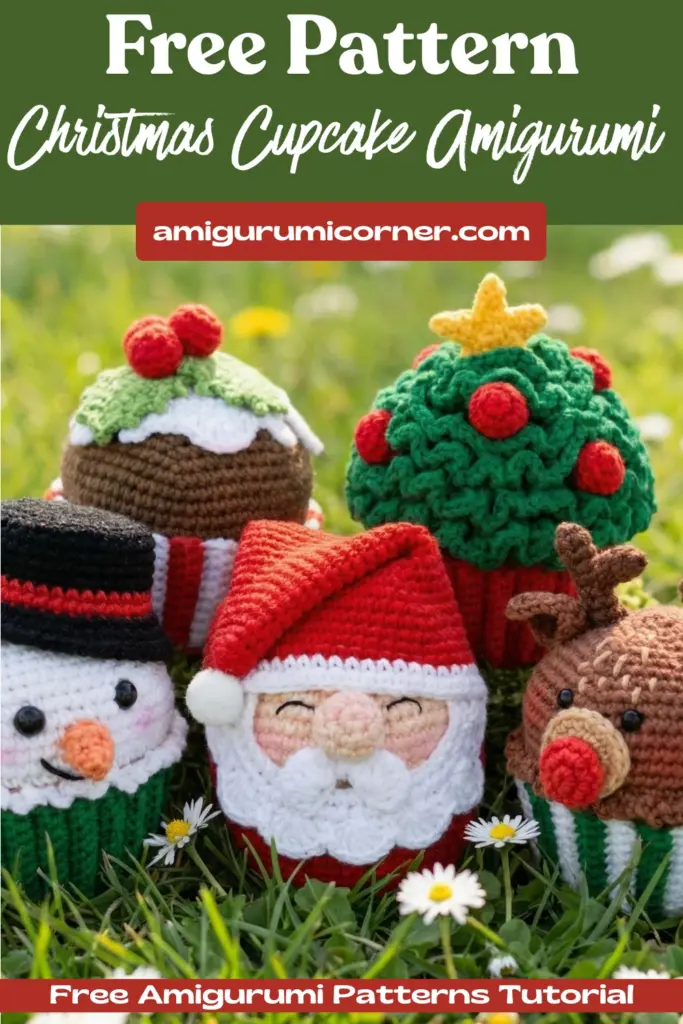
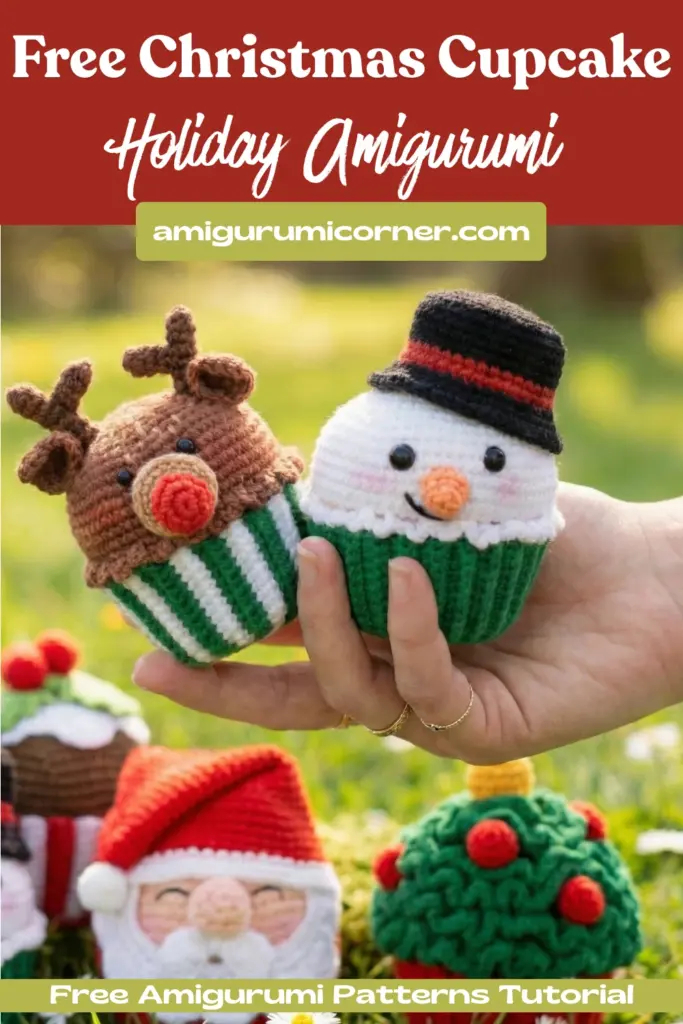
Bring holiday magic to your crochet collection with these charming Christmas cupcake amigurumi! These delightful miniatures combine the sweetness of cupcakes with festive characters, creating perfect decorations or gifts that capture the spirit of the season.
Remember it later!
Planning to try this soon? Pin it for a quick find later!
Materials and Tools Needed
Before diving into these Christmas Cupcake, gather your supplies for smooth crafting:
Yarn Requirements
- Yarn Art Jeans (55% cotton, 45% acrylic, 160m/50g) in colors: 07, 40, 26 or 90, 01 or 62, 52, 53, 23, 70, 73, 35
- Alize Cotton Baby Soft (50% cotton, 50% acrylic, 270m/100g) in color 321
- Gazzal Baby Cotton (60% cotton, 40% acrylic, 165m/50g) in colors 3443, 3448
Essential Tools
- 2.25mm crochet hook (primary)
- 2mm crochet hook (for Gazzal Baby Cotton details)
- Big-eyed needle
- Hot glue gun
- Synthetic fiberfill
- Hard plastic from table place mats or paper folders
- Wooden manicure sticks
- 8mm safety eyes (2 pairs)
- Pink and red oil pastels for tinting
- Stiff brush
- White synthetic pompom (1.5-2cm)

Understanding the Pattern Basics
Stitch Abbreviations
- AR – Adjustable Ring (Magic Ring)
- ch – chain
- sc – single crochet
- htr – half treble crochet
- dc – double crochet
- sl st – slip stitch
- dec – decrease
- inc – increase
- **( )n* – repeat combination in brackets n times
Important Notes
The finished cupcakes measure approximately 10-11cm in height. All Yarn Art Jeans and Alize Cotton Baby pieces use the 2.25mm hook, while Gazzal Baby Cotton details require the 2mm hook. Work spiral rounds without turning chains unless specified, and include turning chains for back-and-forth rows.
Christmas Pudding Cupcake Pattern
Creating the Base
Start with brown yarn to form the cupcake bottom:
- Make 6 sc in AR
- Inc×6 = 12 sc
- (1 sc, inc)×6 = 18 sc
- 1 sc, inc, (2 sc, inc)×5, 1 sc = 24 sc
- (3 sc, inc)×6 = 30 sc
- 2 sc, inc, (4 sc, inc)×5, 2 sc = 36 sc
Finish with a slip stitch but don’t fasten off. Cut a plastic circle slightly smaller than your crocheted piece and hot glue it to the wrong side for stability.
Building the Cupcake Body
- Work 36 sc through back loops only
- Continue with 36 sc through both loops
- (5 sc, inc)×6 = 42 sc
10-12. Work 3 rounds straight (42 sc each) - (6 sc, inc)×6 = 48 sc
14-16. Work 3 rounds straight (48 sc each) - Through back loops: (3 sc, inc)×12 = 60 sc
18-20. Work 3 rounds straight (60 sc each)
Shaping the Top
Begin decreasing while stuffing:
21. (8 sc, dec)×6 = 54 sc
22. (7 sc, dec)×6 = 48 sc
23. (6 sc, dec)×6 = 42 sc
24. (5 sc, dec)×6 = 36 sc
25. (4 sc, dec)×6 = 30 sc
26. (3 sc, dec)×6 = 24 sc
27. (2 sc, dec)×6 = 18 sc
28. (1 sc, dec)×6 = 12 sc
29. Decrease every stitch until closed, fasten off
White Icing with Drips
Using white yarn:
- 6 sc in AR
- Inc×6 = 12 sc
- (1 sc, inc)×6 = 18 sc
- (2 sc, inc)×6 = 24 sc
- (3 sc, inc)×6 = 30 sc
- (4 sc, inc)×5 = 36 sc
Create realistic drips by chaining 3, working 2 sc down the chain, then adding another sc through the side loop. Continue around with 2-3 sc between drips. For shell-shaped drips: skip 1 sc, work 6 dc in 1 stitch, skip 1, then 1 sc.
Holly Decoration
Using Gazzal Baby Cotton for leaves:
- Chain 11, work: 1 sl st, 1 sc, 1 htr, 4 dc, 1 htr, 1 sc, 1 sl st
- Turn and repeat on the other side
- Add decorative edges: 1 sc, 3 ch, sl st in first ch, 2 sc along leaf
- Create 2 leaves
For berries (make 3):
- 6 sc in AR
- Inc×6 = 12 sc
3-4. Work 2 rounds straight, stuff - Decrease until closed
Snowman Cupcake Variation
The Snowman Base
Follow the basic cupcake pattern through round 16 using beige yarn, then switch to white:
- Through back loops: (3 sc, inc)×12 = 60 sc
18-22. Work 5 rounds straight (60 sc)
Insert safety eyes between rounds 5-6 of the white section, spacing them 7 stitches apart.
Creating the Hat
With black yarn:
1-6. Follow increases to reach 36 sc
7. Work 36 sc through back loops
8-10. Work 3 rounds of 36 sc
11-12. Change to red, work 2 rounds
13. Change to black, through front loops: (5 sc, inc)×6 = 42 sc
14. (6 sc, inc)×6 = 48 sc
15. (7 sc, inc)×6 = 54 sc
Carrot Nose
- 3 sc in AR
- Inc×3 = 6 sc
- (1 sc, inc)×3 = 9 sc
- (2 sc, inc)×3 = 12 sc
Roll into a cone shape and secure with thread.
Rudolf Reindeer Cupcake
Special Features
Create this festive reindeer following the snowman pattern but using brown yarn instead of white for the top portion. Position 6mm or 8mm safety eyes between rounds 6-7.
Antlers Construction
Insert halved manicure sticks (protruding 2.5cm) where antlers should be placed. Crochet tubes with dark brown yarn:
- Work 7 sc in AR, then continue spiral rounds to cover stick length
- Create smaller branch pieces (1.5cm) and attach to sides
Distinctive Muzzle
Using beige yarn:
- Chain 3, work 3 sc in second chain, 3 sc in third
- Inc×6 = 12 sc
- (1 sc, inc)×6 = 18 sc
Create a red nose following the holly berry pattern, then attach to the muzzle center.
Santa Claus Cupcake Christmas
The Santa Hat
With red yarn, create a tapered hat:
- Start with 6 sc in AR
- Gradually increase every other round
- Continue to 54 sc total
- Add white trim for final 2 rounds
Beard and Mustache
For the beard:
- Chain 42, join with sl st
- (6 sc, inc)×6 = 48 sc
- (7 sc, inc)×6 = 54 sc
- Create shell edging: skip 1, 6 dc in 1, skip 1, sc (repeat 7 times)
Mustache:
- Chain 7, work 6 sc
- Add 2 shell stitches
- Sew under nose with center gathered
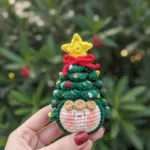
Christmas Tree Cupcake
Tree Structure
Begin with the standard beige base through round 16, then switch to green:
- Through back loops: 1 sc, 1 htr, 46 dc
18-22. Continue decreasing through back loops while stuffing
Create the tree’s layered effect by working 4 dc in each remaining front loop for approximately 3 rounds, then 3 dc per stitch to finish.
Star Topper
Using yellow yarn:
- 5 sc in AR, sl st
- (4 ch, 1 sl st, 2 sc, 1 htr, sl st in next)×5 for 5 points
- Create second star and sew together
- Attach to tree top

Festive Cupcake Liners
Striped Liner Pattern
Create charming red and white striped liners:
- Start with 36 sc base in chosen color
- Chain 11, work 10 sc, change colors on last stitch
- Alternate colors every row
- Work through back loops only
- Use turning chains from edge to center
- Skip stitches appropriately when returning to center
Assembly Tips
- Thread needle and sew first and last rows together
- Liners can be fixed permanently or left removable
- Match liner colors to each character theme
Finishing Touches and Details
Tinting Techniques
Apply realistic blush to cheeks:
- Color paper heavily with oil pastel
- Use stiff brush to pick up color
- Apply gently to desired areas
- Build color gradually for natural effect
Professional Assembly
- Reinforce all bases with plastic circles
- Use hot glue for permanent attachments
- Leave some elements removable for versatility
- Ensure all safety eyes are secure before gifting
Conclusion
These enchanting Christmas cupcake amigurumi combine traditional holiday characters with whimsical cupcake designs, creating unique decorations that spread joy throughout the season. Each character brings its own personality—from the jolly Santa with his fluffy beard to the sparkling Christmas tree with its golden star.
Whether displayed as holiday decorations, given as handmade gifts, or used in festive photography, these cupcakes capture the magic of Christmas in yarn form. The interchangeable liners add versatility, while the detailed finishing touches bring each character to life. Start your collection today and watch as these sweet creations become cherished holiday traditions for years to come!


Remember it later!
Planning to try this soon? Pin it for a quick find later!