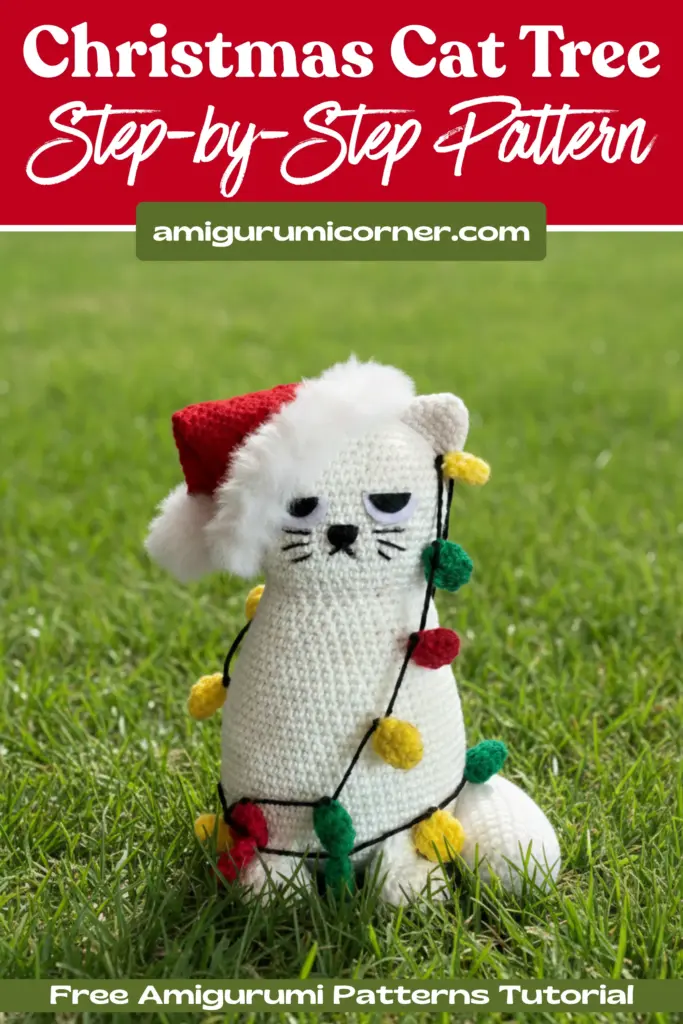
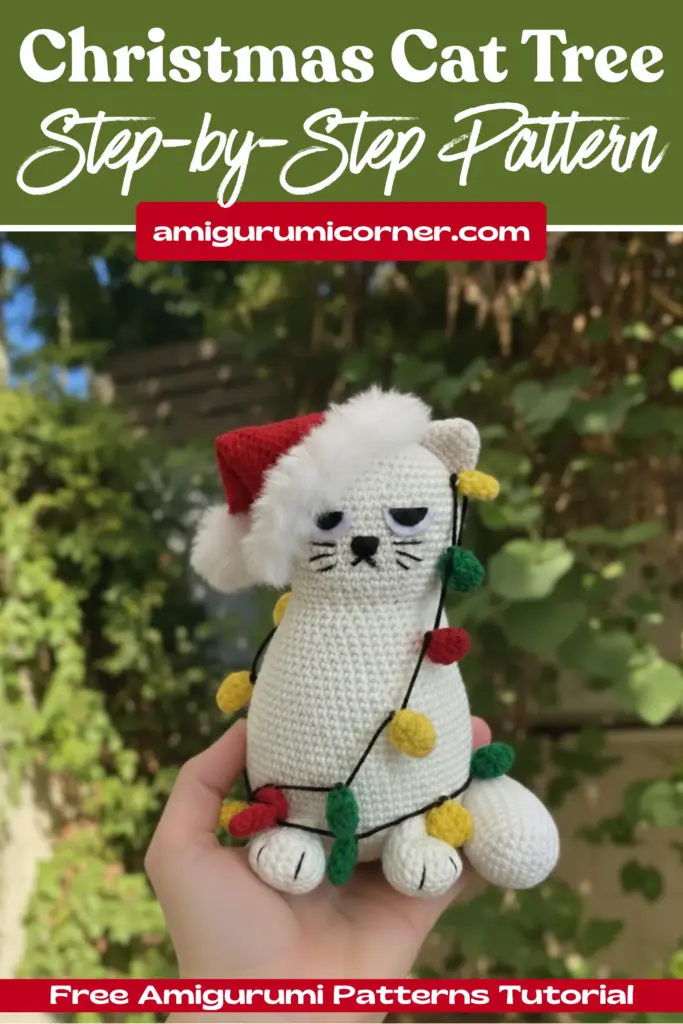
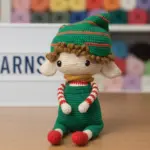
Looking for a charming holiday craft project? This festive christmas cat tree amigurumi is the perfect addition to your seasonal décor or a thoughtful handmade gift. With its sweet expression, colorful garland, and cheerful Santa hat, this crocheted feline captures the magic of the Christmas season.
What You’ll Need to Create Your Christmas Cat
Yarn Requirements
For this project, you’ll need sport weight yarn in several festive colors:
- Milk/Cream (180 yards) – for the cat’s body
- Ginger/Orange (180 yards) – for spot details and tail
- White Plush Yarn – for the hat’s fluffy trim
- Black (180 yards) – for details
- Yellow (180 yards) – for garland bulbs
- Red (180 yards) – for the Santa hat and garland
- Green (180 yards) – for garland bulbs
Additional Supplies
- 2.00mm crochet hook
- White and black felt (or paper/fabric alternatives)
- Craft glue
- Wire for the star topper
- Black thread for embroidery
- Polyester stuffing
- Tapestry needle for sewing
Note: You can substitute different yarn weights, but remember that your finished cat’s size will vary accordingly.
Understanding the Pattern Basics
This christmas cat tree pattern uses standard crochet terminology and techniques. The cat is worked in continuous rounds unless otherwise specified. You’ll need to be familiar with basic stitches including:
- Single crochet (SC)
- Increases (INC)
- Decreases (DEC)
- Magic ring (MR)
- Front loops only (FLO)
- Slip stitch (SS)
Remember to stuff your pieces as you work, making it easier to achieve a smooth, well-shaped finish.
Crafting the Body
Creating the Base
Start with a foundation chain of 10 stitches, then work around both sides to create an oval shape. The body begins with 22 stitches and gradually increases to 64 stitches through careful shaping.
Work rounds 9-15 even with 64 stitches to build height, then begin strategic decreasing to shape the torso. The body tapers from 64 stitches down to 36 stitches over several rounds, creating the cat’s distinctive form.
Two Pattern Variations
This christmas cat tree pattern offers flexibility with two options:
- Cat with spot: Follow the color-changing instructions to create ginger patches
- Plain cat: Work entirely in milk-colored yarn for a simpler approach
When changing colors, always switch at the last step of the final stitch in the previous color for neat transitions.
Shaping the Head
The head continues directly from the body, working into the front loops only of round 32. This creates a subtle ridge that defines where the body meets the head.
Starting with 36 stitches, increase to 54 stitches to form the rounded head shape. Work several even rounds before beginning decreases that shape the muzzle and top of the head.
For the spotted version, continue following the color-change pattern through the head. The final rounds decrease rapidly from 24 stitches down to 6, which you’ll close by weaving through the front loops.
Adding Character with Ears
Crochet two triangular ears, making one in milk yarn and one in ginger to match your cat’s coloring. Each ear starts with 6 stitches in a magic ring and increases to 18 stitches over five rounds.
Fold each ear in half and slip stitch across the opening to create a cupped shape. Position and sew the ears between rows 10 and 17 of the head for the most natural placement.

Remember it later!
Planning to try this soon? Pin it for a quick find later!
The Distinctive Curved Tail
The tail is one of this pattern’s most charming features, with a gentle curve created through strategic slip stitch placement.
Begin with 6 stitches and increase to 24 stitches over four rounds. Work even for several rounds, then introduce 5 slip stitches on one side while continuing single crochet on the other side. Gradually shift the position of these slip stitches to create the tail’s characteristic bend.
Decrease from 24 to 12 stitches over the final rounds, stuff lightly, then fold and close the opening. Attach the tail to the body as shown in your reference images.
Crafting the Paws
Shaping the Feet
Each paw begins with a small oval worked around a foundation chain of 4 stitches. This creates the rounded toe area. After working several rounds to build the foot, begin decreasing to shape the leg.
Create dimension by working strategic decreases that form the paw pad area. After row 8, stuff the foot portion firmly.
Adding Toe Definition
Using black thread and a tapestry needle, make small stitches to define three toes on each paw. Make a stitch, pull tight to create an indent, and repeat for realistic texture.
The legs narrow to 10 stitches and remain mostly unstuffed for flexibility. Fold each completed paw in half and slip stitch closed, leaving a tail for sewing.
Attach the paws to the 11th round of the body, spacing them 5 stitches apart. Also tack the 5th row of each paw to the 6th row of the body for stability.
Creating Facial Features
Eyes That Sparkle
Cut eye shapes from white and black felt following the pattern template. If felt isn’t available, sturdy paper or fabric works well. Layer the black pupils on the white eye bases with craft glue.
Position the completed eyes between rows 8 and 12 of the head, spacing them appropriately for a sweet expression.
Embroidered Details
Using black embroidery thread, carefully stitch:
- A small triangular nose
- A simple mouth line
- Eye outlines for definition
- Delicate whiskers extending from the muzzle
These hand-stitched details bring your christmas cat tree to life with personality and charm.
The Festive Santa Hat
Building the Hat Base
Create a foundation chain of 42 stitches and join into a round. Work three even rounds, then begin decreasing gradually. The strategic decrease pattern shapes the hat from a 42-stitch brim to a 6-stitch point at the top.
Continue working rounds with periodic decreases, maintaining the conical shape. The hat measures approximately 27 rounds from brim to tip.
Adding the Fluffy Trim
Attach white plush yarn to the foundation chain of the hat. If using plush yarn, work 2 rounds of single crochet. With regular yarn, work 3 rounds for adequate fullness.
This creates the classic white fur trim seen on Santa hats.
Two Pompom Options
Option 1 – Simple Pompom:
Use white plush yarn to create a small sphere starting with 6 stitches and increasing to 24. After working even rounds, decrease back to 6, stuff, and close.
Option 2 – Traditional Pompom:
Create a fluffy pompom using traditional yarn-wrapping techniques for a more textured look.
Sew the pompom securely to the tip of the hat, then fold down the hat’s point and tack it to the base for the classic floppy Santa hat appearance.
Stringing the Colorful Garland
Creating Festive Bulbs
Make individual light bulbs in yellow, green, and red yarn. Each bulb starts with 5 stitches, increases to 10, then decreases back to 5 stitches. Work the yarn end inside when closing each bulb for a neat finish.
Create as many bulbs as desired for your garland length.
Assembling the Garland
Cut a length of black yarn double the desired garland length. Thread through a needle and insert through the front loops of each bulb, alternating colors. Make several stitches through each bulb to secure it in place along the strand.
Fix one end of the garland at the tail base, drape it across the cat’s body, and secure the other end near an ear. This creates the appearance of the cat playfully tangled in Christmas lights.

The Finishing Touch: A Star on Top
Crocheting the Star
In a magic ring, work 5 pointed sections using this sequence for each point:
- 1 single crochet
- 1 double crochet
- 1 chain
- 1 slip stitch in 2nd loop from hook
- 1 double crochet
Join with a slip stitch. Pull the magic ring tight and crochet a second identical star piece.
Adding Structure
Cut a 2cm (approximately 0.8 inch) piece of wire and create a small loop at one end. Place this looped end between your two star pieces and sew around the edges to secure, leaving the straight wire end free.
Insert the wire end down through the center of the head to crown your Christmas cat with a golden star.
Tips for Success
Tension Matters
Maintaining consistent tension throughout your project ensures even shaping and professional results. Your stitches should be firm enough that stuffing doesn’t show through, but not so tight that the fabric becomes stiff.
Stuff as You Go
Don’t wait until pieces are complete to add stuffing. Working in small amounts as you progress makes it easier to achieve smooth, lump-free results, especially in areas with significant shaping.
Color Changes
For clean color transitions, always change colors during the last yarn over of the previous stitch. This places the color change exactly where you want it rather than creating a visible jog.
Blocking and Shaping
After completing your cat, you may want to lightly steam or mist pieces to help them hold their shape. The hat, in particular, benefits from light shaping to achieve that perfect floppy appearance.
Customization Ideas
While this christmas cat tree pattern creates a classic Christmas cat, consider these variations:
Color Schemes
- Create a white cat with gray spots for a snowy appearance
- Use brown and cream for a more realistic tabby coloring
- Try all-white with blue accents for a winter wonderland theme
Accessory Options
- Add a small scarf or bow tie
- Create miniature presents for the cat to “guard”
- Make additional garland colors for variety
- Design matching ornaments in complementary colors
Size Adjustments
- Use bulkier yarn and a larger hook for a bigger display piece
- Try finer yarn for miniature ornament-sized versions
- Adjust the body length for a more elongated or compact cat
Care Instructions
Your finished christmas cat tree will last for many holiday seasons with proper care:
- Spot clean with mild soap and water when needed
- Store in a cool, dry place away from direct sunlight
- Avoid crushing or compressing the stuffing during storage
- Keep away from pets who might mistake it for a toy
The Joy of Handmade Holiday Décor
Creating this christmas cat tree offers more than just a festive decoration. The meditative rhythm of crochet provides a peaceful escape during the often-hectic holiday season. Each stitch carries the warmth of time spent crafting something meaningful.
Whether you’re making this cat for yourself or as a gift, you’re creating something that carries personal touches no store-bought item can match. The slight variations in tension, the color choices, and the finishing details make each cat unique.
Conclusion
This christmas cat tree pattern combines fundamental crochet techniques with clever construction to create an endearing holiday decoration. From the carefully shaped body to the whimsical accessories, each element contributes to the overall charm.
The pattern’s clear instructions make it accessible for intermediate crocheters, while the detailed shaping provides enough interest for more experienced makers. With options for customization and two construction variations, you can make this pattern your own.
As you complete your festive feline friend, take pride in the handcrafted treasure you’ve created. Display your Christmas cat prominently where its cheerful presence can spread holiday joy throughout the season. Better yet, make several to share with friends and family—nothing says “handmade with love” quite like a custom crocheted gift.
Gather your supplies, set aside some cozy crafting time, and bring this delightful Christmas cat to life. Happy crocheting, and may your holidays be merry and bright!
Remember it later!
Planning to try this soon? Pin it for a quick find later!