Table of contents
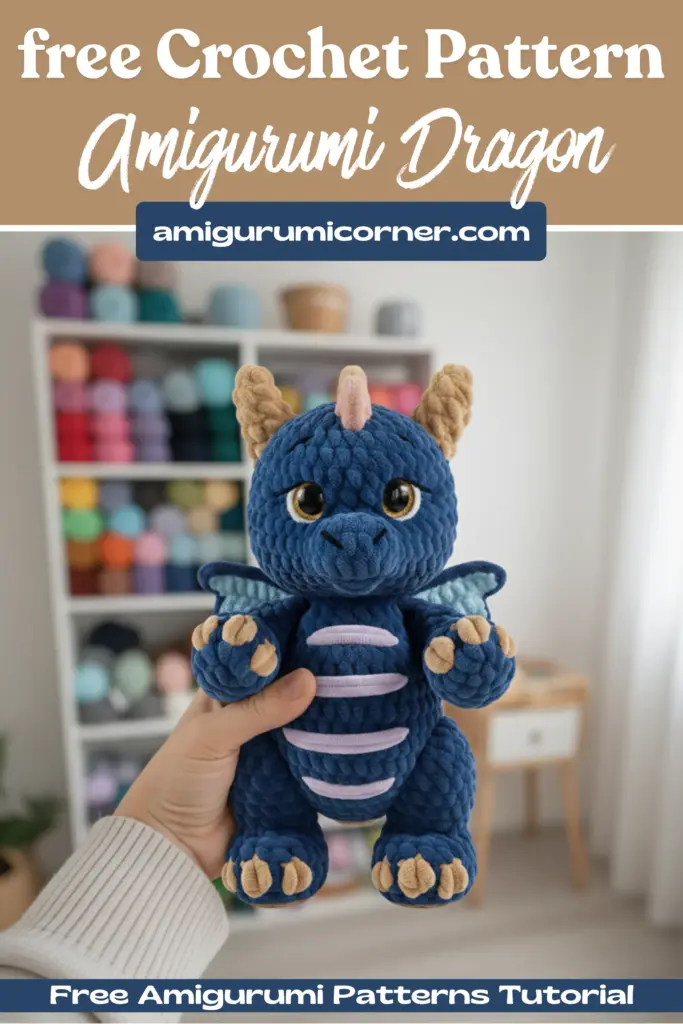
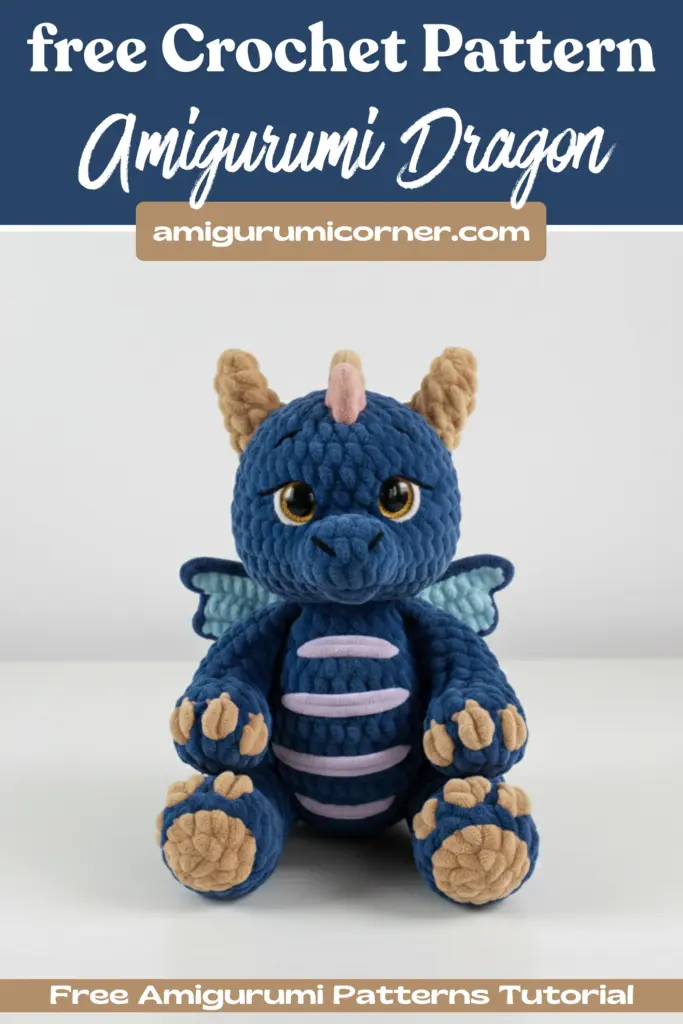
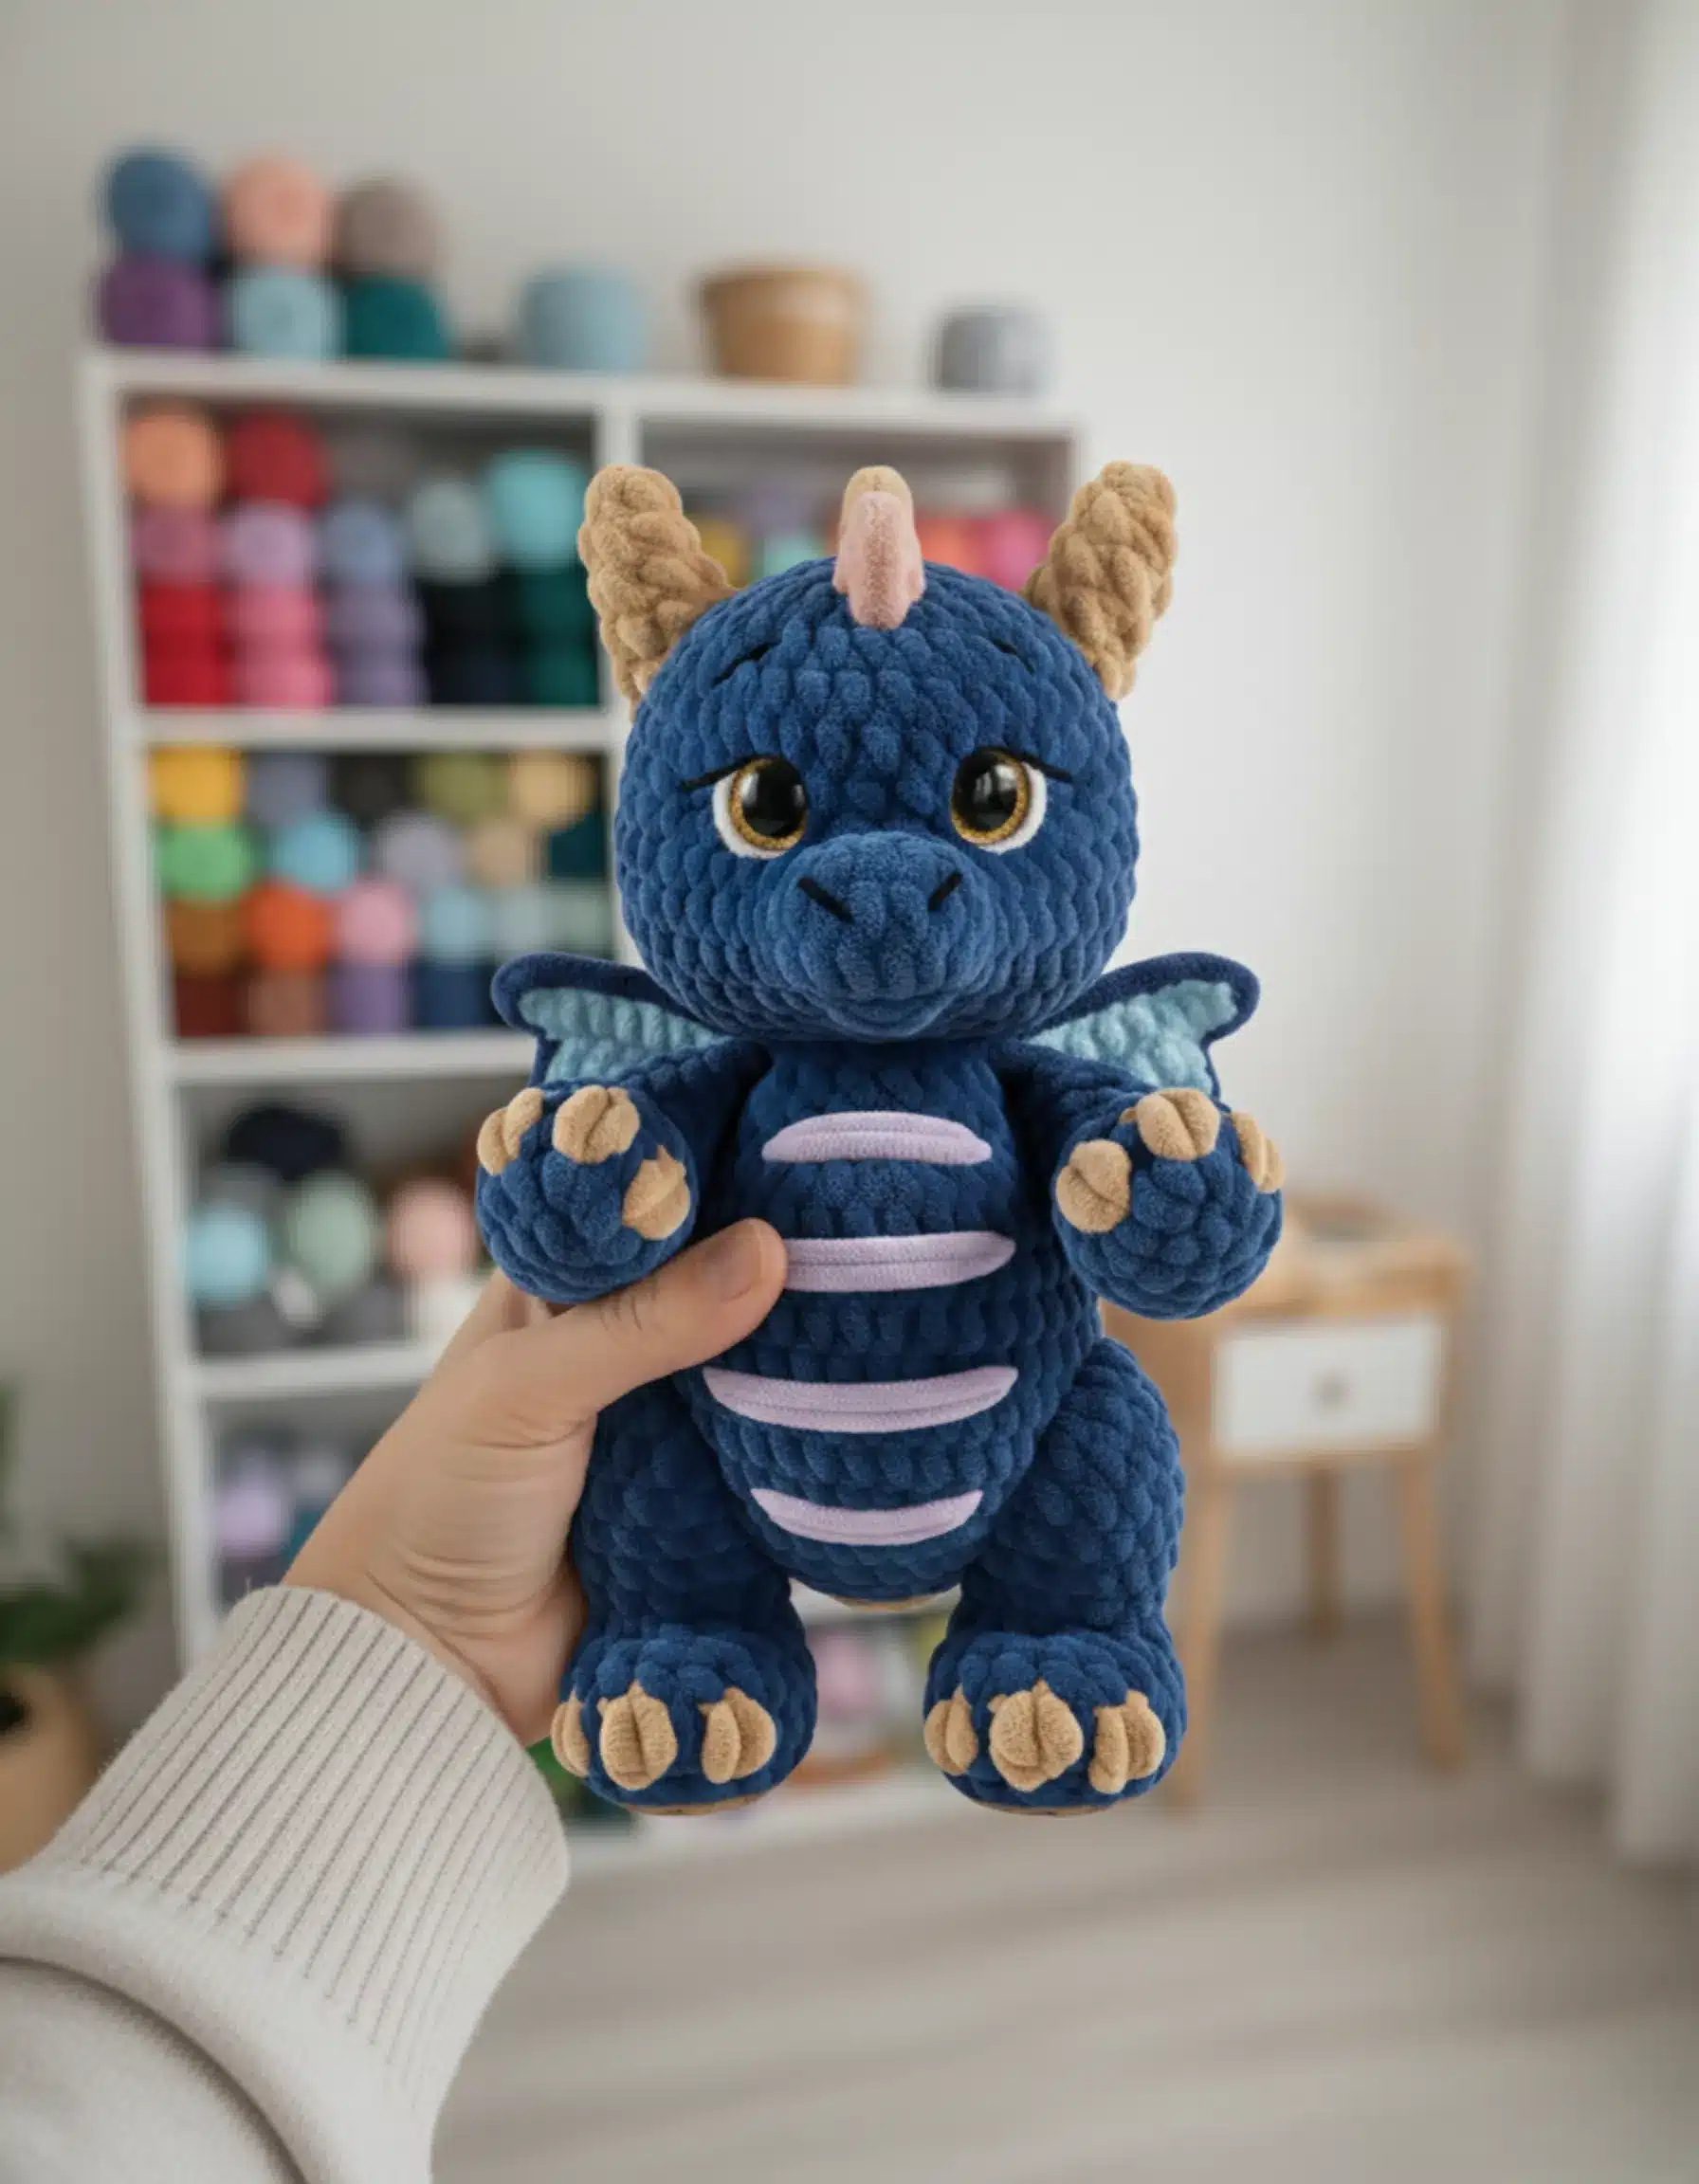
Looking to create your own charming dragon companion? This comprehensive guide will walk you through crafting an adorable amigurumi dragon from start to finish. Whether you’re a seasoned crocheter or looking to expand your skills, this pattern offers a delightful project that results in a cuddly, handmade treasure.
Remember it later!
Planning to try this soon? Pin it for a quick find later!
What You’ll Need
Materials
Before diving into the pattern, gather these essential supplies:
Yarn:
- Plush yarn (Himalaya Dolphin Baby or similar) in purple for the main body color
- White plush yarn for secondary color accents
- Acrylic yarn for facial details and eye embroidery
Tools and Notions:
- 4mm crochet hook
- 16mm safety eyes
- Yarn needle
- Scissors
- Stitch marker
- Hollow fiber stuffing
Understanding the Abbreviations
Familiarize yourself with these crochet terms before beginning:
- MR – Magic Ring
- ch – Chain
- st – Stitch
- sl st – Slip stitch
- sc – Single crochet
- dec – Decrease
- inc – Increase (2 sc in one stitch)
- BLO – Back loop only
- hdc – Half double crochet
- DC – Double crochet
- BBL – Bobble stitch (2 double crochet bobble stitch)
- cc – Color change
- FO – Fasten off

Creating the Legs (Make 2)
Start with your main color:
- Round 1: Chain 4, from the 2nd chain from hook: 2 sc, 3 sc in one stitch, 2 sc (continue crocheting the second side of chain), inc
- Round 2: inc, 2 sc, 3 inc, 2 sc, inc (14)
- Round 3: inc, 5 sc, inc, 7 sc (16)
- Round 4: 6 sc, (BBL, sc) x3, 4 sc (16) – This round involves color changing with bobble stitches
- Round 5: 16 sc around (16)
- Round 6: 5 sc, 4 dec, 3 sc (12)
- Round 7: inc, 2 sc, 3 dec, 3 sc (10) – Begin stuffing
- Round 8: 5 sc, 2 inc, 3 sc (12)
- Round 9: inc, 7 sc, inc, 3 sc (14)
- Round 10: (2 sc, inc) x4, 2 sc (18)
- Round 11: 6 sc, inc, 8 sc, inc, 2 sc (20)
- Round 12: 20 sc around (20) – Continue stuffing
- Round 13: (3 sc, dec) x4 (16)
- Round 14: dec, 6 sc, dec, 6 sc (14)
- Round 15: dec, 6 sc, dec, 4 sc (12)
Work 1 sc, then fold in half and crochet 5 sc through both sides. Cut yarn and fasten off.
Crafting the Arms (Make 2)
Begin with your main color:
- Round 1: 7 sc in a magic ring
- Round 2: 7 inc (14)
- Round 3: 4 sc, (BBL, sc) x3, 4 sc (14) – Color change round with bobble stitches
- Round 4: 14 sc around (14)
- Round 5: 3 sc, 4 dec, 3 sc (10)
- Round 6: 10 sc around
- Round 7: 5 sc, inc, 4 sc (11) – Begin stuffing
- Rounds 8-11: 11 sc around (11) – Work 4 rows
- Round 12: 6 sc, dec, 3 sc (10) – Continue stuffing
Work 1 sc, fold in half, and crochet 5 sc through both sides. Cut yarn and fasten off.
Building the Tail
Start with your main color and begin stuffing after Round 14:
- Round 1: 6 sc in a magic ring
- Round 2: 6 sc around (6)
- Round 3: (1 sc, inc) x3 (9)
- Rounds 4-5: 9 sc around (9) – Work 2 rows
- Round 6: inc, 4 sc, inc, 3 sc (11)
- Round 7: 11 sc around (11)
- Round 8: inc, 4 sc, inc, 5 sc (13)
- Round 9: 13 sc around (13)
- Round 10: inc, 12 sc (14)
- Round 11: 14 sc around (14)
- Round 12: (inc, 6 sc) x2 (16)
- Rounds 13-18: 16 sc around (16) – Work 6 rows
Finish with 9 sc, cut yarn, and fasten off.

Constructing the Body and Head
This is where your dragon really takes shape:
- Round 1: 6 sc in a magic ring
- Round 2: 6 inc (12)
- Round 3: (sc, inc) x6 (18)
- Round 4: (2 sc, inc) x6 (24)
- Round 5: (3 sc, inc) x6 (30)
- Round 6: 1 sc, inc, (4 sc, inc) x5, 3 sc (36)
- Round 7: 6 sc, 5 sc together with leg, 14 sc, 5 sc together with leg, 2 sc, 4 sc together with tail (36)
- Round 8: 4 sc together with tail, 4 sc, inc, 18 sc, inc, 4 sc, 4 sc on the tail (38)
- Round 9: 4 sc on the tail, 34 sc (38) – Begin stuffing the tail
- Rounds 10-12: 38 sc around (38) – Work 3 rows
- Round 13: 9 sc, dec, 17 sc, dec, 8 sc (36)
- Round 14: (4 sc, dec) x6 (30)
- Round 15: (3 sc, dec) x6 (24) – Begin stuffing the body
- Round 16: 24 sc around (24)
- Round 17: 6 sc, 5 sc together with arm, 7 sc, 5 sc together with arm, 1 sc (24)
- Round 18: (2 sc, dec) x6 (18)
- Round 19: 18 inc
- Round 20: (5 sc, inc) x6 (42)
- Round 21: 17 sc, inc, 7 sc, inc, 16 sc (44)
- Rounds 22-24: 44 sc around (44) – Work 3 rows
- Round 25: 10 sc, (1 sc, dec) x8, 10 sc (36)
- Rounds 26-28: 36 sc around (36) – Work 3 rows; add safety eyes between Rounds 26 and 27, approximately 6 stitches apart
- Round 29: (4 sc, dec) x6 (30)
- Round 30: (3 sc, dec) x6 (24)
- Round 31: (2 sc, dec) x6 (18)
- Round 32: (sc, dec) x6 (12)
- Round 33: 6 dec
- Finish stuffing, cut yarn, and close the hole.
Adding the Details
Horns (Make 2)
- Round 1: 4 sc in a magic ring
- Round 2: (1 sc, inc) x2 (6)
- Round 3: 6 sc
- Round 4: 1 sc, 3 sl st, 1 sc, inc (7)
- Round 5: 5 sc, inc, 1 sc, sl st
Cut yarn, leaving a tail for sewing. Stuff lightly.
Wings (Make 2)
- Round 1: Chain 15, from the 2nd chain from hook: 14 sc, chain 1, turn
- Round 2: 12 sc (BLO), chain 1, turn
- Round 3: 12 sc (BLO), chain 1, turn
- Round 4: 9 sc (BLO), chain 1, turn
- Round 5: 9 sc (BLO), chain 1, turn
- Round 6: 6 sc (BLO), chain 1, turn
- Round 7: 6 sc (BLO)
Cut yarn, leaving a tail for sewing.
Mouth
Round 1: 4 sc in a magic ring
Cut yarn, leaving a tail for sewing.

Bringing Your Dragon to Life
After completing all the individual pieces, it’s time for assembly and embroidery. Position the horns symmetrically on top of the head and sew securely. Attach the wings to the back, ensuring they’re placed evenly. Sew the mouth piece to create an adorable expression.
For facial embroidery, use acrylic yarn to add eyebrows, eye highlights, and any additional character details. The placement of these features will give your dragon its unique personality.
Tips for Success
- Maintain consistent tension throughout your work for even stitches
- Stuff firmly but not too tightly to maintain the dragon’s shape while keeping it cuddly
- Take your time with color changes to achieve clean transitions, especially around the bobble stitches
- Position appendages carefully before sewing to ensure your dragon is well-balanced
Making It Your Own
While this pattern creates an adorable purple and white dragon, feel free to customize your creation! Try different color combinations, add stripes or spots, or experiment with different yarn textures. Each dragon you create will have its own unique charm.
Final Thoughts
Creating this amigurumi dragon is a rewarding project that combines various crochet techniques. From magic rings to bobble stitches, color changes to assembly, you’ll practice multiple skills while crafting an enchanting handmade toy. Whether you’re making this dragon as a gift or for your own collection, the time and care you invest will result in a treasured keepsake.
Remember, you’re welcome to sell finished items you personally handmade from this pattern. Each stitch represents your skill and creativity, resulting in a one-of-a-kind creation that brings joy and magic into the world.
Happy crocheting, and may your dragon bring smiles wherever it goes!
You’ll Love Also This
Remember it later!
Planning to try this soon? Pin it for a quick find later!