Table of contents
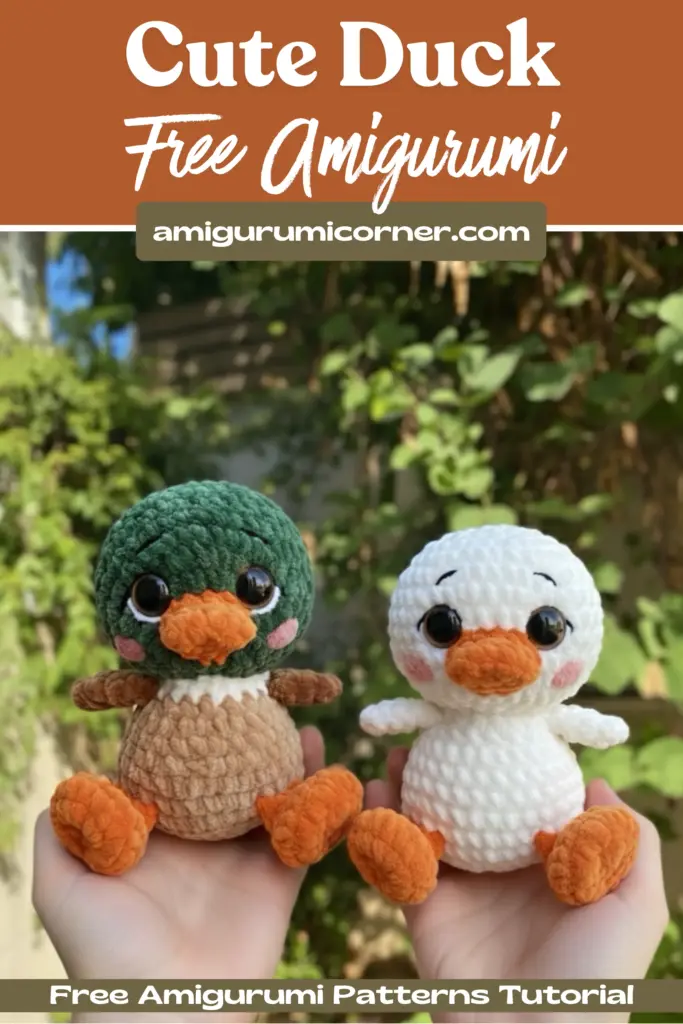
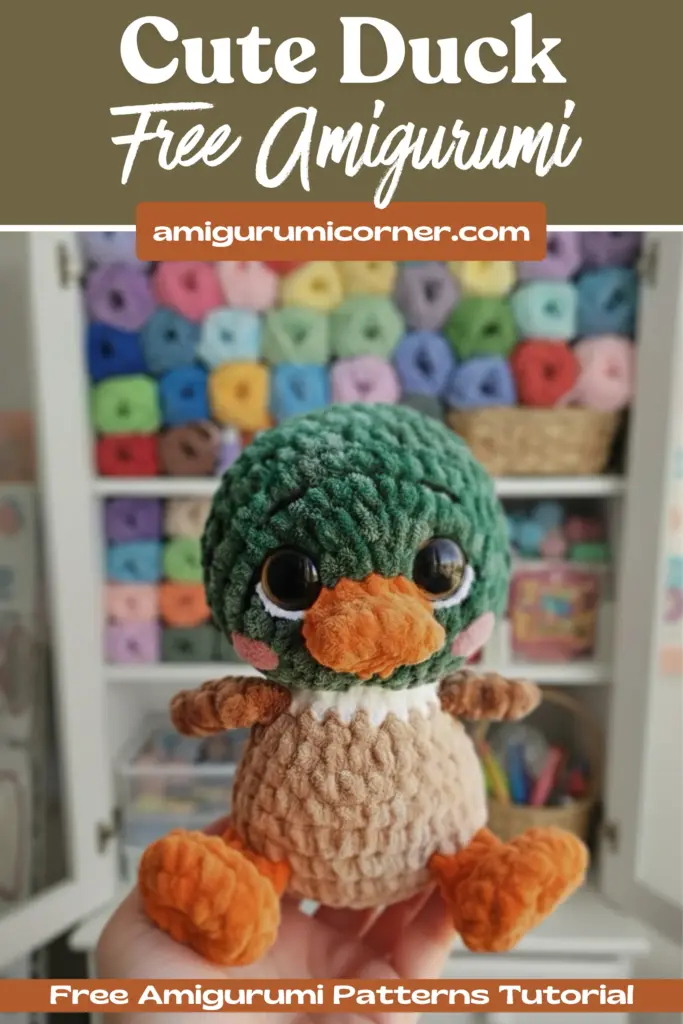
Are you ready to create the cutest little companion for yourself or a loved one? This comprehensive crochet pattern will guide you through making an irresistibly charming amigurumi duckling that stands approximately 15cm tall. Perfect for crafters with basic amigurumi experience, this project combines plush yarn for a soft, huggable finish with detailed shaping techniques to bring your duckling to life.
Remember it later!
Planning to try this soon? Pin it for a quick find later!
Materials You’ll Need
Yarn Requirements
Plush Yarn (Himalaya Dolphin Baby or equivalent – 100g/120m):
- Main color: 50-60 grams
- Additional colors: 5-20 grams
Semi-Cotton Yarn (YarnArt Jeans 50g/160m):
- Black (color 53) for facial details
- Color options: 360, 363, 313, 317, 337, 368
Tools and Notions
- 3.5mm crochet hook
- 16mm safety eyes
- 8-10cm sewing needle
- Strong nylon thread for facial shaping
- Sewing pins for part placement
- Polyester fiberfill stuffing
- Tapestry needle with wide eye
- Stitch markers
- Scissors
- Two knitting needles or long pins for head attachment
- Lighter for finishing yarn ends

Understanding the Pattern
Stitch Abbreviations
- ch – chain stitch
- ss – slip stitch
- ring – magic ring (amigurumi ring)
- sc – single crochet
- hdc – half double crochet
- inc – increase (2 sc in one stitch)
- dec – decrease
- (…) × 6 – repeat instructions in parentheses 6 times
Important Tips Before You Begin
About Size: Your finished duckling’s dimensions will vary based on your personal tension, yarn quality, hook size, and crochet technique. The original pattern uses the “tick” method and produces a 15cm tall duckling.
Tension Matters: Use a hook no larger than 3.5mm and maintain tight tension to prevent gaps in your work. The stuffing should not show through your stitches.
Stuffing Technique: Proper stuffing is crucial for achieving the adorable rounded shape. Stuff firmly but not overly tight, emphasizing the cheeks and belly while leaving hands and feet softer. Shape as you go.
Finishing Plush Yarn: Lightly singe plush yarn ends with a lighter to prevent fuzzing and create clean finishes.
Creating the Head
Begin with yellow yarn for the beak portion.
Round 1: Chain 5, working from the second chain from hook: inc, 2sc, 3sc in the final chain, 3sc (10 stitches total)
Rounds 2-3: 10sc (10) for 2 rounds
At this stage, your piece should appear slightly flat and beak-shaped.
Round 4: Work 2 triple increases, 3sc, 2 triple increases, 3sc (18) Note: A triple increase means working 3 sc into one stitch.
Change to your main color yarn.
Round 5: 1sc, inc, 2 triple increases, 8inc, 2 triple increases, inc, 3sc (36)
Rounds 6-12: 36sc (36) for 7 rounds
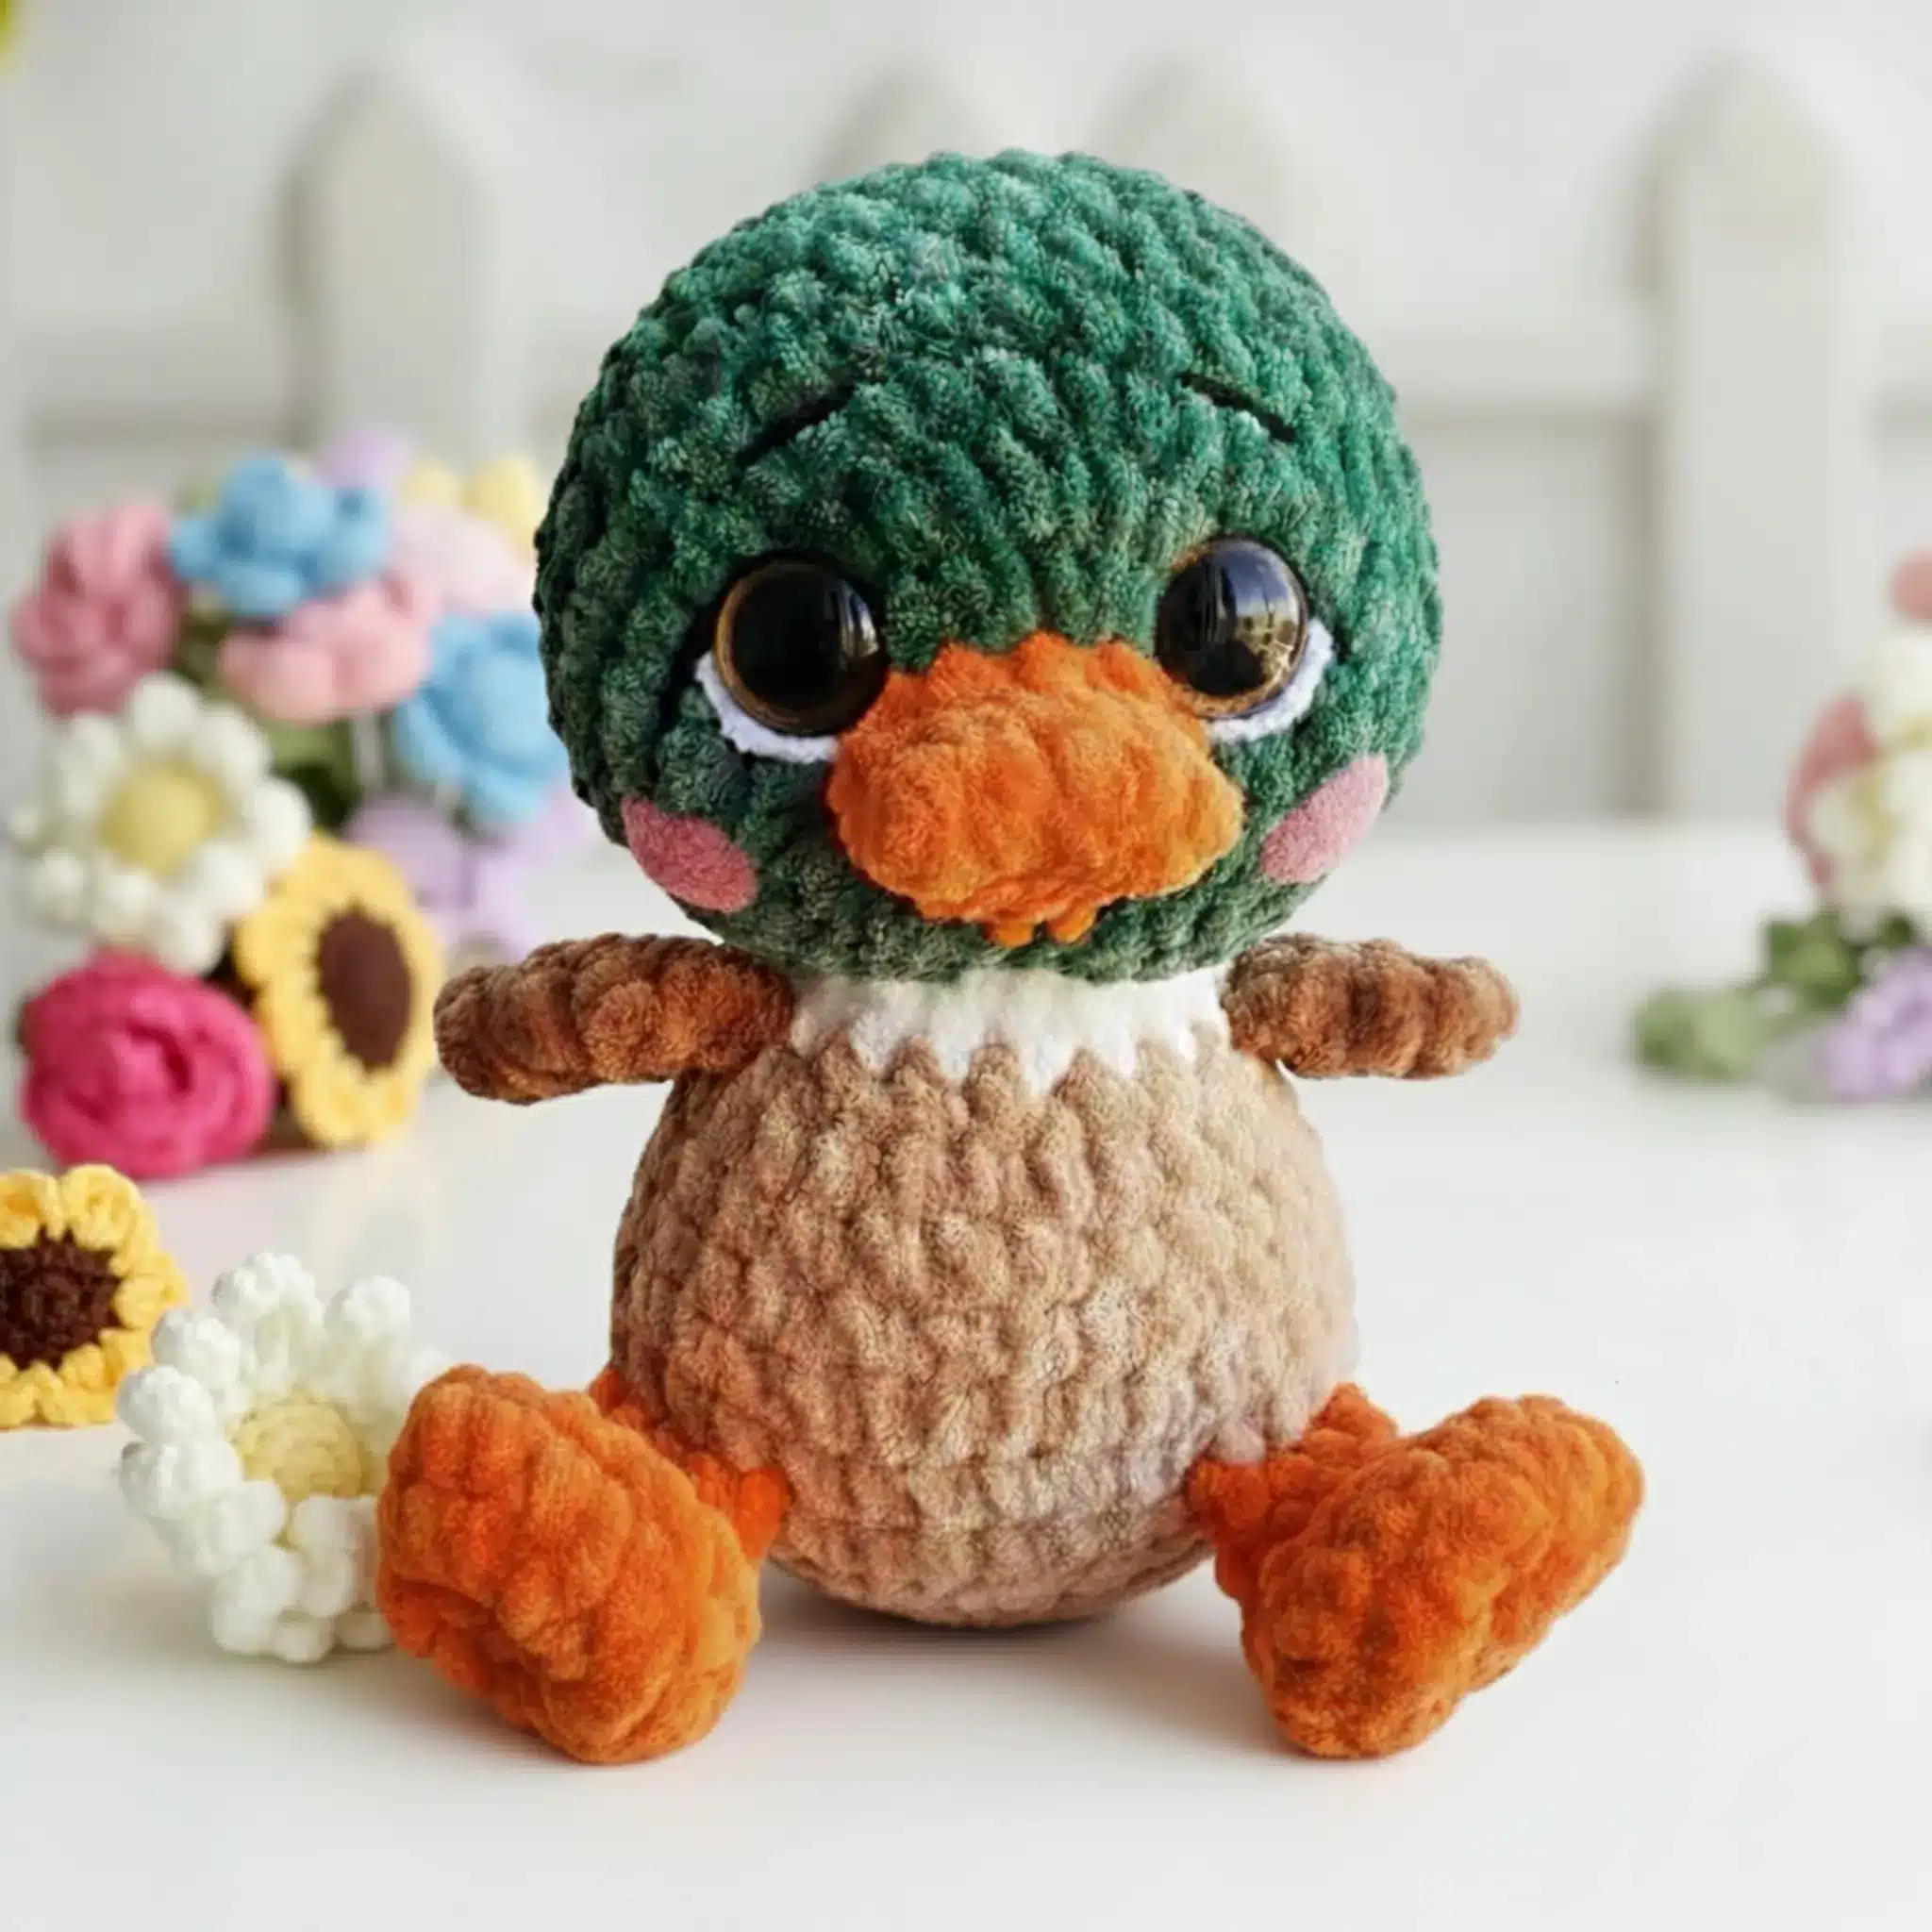
Inserting Safety Eyes: Position eyes between rounds 5 and 6, spacing them 12 stitches apart (6 increases between eyes). Verify they’re level with the beak before securing. For a more expressive look, carefully trim the plush fibers around each eye with nail scissors.
Note: Your stitch marker should run along the chin area.
Round 13: (4sc, dec) × 6 (30)
Round 14: (3sc, dec) × 6 (24)
Round 15: (2sc, dec) × 6 (18)
Begin stuffing the head, leaving the beak unstuffed. Pull the fabric outward at the cheek areas and stuff generously for rounded, plump cheeks.
Round 16: (1sc, dec) × 6 (12) – Complete stuffing
Round 17: 6dec (6)
Slip stitch, fasten off, leaving a tail. Use your tapestry needle to close the remaining hole.
Crafting the Wings (Make 2)
Round 1: Work 7sc in magic ring (or chain 2 and work 7sc in second chain from hook) (7)
Round 2: 7inc (14)
Fold the piece in half and work 7 hdc through both layers to close. Fasten off and weave in ends.

Making the Feet (Make 2)
Round 1: Work 6sc in magic ring (or chain 2 and work 6sc in second chain from hook) (6)
Round 2: 6inc (12)
Round 3: (1sc, inc) × 6 (18)
Round 4: 18sc (18)
Round 5: 3sc, 6dec, 3sc (12)
Round 6: 3sc, 3dec, 3sc (9)
Round 7: 3sc, dec, 4sc (8)
Do not stuff the feet. Work 2 more sc, fold in half, and work 4 sc through both layers. Fasten off. Shape the feet with your fingers to create the proper webbed appearance.
Building the Body
Round 1: Work 7sc in magic ring (or chain 2 and work 7sc in second chain from hook) (7)
Round 2: 7inc (14)
Round 3: (1sc, inc) × 7 (21)
Round 4: (inc, 2sc) × 7 (28)
Round 5: (3sc, inc) × 7 (35)
Round 6: 1sc, inc, (4sc, inc) × 6, 3sc (42)
Round 7: Attach the legs: 14sc, 4sc joining first leg, 6sc, 4sc joining second leg, 14sc (42)
Round 8: 42sc (42)
Round 9: (4sc, dec) × 7 (35)
Round 10: 35sc (35)
Forming the Tail
Chain 3, work 1 sc in the first chain. Pinch the edges together as shown in reference photos and work 6sc through both layers to form the tail. Move your stitch marker to mark the new beginning of the round.
Round 11: Work 23sc around, then 1sc in the last stitch where you finished the tail (24)
Critical Step: Lightly stuff the body and check tail alignment with the feet. The tail should be symmetrical. Due to tension variations, you may need to adjust where you begin forming the tail by one stitch in either direction.
Round 12: (2sc, dec) × 6 (18)
Change to white yarn.
Round 13: Attach wings: 4sc, 2sc joining first wing, 7sc, 2sc joining second wing, 3sc (18)
Verify wing placement is symmetrical with legs and tail. Lightly stuff to check positioning.
Round 14: 18sc (18)
Work 1 more sc, slip stitch, and fasten off leaving a long tail for sewing the head to body. Stuff the body firmly, keeping the bottom slightly flat for stability.
Assembly and Finishing
Facial Sculpting
Using a long needle and strong thread, create definition in the face by sculpting:
- Insert needle between rounds 7-8 at point 1
- Bring out at point 2 (beside eye)
- Insert at point 3 (beside same eye)
- Exit at point 4 (near point 1)
- Insert at point 1, exit at point 5 (beside other eye)
- Insert at point 6 (beside same eye)
- Return to point 4
Pull both thread ends to create rounded cheeks. When satisfied with the shape, secure with knots and hide thread ends inside the head.
Embroidering Details
Eye Highlights: Using white plush yarn, embroider small highlights at the bottom of each eye.
Eyelids and Eyebrows: With black semi-cotton yarn, create 2 stitches for each eyelid and 1 stitch for each eyebrow.
Cheeks (Optional): Add a sweet blush with pink plush yarn using 3-4 small stitches on each cheek.

Attaching the Head
Use two knitting needles to position the head evenly on the body. The neck line should sit very close to where you created the facial sculpting. Sew securely using the long tail from the body or strong thread. Add extra stuffing around the neck area for stability.
Conclusion
Congratulations on completing your adorable amigurumi duckling! This charming creation makes a wonderful gift for children and adults alike, or a delightful addition to your handmade collection. The combination of soft plush yarn and careful shaping techniques results in a professional-looking toy with tons of personality.
Remember, each duckling you create will have its own unique character based on your tension, yarn choices, and finishing touches. Don’t be afraid to experiment with different color combinations or add your own creative embellishments. The beauty of amigurumi lies in making each piece uniquely yours.
Happy crocheting, and enjoy your new feathered friend!
You’ll Love Also This

Remember it later!
Planning to try this soon? Pin it for a quick find later!