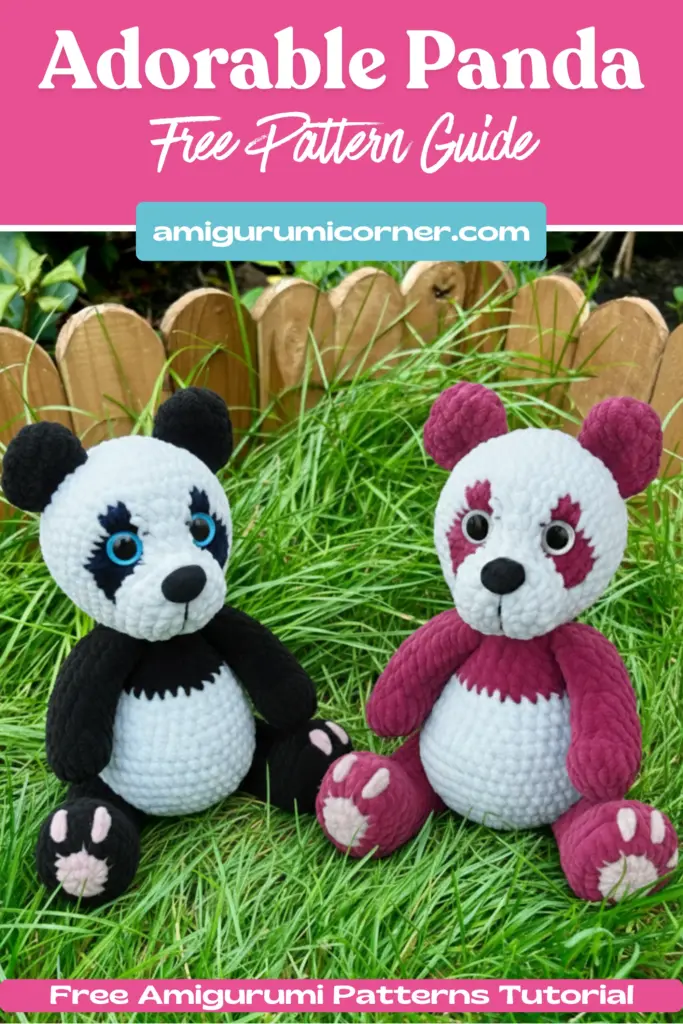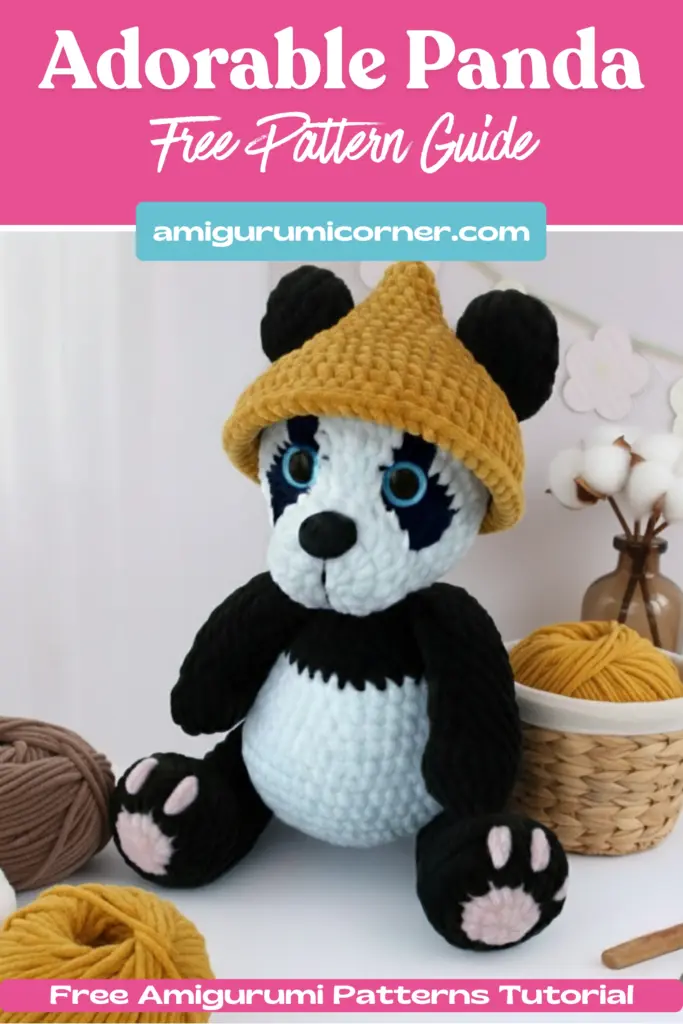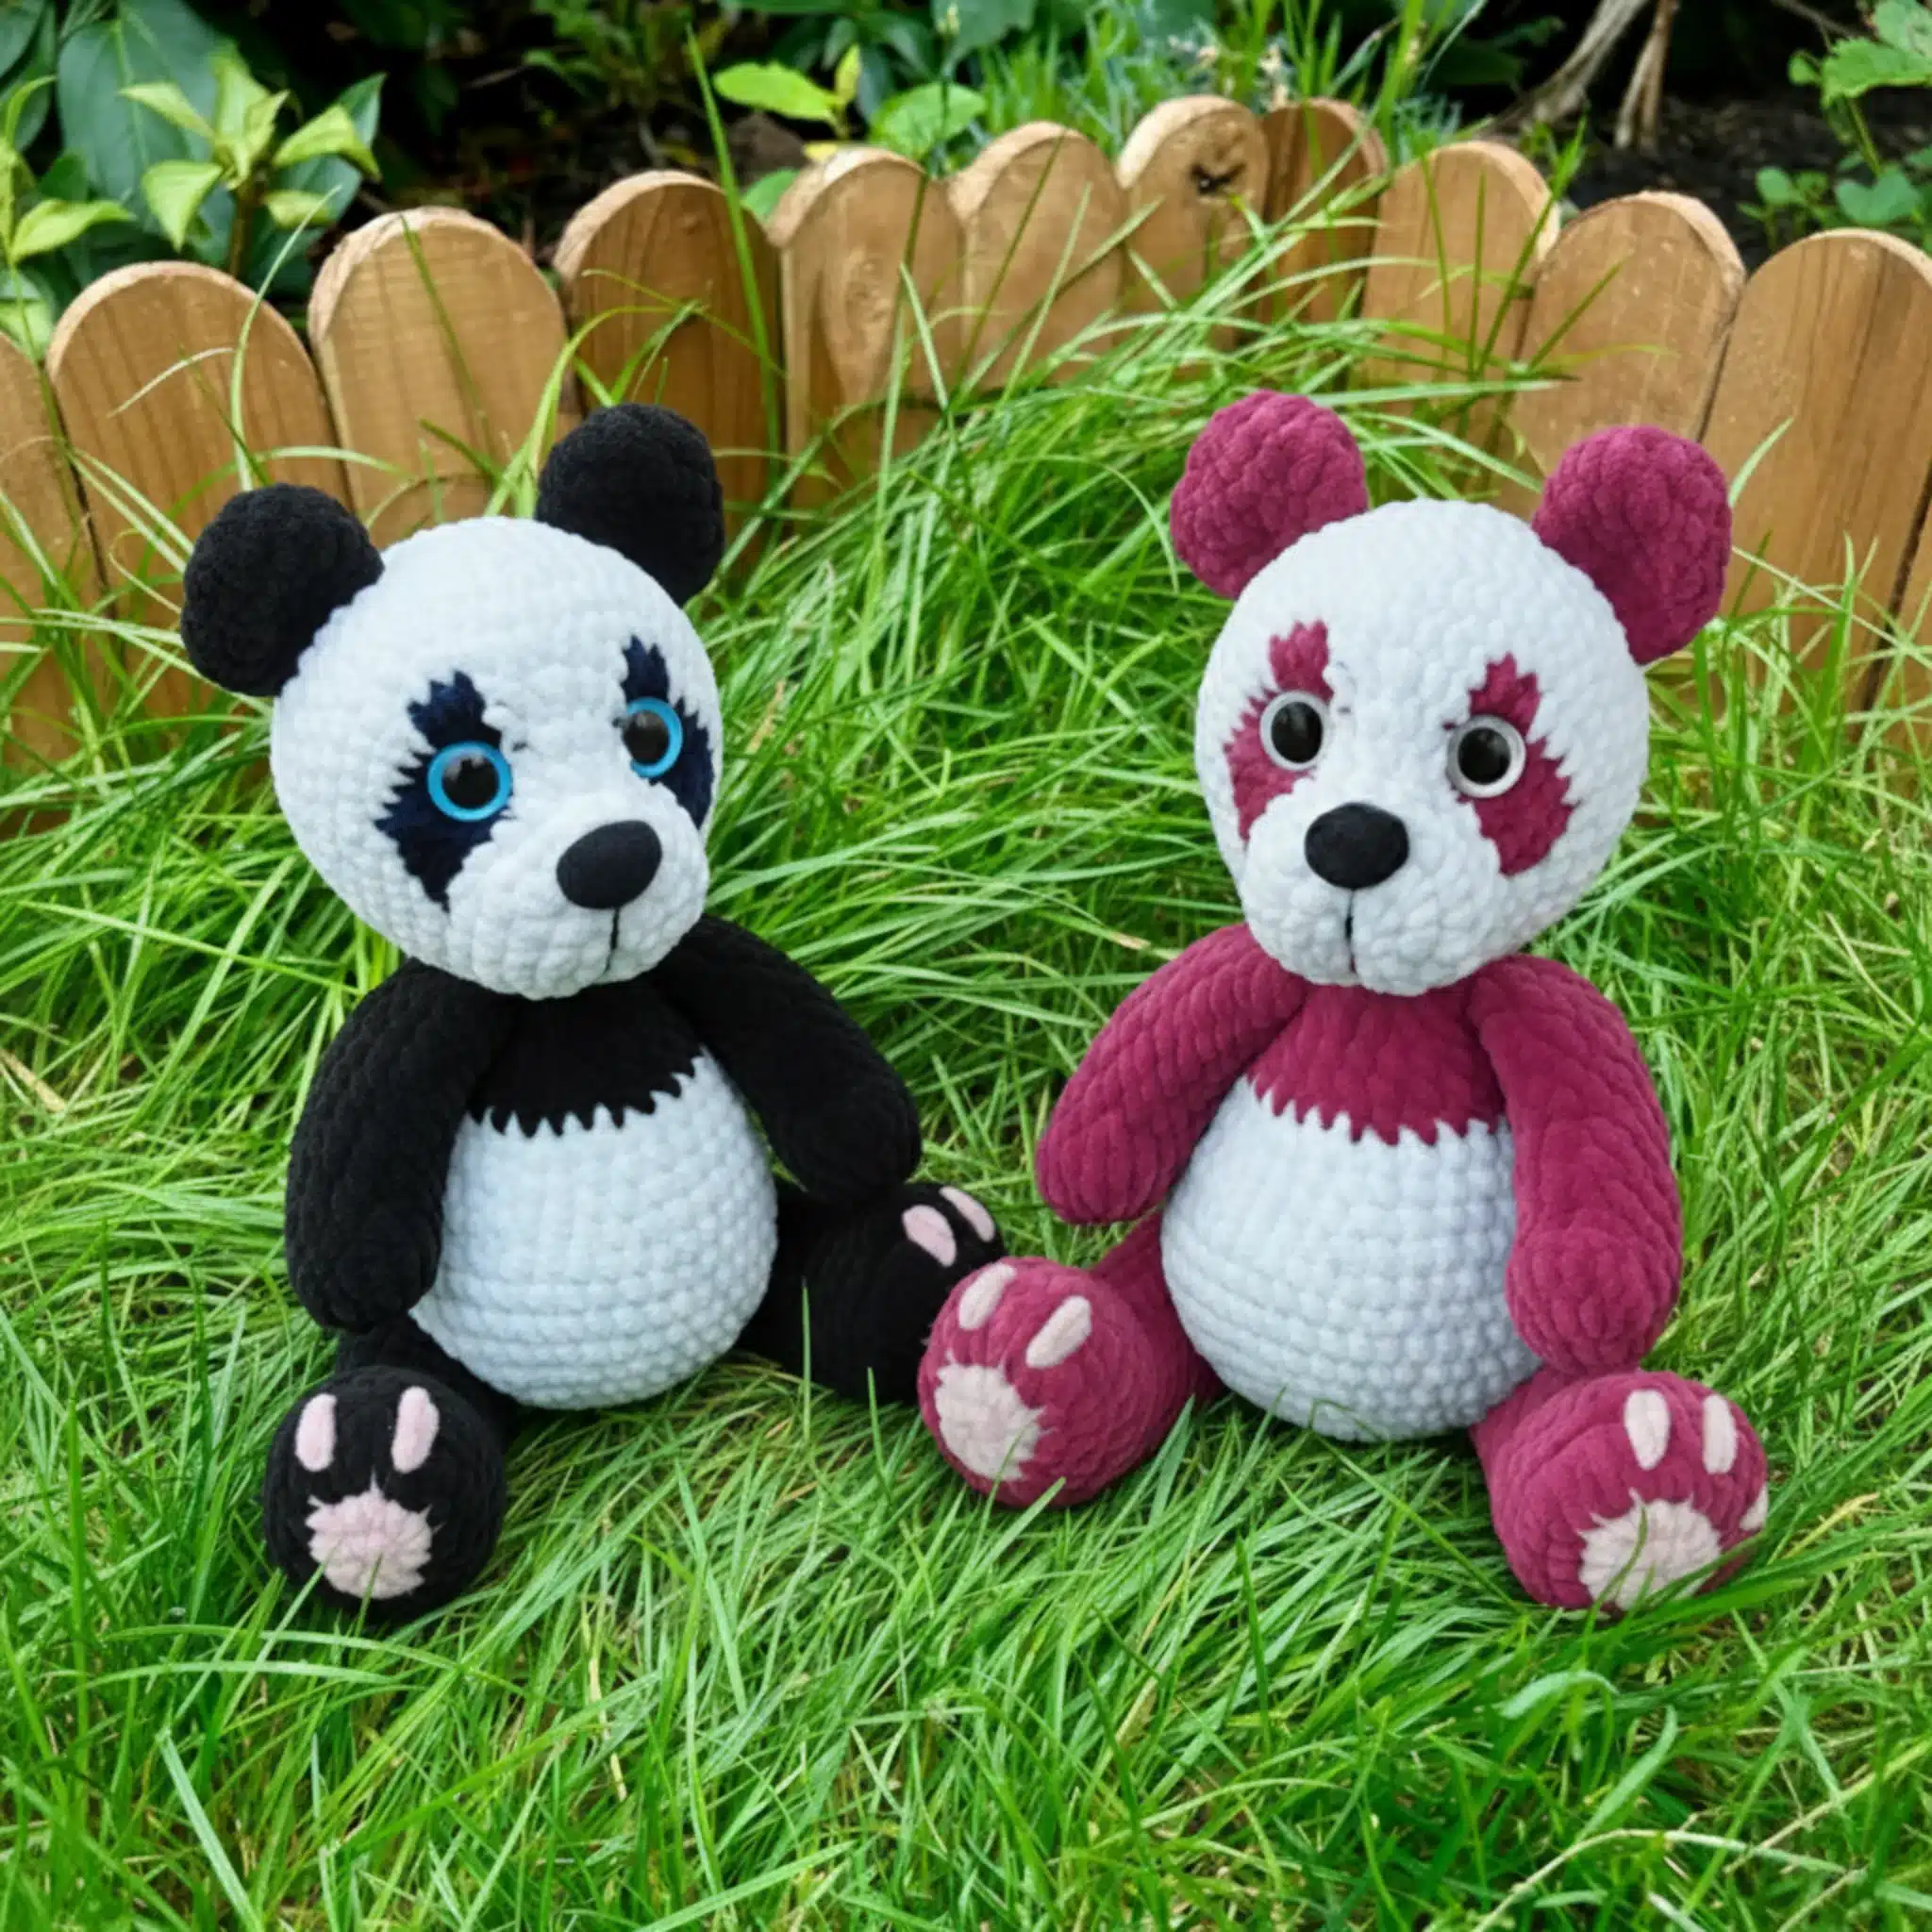
Are you ready to embark on a delightful crochet adventure? “The Panda” pattern offers a charming opportunity to create your very own cuddly companion. This comprehensive guide will walk you through the essentials of crafting this beloved amigurumi figure, from gathering your materials to assembling each intricate part, ensuring a rewarding experience for crocheters of all levels.
Getting Started: Understanding the Essentials
Before diving into stitches, it’s crucial to understand the language of the pattern and gather your supplies. The designer of “The Panda” pattern has crafted clear instructions, and they even offer a supportive YouTube tutorial for those tricky sections.
Essential Abbreviations
Familiarizing yourself with common crochet abbreviations is key to navigating any pattern. Here are the ones you’ll encounter in “The Panda” guide:
- MR: Magic Ring
- ch: Chain
- sl st: Slip Stitch
- sc: Single Crochet
- dec: Decrease (single crochet two stitches together)
- inc: Increase (two single crochet stitches in one stitch)
- BLO: Back Loop Only
- cc: Color Change
- FO: Fasten Off
- (…): Repeat instructions in parentheses
- *…: Repeat instructions the specified number of times

Materials You’ll Need
To bring your panda to life, gather these materials:
- Hook: 4 mm
- Yarn:
- Main Body Color: White (e.g., Himalaya Dolphin Baby)
- Secondary Color: Black and Pink (e.g., Himalaya Dolphin Baby)
- Hat Color: Brown
- Safety Eyes: 16 mm
- Safety Nose: 15/22 mm
- Joints (optional): 30 mm (for movable limbs)
- Tools: Yarn needle, scissors, hollowfiber stuffing, stitch marker
Crafting Each Component: Step-by-Step
“The Panda” pattern breaks down the creation into manageable parts. A key tip from the designer: unless specifically stated, do not leave long yarn tails for sewing, as most parts are attached as you crochet. Only the head and tail will require sewing.
Ears (Make 2)
Start with black yarn to create the iconic panda ears. These are small, quick pieces that define your panda’s character.
Tail
Beginning with black yarn, the tail is worked in rounds and lightly stuffed before fastening off. Remember to leave a tail for sewing this part onto the body, specifically between rounds 7 and 9 of the body.
Arms (Make 2)
Start with black yarn for the arms. You’ll stuff the arms as you crochet them, ensuring they take shape evenly.
Legs (Make 2)
Begin the legs with pink yarn, then switch to black. The designer provides two options for the legs: one without using joints and another with joints for articulation. If you opt for joints, the designer’s video tutorial provides detailed guidance on this process. Remember to adjust stitches to ensure the feet face forward and are symmetrical.
Body
Start the body with your main white yarn. This is where your panda truly begins to take form. The pattern offers distinct instructions for attaching the legs, depending on whether you’re using joints or crocheting them directly into the body. For the jointed version, legs are attached after round 12. You’ll also integrate the arms into the body as you crochet, switching to black and then back to white yarn at specific rounds to create the panda’s distinctive markings.
Head
The head is the focal point of your panda, starting with the main white yarn. Rounds 7-10 involve crucial color changes (alternating between black and white yarn) to create the panda’s eye patches. The designer’s video tutorial is particularly helpful for navigating these intricate color changes and shaping. Safety eyes are placed between rows 8 and 9, about 7 visible stitches apart, and the nose between rows 3 and 4. You’ll attach the ears in round 16, referring to visual aids to ensure proper placement. Begin stuffing the head around round 18.
Hat (Optional Accessory)
Complete your panda’s look with an adorable hat, crocheted in brown yarn. This piece involves chains and skipped stitches to create openings, which are then worked into in subsequent rounds. Try the hat on your panda’s head as you go to ensure a perfect fit.

Finishing Touches and Assembly
Once all the individual components are crocheted, it’s time for the final assembly:
- Head: After completing the head, cut the yarn, close the hole, and sew the head securely to the body.
- Tail: Sew the tail onto the body, as specified earlier.
Conclusion
Creating “The Panda” amigurumi is a delightful journey that results in a cherished, handmade toy. By following these instructions , you’ll soon have a charming panda to call your own. Happy crocheting!
Remember it later!
Planning to try this soon? Pin it for a quick find later!