Table of contents
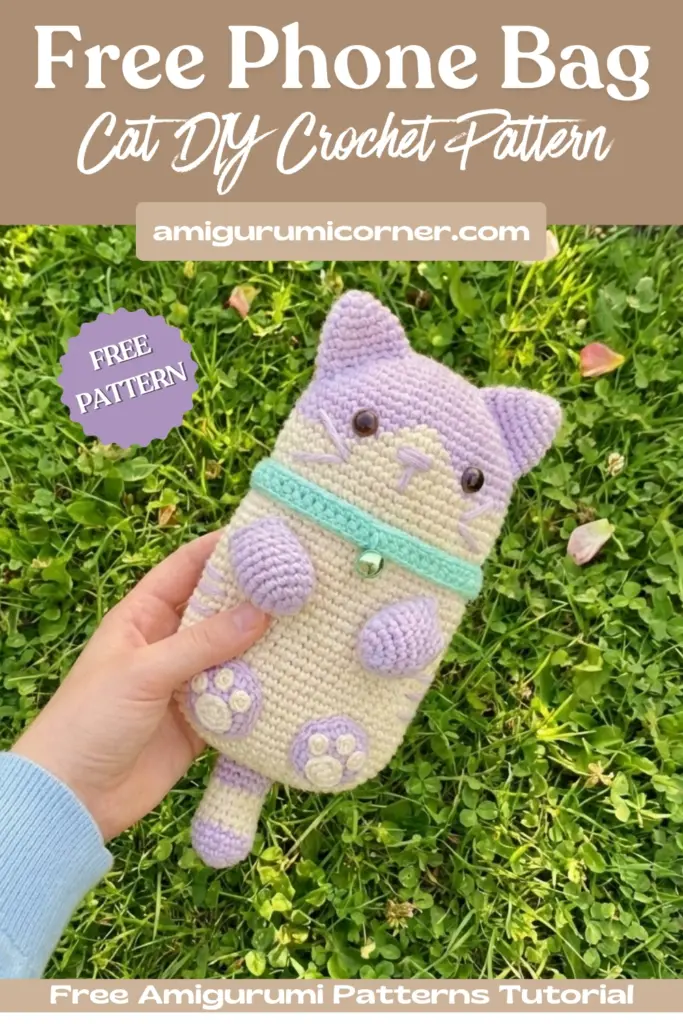
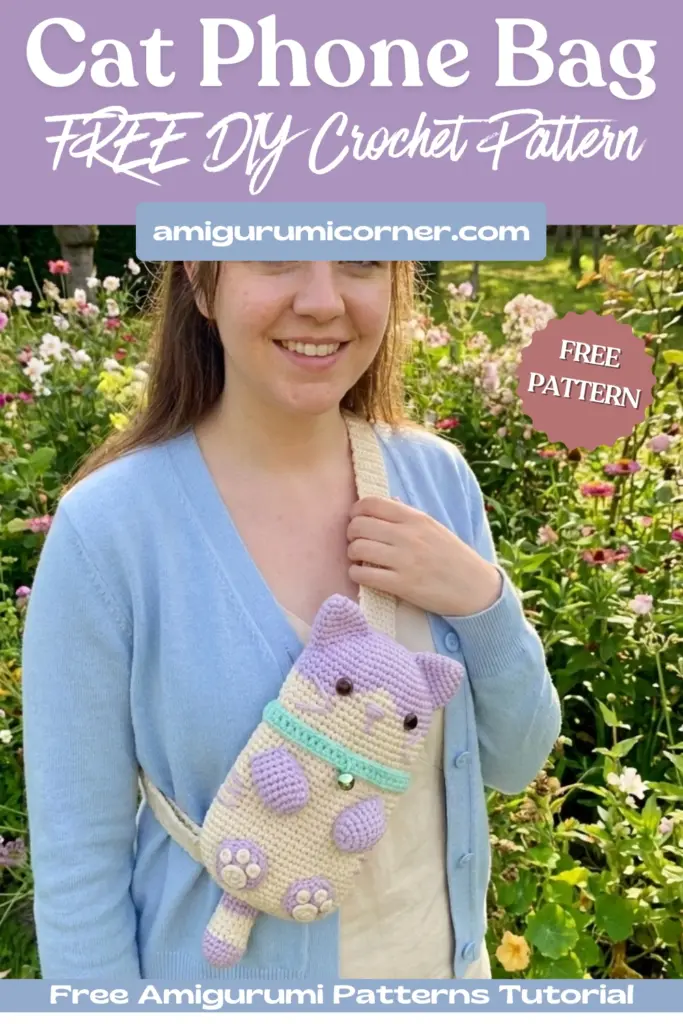
Looking for a cute and functional accessory to carry your phone in style? This charming crochet cat phone bag is the perfect project for crocheters who want to combine practicality with adorable design. With its adjustable slant chest strap and roomy interior that fits phones up to 6.8 inches, this little companion will keep your essentials safe while adding a playful touch to any outfit. The finished bag measures 23cm in height and 13cm in width, making it the ideal size for everyday use.
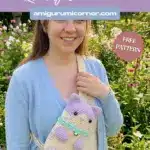
Remember it later!
Planning to try this soon? Pin it for a quick find later!
Materials You’ll Need For Crochet Cat Phone Bag
Yarn:
- 125g of 4-strand Milk Cotton (worked with double thread)
- 1 skein of body color (choose from off-white or light gray) – approximately 100g
- 1/2 skein of head color (lavender/light purple) – approximately 50g
- Small amount of contrasting color for collar (mint/turquoise green)
Crochet Hook:
- 3.5mm for main work
- 2.0mm for foot pads
Safety Features:
- Pair of 15mm safety eyes
- 13x17mm nose (can be glued or sewn)
- 15mm bell
Hardware and Notions:
- 12cm zipper
- Japanese-style buckle (inner diameter 3.9cm, inner height 2cm)
- Black embroidery floss
- Scissors
- Tapestry needle
- Pins
Abbreviations
- MR – Magic ring
- Ch – Chain
- Sc – Single crochet
- Slst – Slip stitch
- Dec – Decrease
- Inc – Increase

Crochet Cat Phone Bag Pattern Instructions
Body
Important Note: Start all rows with 1 chain and finish with 1 slip stitch. However, these are NOT counted in the total stitch count for each row.
Begin with off-white color yarn from the bottom of the bag:
- Row 1: Ch11, starting in the second loop from the hook, 10 sc, turn the work and continue knitting on the other side of the chain, 10 sc = 20 sc
- Row 2: inc, 8 sc, 2 inc, 8 sc, inc = 24 sc
- Row 3: inc, 10 sc, 2 inc, 10 sc, inc = 28 sc
- Row 4: 1 sc, inc, 11 sc, 2 inc, 11 sc, inc, 1 sc = 32 sc
- Row 5: 1 sc, inc, 13 sc, 2 inc, 13 sc, inc, 1 sc = 36 sc
- Row 6: (5 sc, inc) x 6 = 42 sc
- Row 7: (3 sc, inc, 3 sc) x 6 = 48 sc
- Rows 8-24: 48 sc (17 rows)
Change color to turquoise green (collar)
- Row 24: 48 sc
Head
Switch to light purple color yarn.
Crochet the first 7 rows in the same way as you knitted the body. In this section, alternate between off-white and light purple yarn colors, where light purple yarn is indicated.
- Row 8: 12 sc, 2 sc, 34 sc = 48
- Row 9: 11 sc, 4 sc, 33 sc = 48
- Row 10: 10 sc, 6 sc, 32 sc = 48
- Row 11: 9 sc, 8 sc, 31 sc = 48
- Row 12: 8 sc, 10 sc, 30 sc = 48
- Row 13: 27 sc, 21 sl-st
- Row 14: 27 sc, 21 ch, skip 21 sts on the head, 1 slst (zipper slot)
- Rows 15-16: 48 sc (2 rows)
Change color to turquoise green (collar)
- Row 16: 48 sc
Change to light color
Front Legs (Make 2)
With light purple color yarn:
- Row 1: 5 sc in MR
- Row 2: 5 inc = 10 sc
- Row 3: (4sc, inc) x 2 = 12 sc
- Rows 4-8: 12 sc (5 rows)
- Row 9: (4 sc, dec) x 2 = 10 sc
Rear Legs (Make 2)
With light purple color yarn:
- Row 1: 8 sc in Mr = 8 sc
- Row 2: 8 inc = 16 sc
- Row 3: (sc, inc) x 8 = 24 sc
Ears (Make 2)
With light purple color yarn:
- Row 1: 6sc in Mr
- Row 2: (2 sc, inc) x 2 = 8 sc
- Row 3: (3 sc, inc) x 2 = 10 sc
- Row 4: (1 sc, inc) x 5 = 15 sc
- Row 5: 15 sc
- Row 6: (2 sc, inc) x 5 = 20 sc
Tail
With light purple color yarn:
- Row 1: 6 sc in MR
- Row 2: 6 inc = 12 sc
- Row 3: (1sc, inc) x 6 = 18 sc
- Row 4: 18 sc
Change to off-white color yarn:
- Row 5: (sc, dec) x 6 = 12 sc
- Rows 6-7: 12 sc
Change to light purple color yarn:
- Rows 8-9: 12 sc
Heel Pads (Make 2)
Note: Use 4-strand single thread and 2.0mm crochet hook.
With off-white color yarn:
- Row 1: 6 sc in Mr
- Row 2: 6 inc = 12 sc
Finger Pads (Make 6)
Note: Use 4-strand single thread and 2.0mm crochet hook.
With off-white color yarn:
- Row 1: 5 sc in Mr
Adjustable Belt Strap
With off-white yarn, crochet in turning rows:
- Row 1: Ch13, starting in the second loop from the hook, 12 sc along the chain
- Row 2: dec, 8 sc, dec = 10 sc
- Row 3: 10 sc
- Row 4: dec, 6 sc, dec = 8 sc
- Row 5: 8 sc
- Row 6: dec, 4 sc, dec = 6 sc
- Rows 7-24: 6 sc (18 rows)
Crochet the number of rows at your own discretion, depending on your height and fullness. This completes the first long strap.
Make the second part of the strap similar to the first, from rows 1 to 7, creating a short webbing piece.

Assembly Instructions
Attaching the Head to Body
After completing the head portion, align the fabric pieces carefully. Pick out the entire stitch on the edge of both the head and body. Sew the crochet pieces together using the mattress stitch technique for a seamless finish. This completes the entire body part of the bag.
Adding Facial Features
- Insert the 15mm safety eyes between rows 10 and 11 of the head
- Attach or sew the 13x17mm nose in position as shown in the pattern image
- Use black embroidery floss to embroider additional facial details
Installing the Zipper
Carefully insert and sew the 12cm zipper into the slot created at row 13 of the head. Take your time with this step to ensure smooth operation.
Attaching Body Parts
- Sew the front legs to the body
- Attach the rear legs with heel pads and finger pads
- Position and sew the ears to the top of the head
- Attach the tail to the back of the bag
- Add the decorative bell
Final Strap Assembly
- Sew both strap pieces to the bag body
- Adjust the strap length according to your individual height
- Install the Japanese-style buckle on the short end of the strap to facilitate easy length adjustment
- Test the strap to ensure it’s secure and comfortable

Frequently Asked Questions
This bag is designed to accommodate mobile phones up to 6.8 inches (21.59 cm) in length. The finished bag measures 23cm in height and 13cm in width, providing enough room for most modern smartphones along with small essentials like cards or earbuds.
While the pattern is designed for 4-strand Milk Cotton worked with double thread and a 3.5mm hook, you can experiment with different yarn weights. Just remember that using thicker or thinner yarn will change the final size of your bag. Make a test swatch first to ensure your phone will fit comfortably.
Sew both strap pieces firmly to the bag body using strong thread and multiple passes through the attachment points. The Japanese-style buckle (inner diameter 3.9cm, inner height 2cm) should be installed on the short strap end, allowing you to adjust the length for comfortable cross-body or shoulder wear.
Light stuffing is recommended for the legs, ears, and tail to help them maintain their shape and give your cat bag a more three-dimensional appearance. Use small amounts of polyester fiberfill, being careful not to overstuff as this can distort the proportions.
Conclusion
Congratulations on completing your adorable crochet cat phone bag! This charming accessory combines functionality with whimsy, creating a unique piece that’s sure to turn heads wherever you go. The adjustable strap makes it versatile for different occasions, whether you’re running errands or enjoying a day out. Don’t forget to share photos of your finished project with fellow crafters, and consider making variations in different color combinations to match your wardrobe. Happy crocheting, and we’ll see you in the next pattern!


Remember it later!
Planning to try this soon? Pin it for a quick find later!