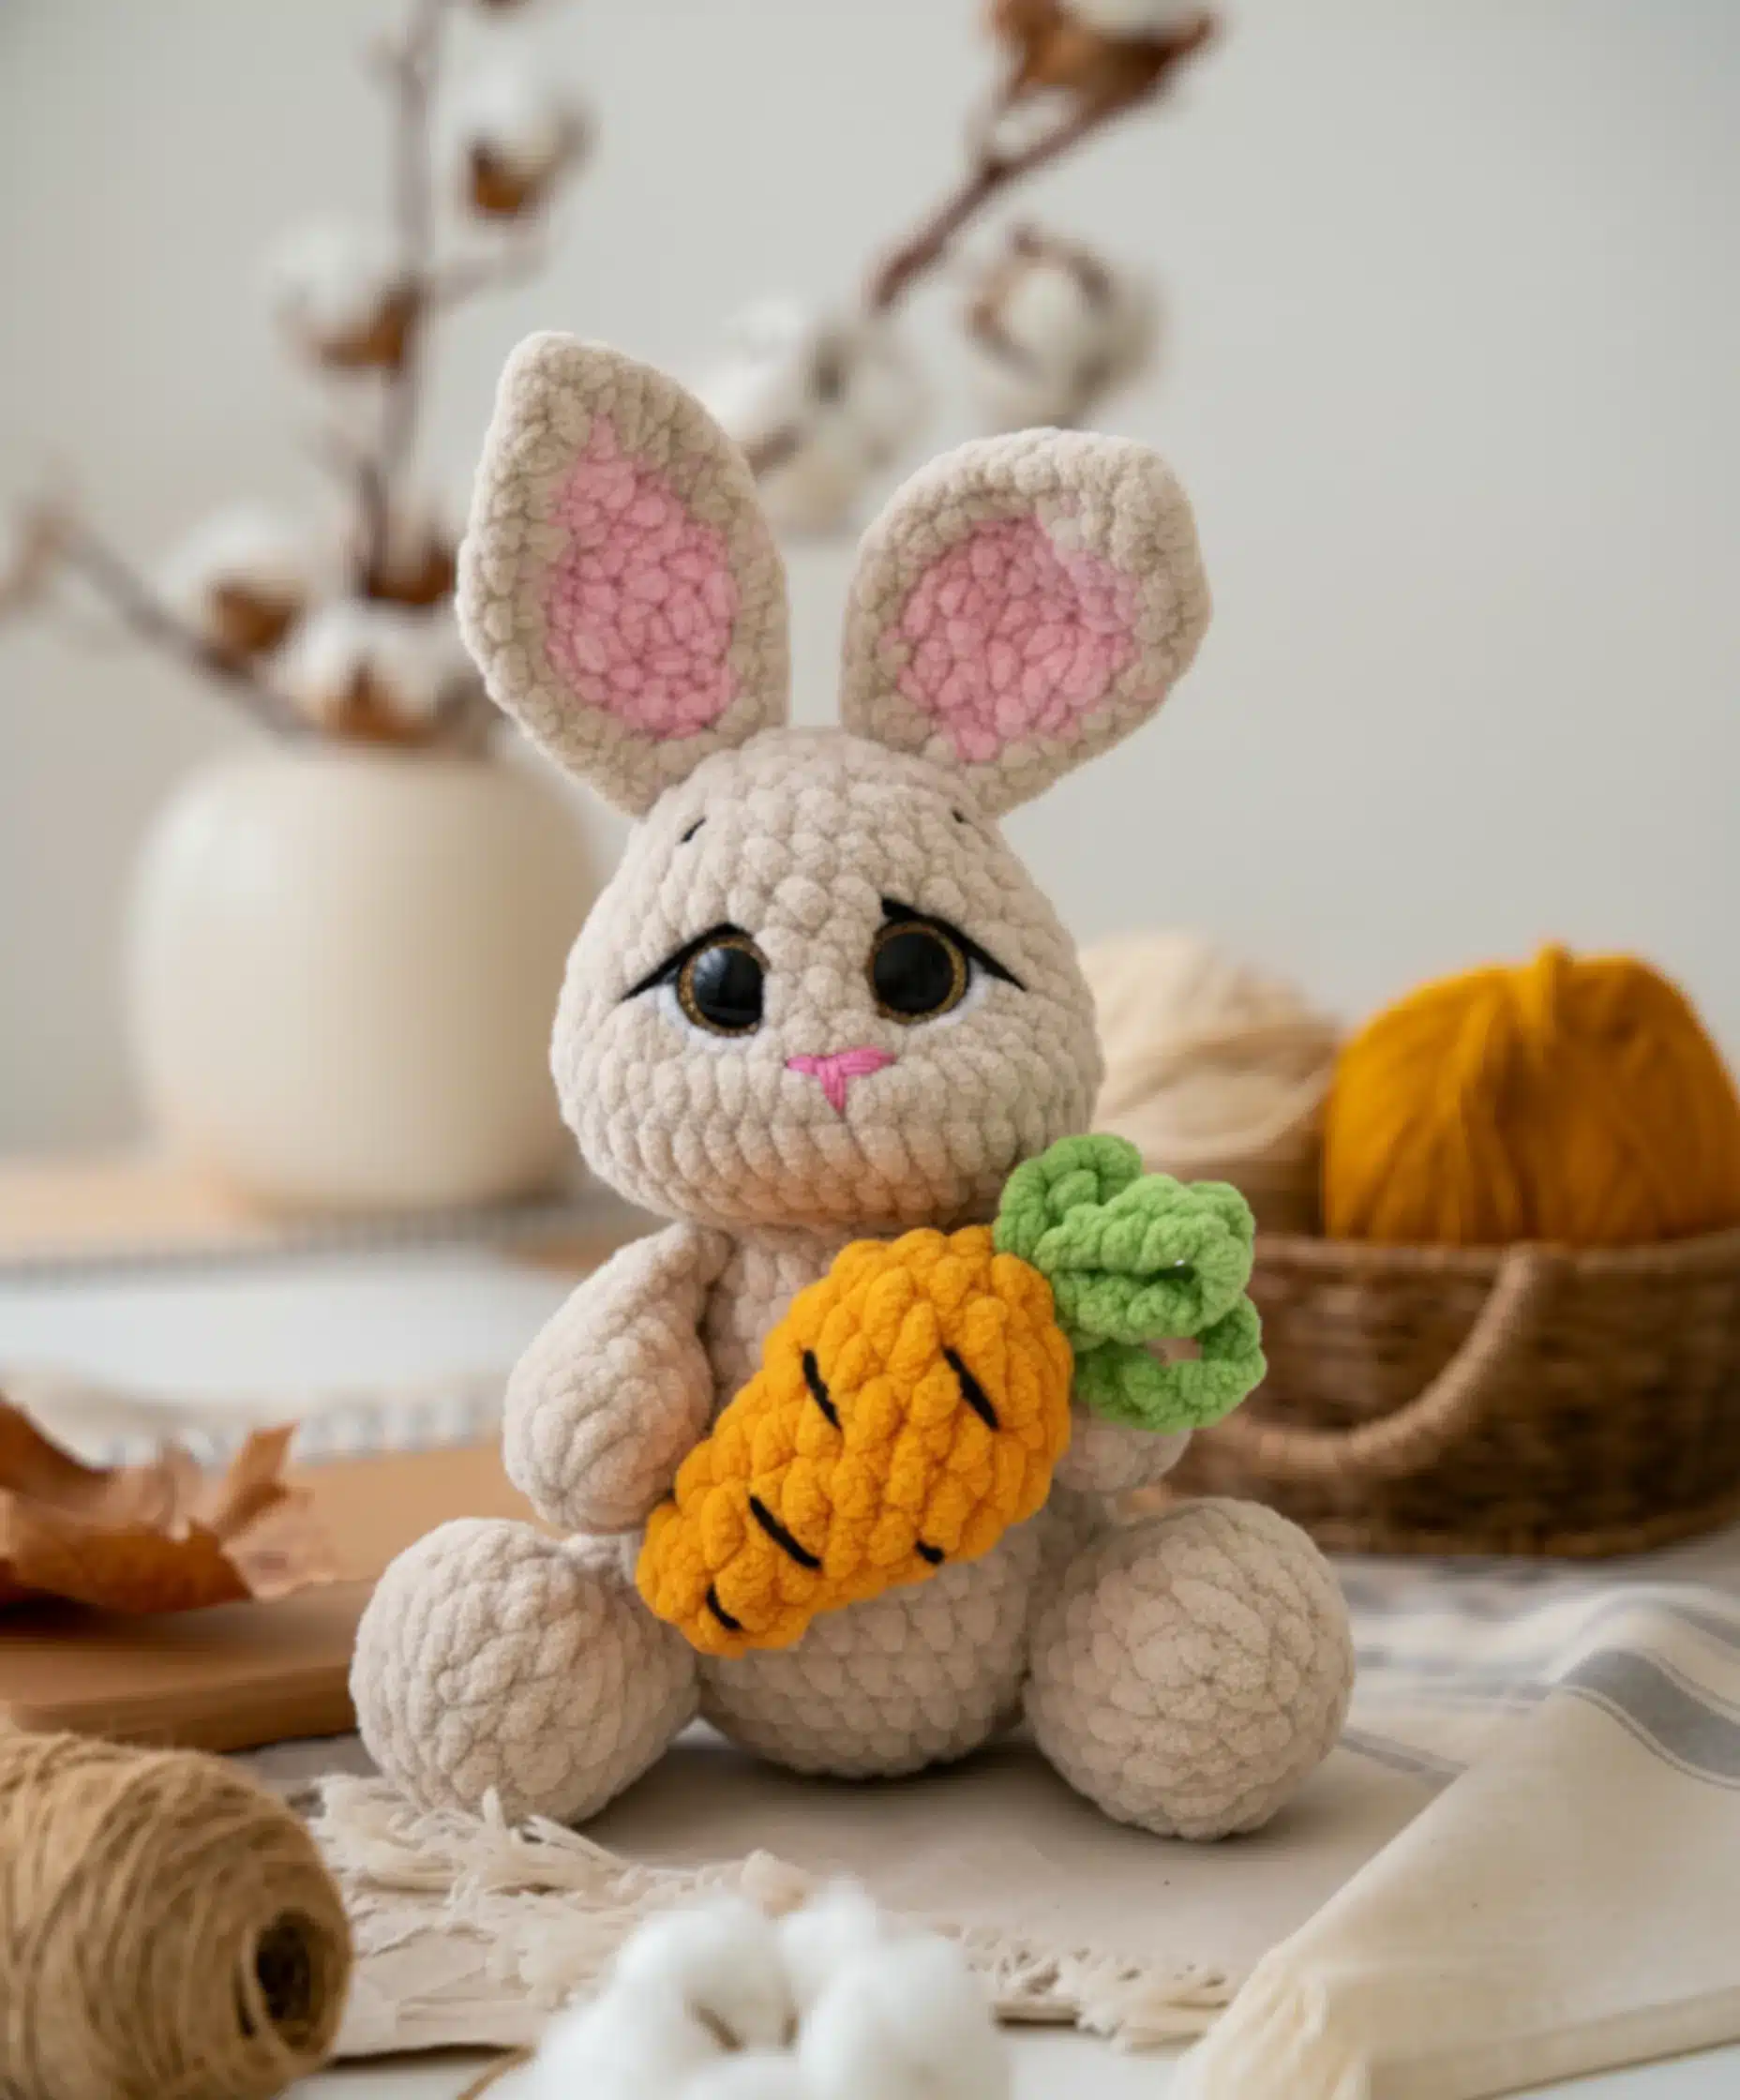
Are you ready to add a touch of handmade charm to your home decor, play kitchen, or a special gift? This beginner-friendly crochet carrot pattern is perfect for crafters of all skill levels, offering a quick and satisfying project that yields an absolutely adorable result. Whether you’re new to amigurumi or looking for a delightful weekend make, this guide will walk you through creating your very own plush carrot, complete with a vibrant green top and charming embroidered details. Let’s grab our hooks and get started!
Understanding the Pattern: What You Need to Know
Before diving into the stitches, it’s important to familiarize yourself with the pattern’s guidelines and the abbreviations used.
Essential Crochet Abbreviations
Familiarize yourself with these standard crochet abbreviations used throughout the pattern:
- MR: Magic Ring
- ch: Chain
- st: Stitch
- sl st: Slip stitch
- sc: Single crochet
- dec: Decrease (single crochet two stitches together)
- inc: Increase (two single crochets in one stitch)
- R: Round
- (…): Repeat the instructions within the parentheses
- FO: Fasten off
Materials You’ll Need
Gather these materials before you begin your crochet adventure:
- Yarn:
- Himalaya Dolphin Baby (Weight 6 Super Bulky) in orange and green. (Similar alternatives include LaVita Velur yarn, Hobbii Honey Bunny, Wolans Bunny Baby, or Premier Yarns Parfait Chunky).
- Black cotton/acrylic yarn for embroidering the strips.
- Crochet Hook: 4.0 mm (G/6)
- Tools:
- Yarn needle
- Scissors
- Hollow fiber (polyfill) for stuffing
- Stitch marker
Crafting Your Carrot: Step-by-Step Instructions
Let’s bring your carrot to life! We’ll start with the orange body and then add the vibrant green top.
The Carrot Body (Orange Yarn)
Begin with your orange yarn:
- R1: Make 6 single crochets in a Magic Ring (6 stitches total)
- R2: Single crochet in each of the 6 stitches (6)
- R3: 1 increase, then single crochet in the next 5 stitches (7)
- R4: 1 increase, single crochet in the next 3 stitches, 1 increase, single crochet in the next 2 stitches (9)
- R5: 1 increase, single crochet in the next 4 stitches, 1 increase, single crochet in the next 3 stitches (11)
- R6: 1 increase, single crochet in the next 4 stitches, 1 increase, single crochet in the next 5 stitches (13)
- R7: 1 increase, single crochet in the next 5 stitches, 1 increase, single crochet in the next 6 stitches (15)
- R8: Single crochet in each of the 15 stitches around (15)
- Start stuffing your carrot at this point.
- R9: Repeat (1 decrease, 1 single crochet) 5 times (10)
- R10: Make 5 decreases (5)
- Finish stuffing your carrot firmly. Cut the yarn, fasten off, close the remaining hole, and weave in the loose end.
Adding the Green Top
Now, let’s add the signature green leaves to your carrot:
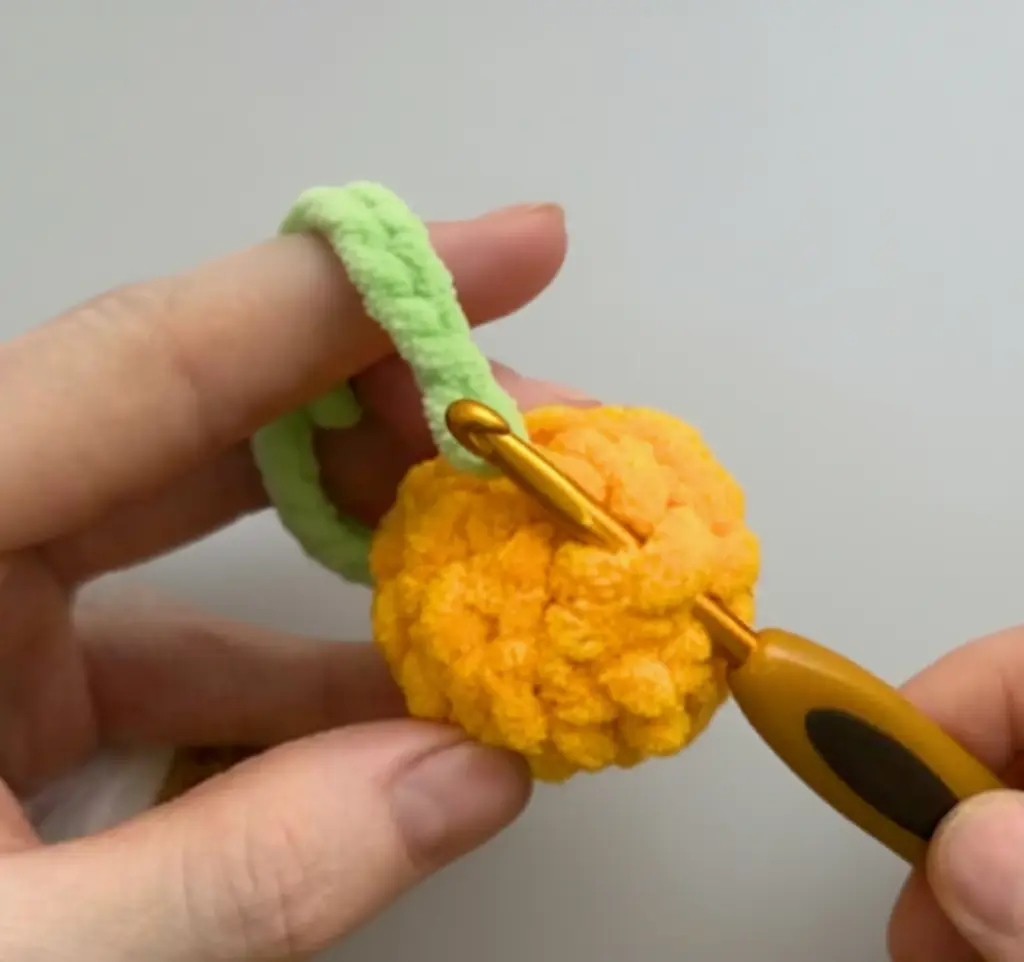

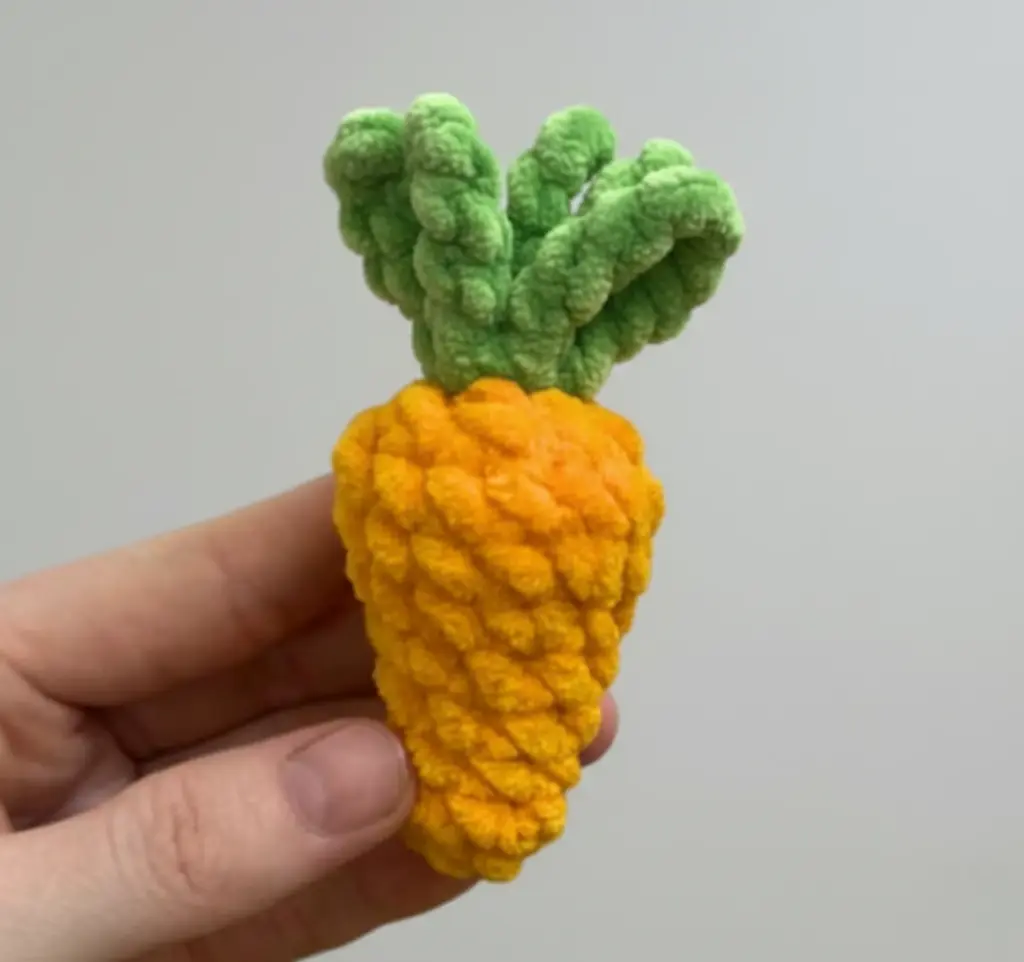
- Take your green yarn and join it to the top of the carrot using a slip stitch.
- Chain 8 stitches.
- Make a slip stitch back into the carrot at the base of your chain.
- Repeat steps 2 and 3 two more times to create a total of three green leaf strands.
- Tie a knot, cut the yarn, fasten off, and carefully hide the ends.
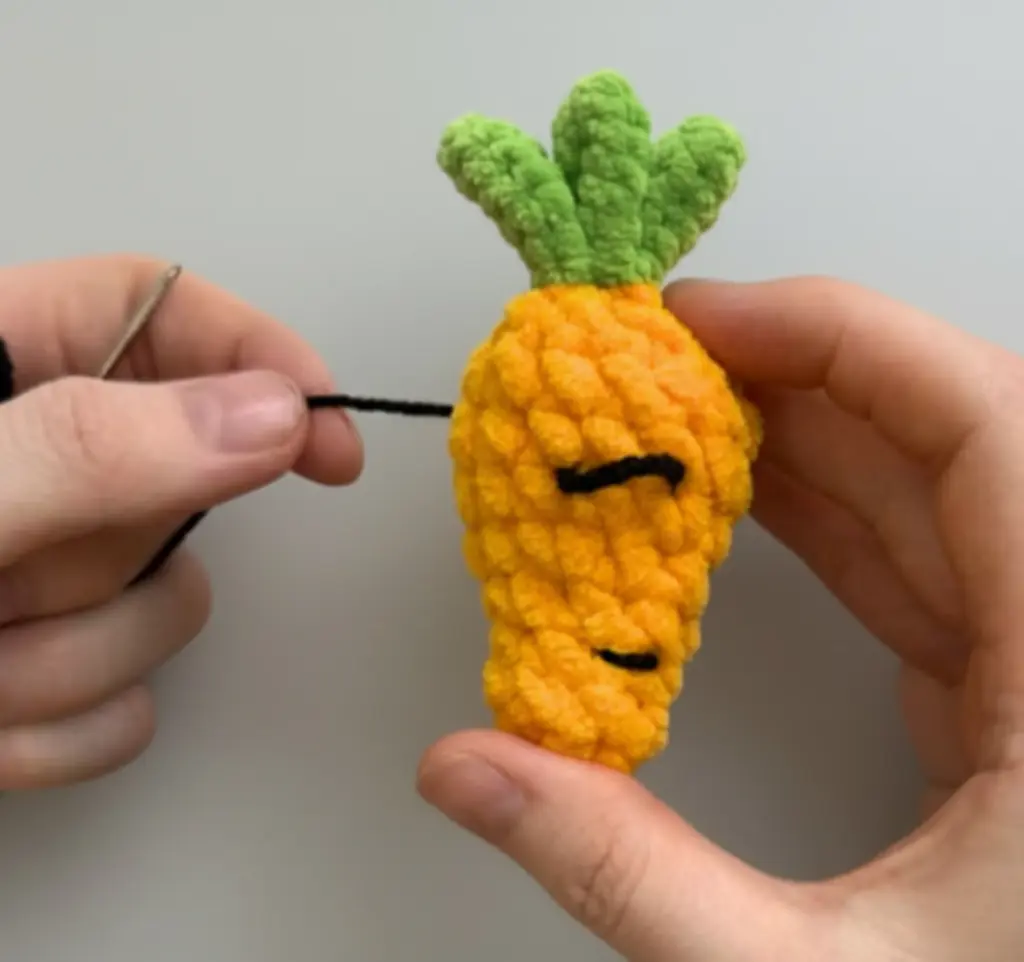
Finishing Touches
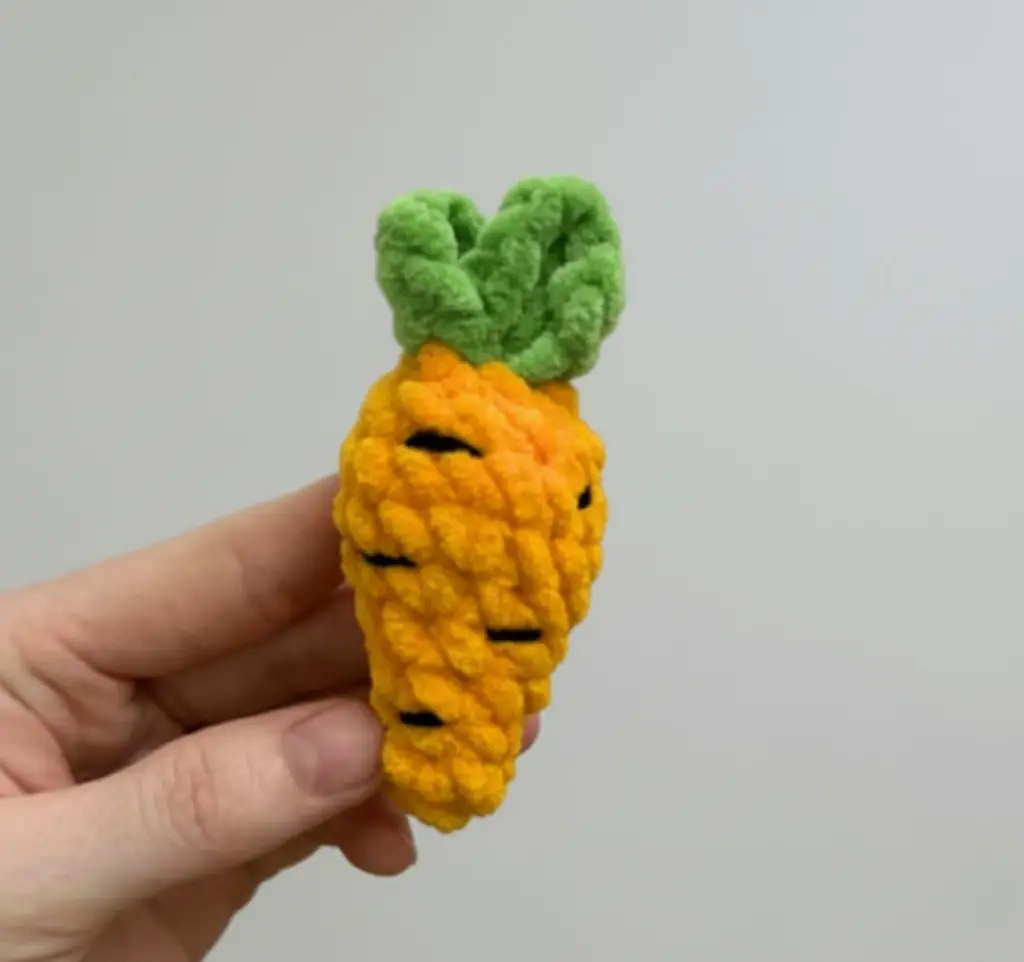
To give your carrot an authentic look:
- Using your yarn needle and black cotton yarn, embroider small horizontal or diagonal strips onto the orange body of the carrot. These simple lines add character and detail.
Your Adorable Crochet Carrot is Ready!
Congratulations! You’ve successfully crocheted a charming carrot. We truly hope you enjoyed this straightforward pattern and the satisfaction of creating something beautiful with your own hands. If you have any questions during your crafting process, please don’t hesitate to reach out.