Table of contents
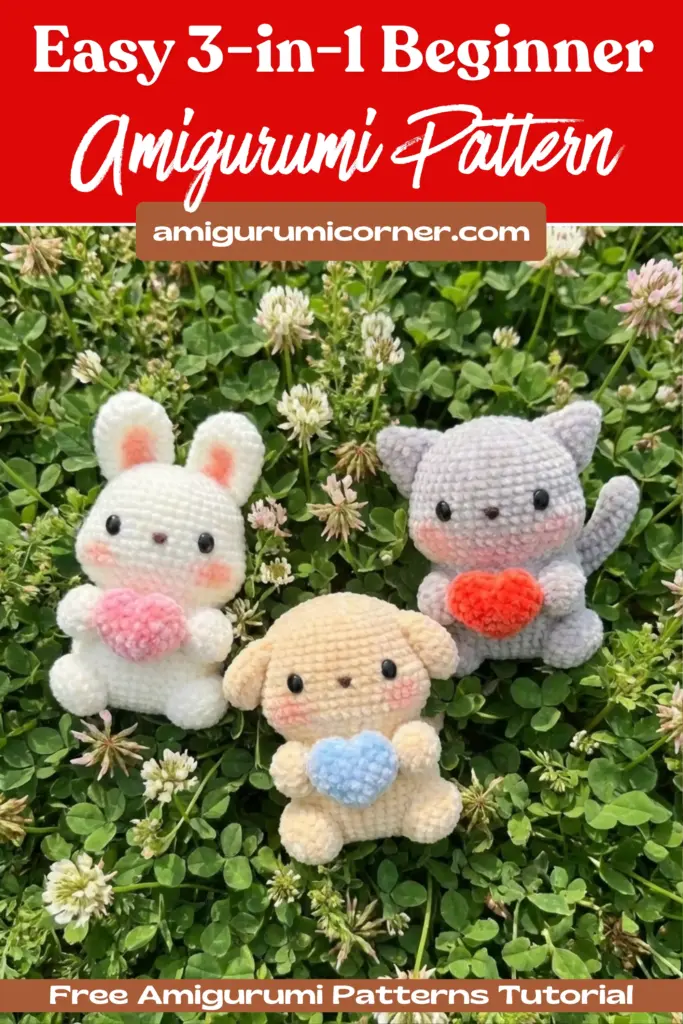
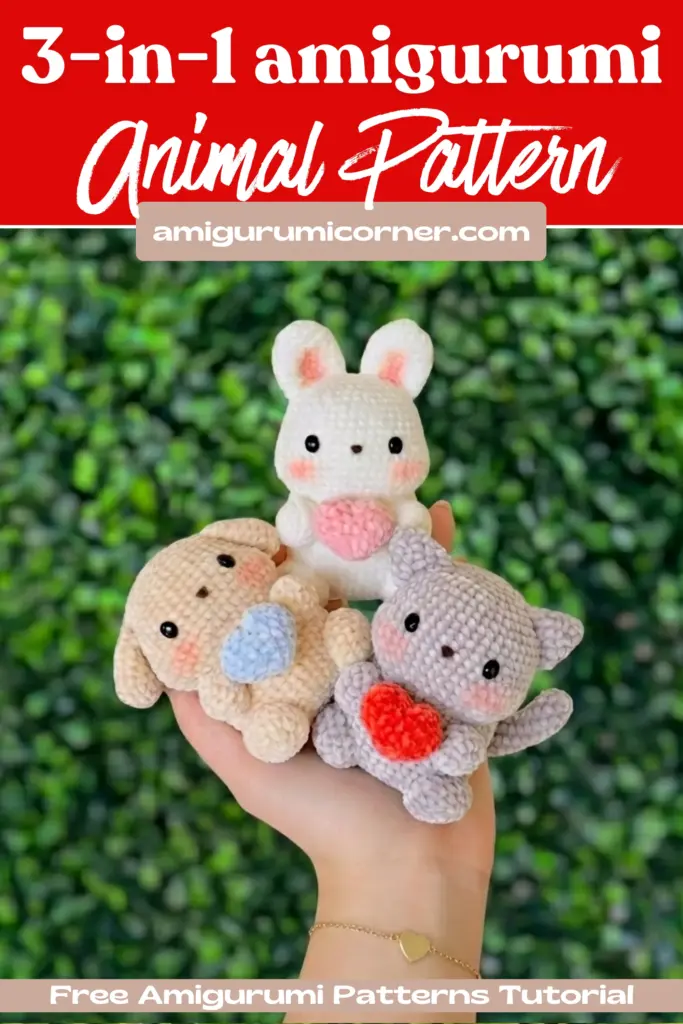
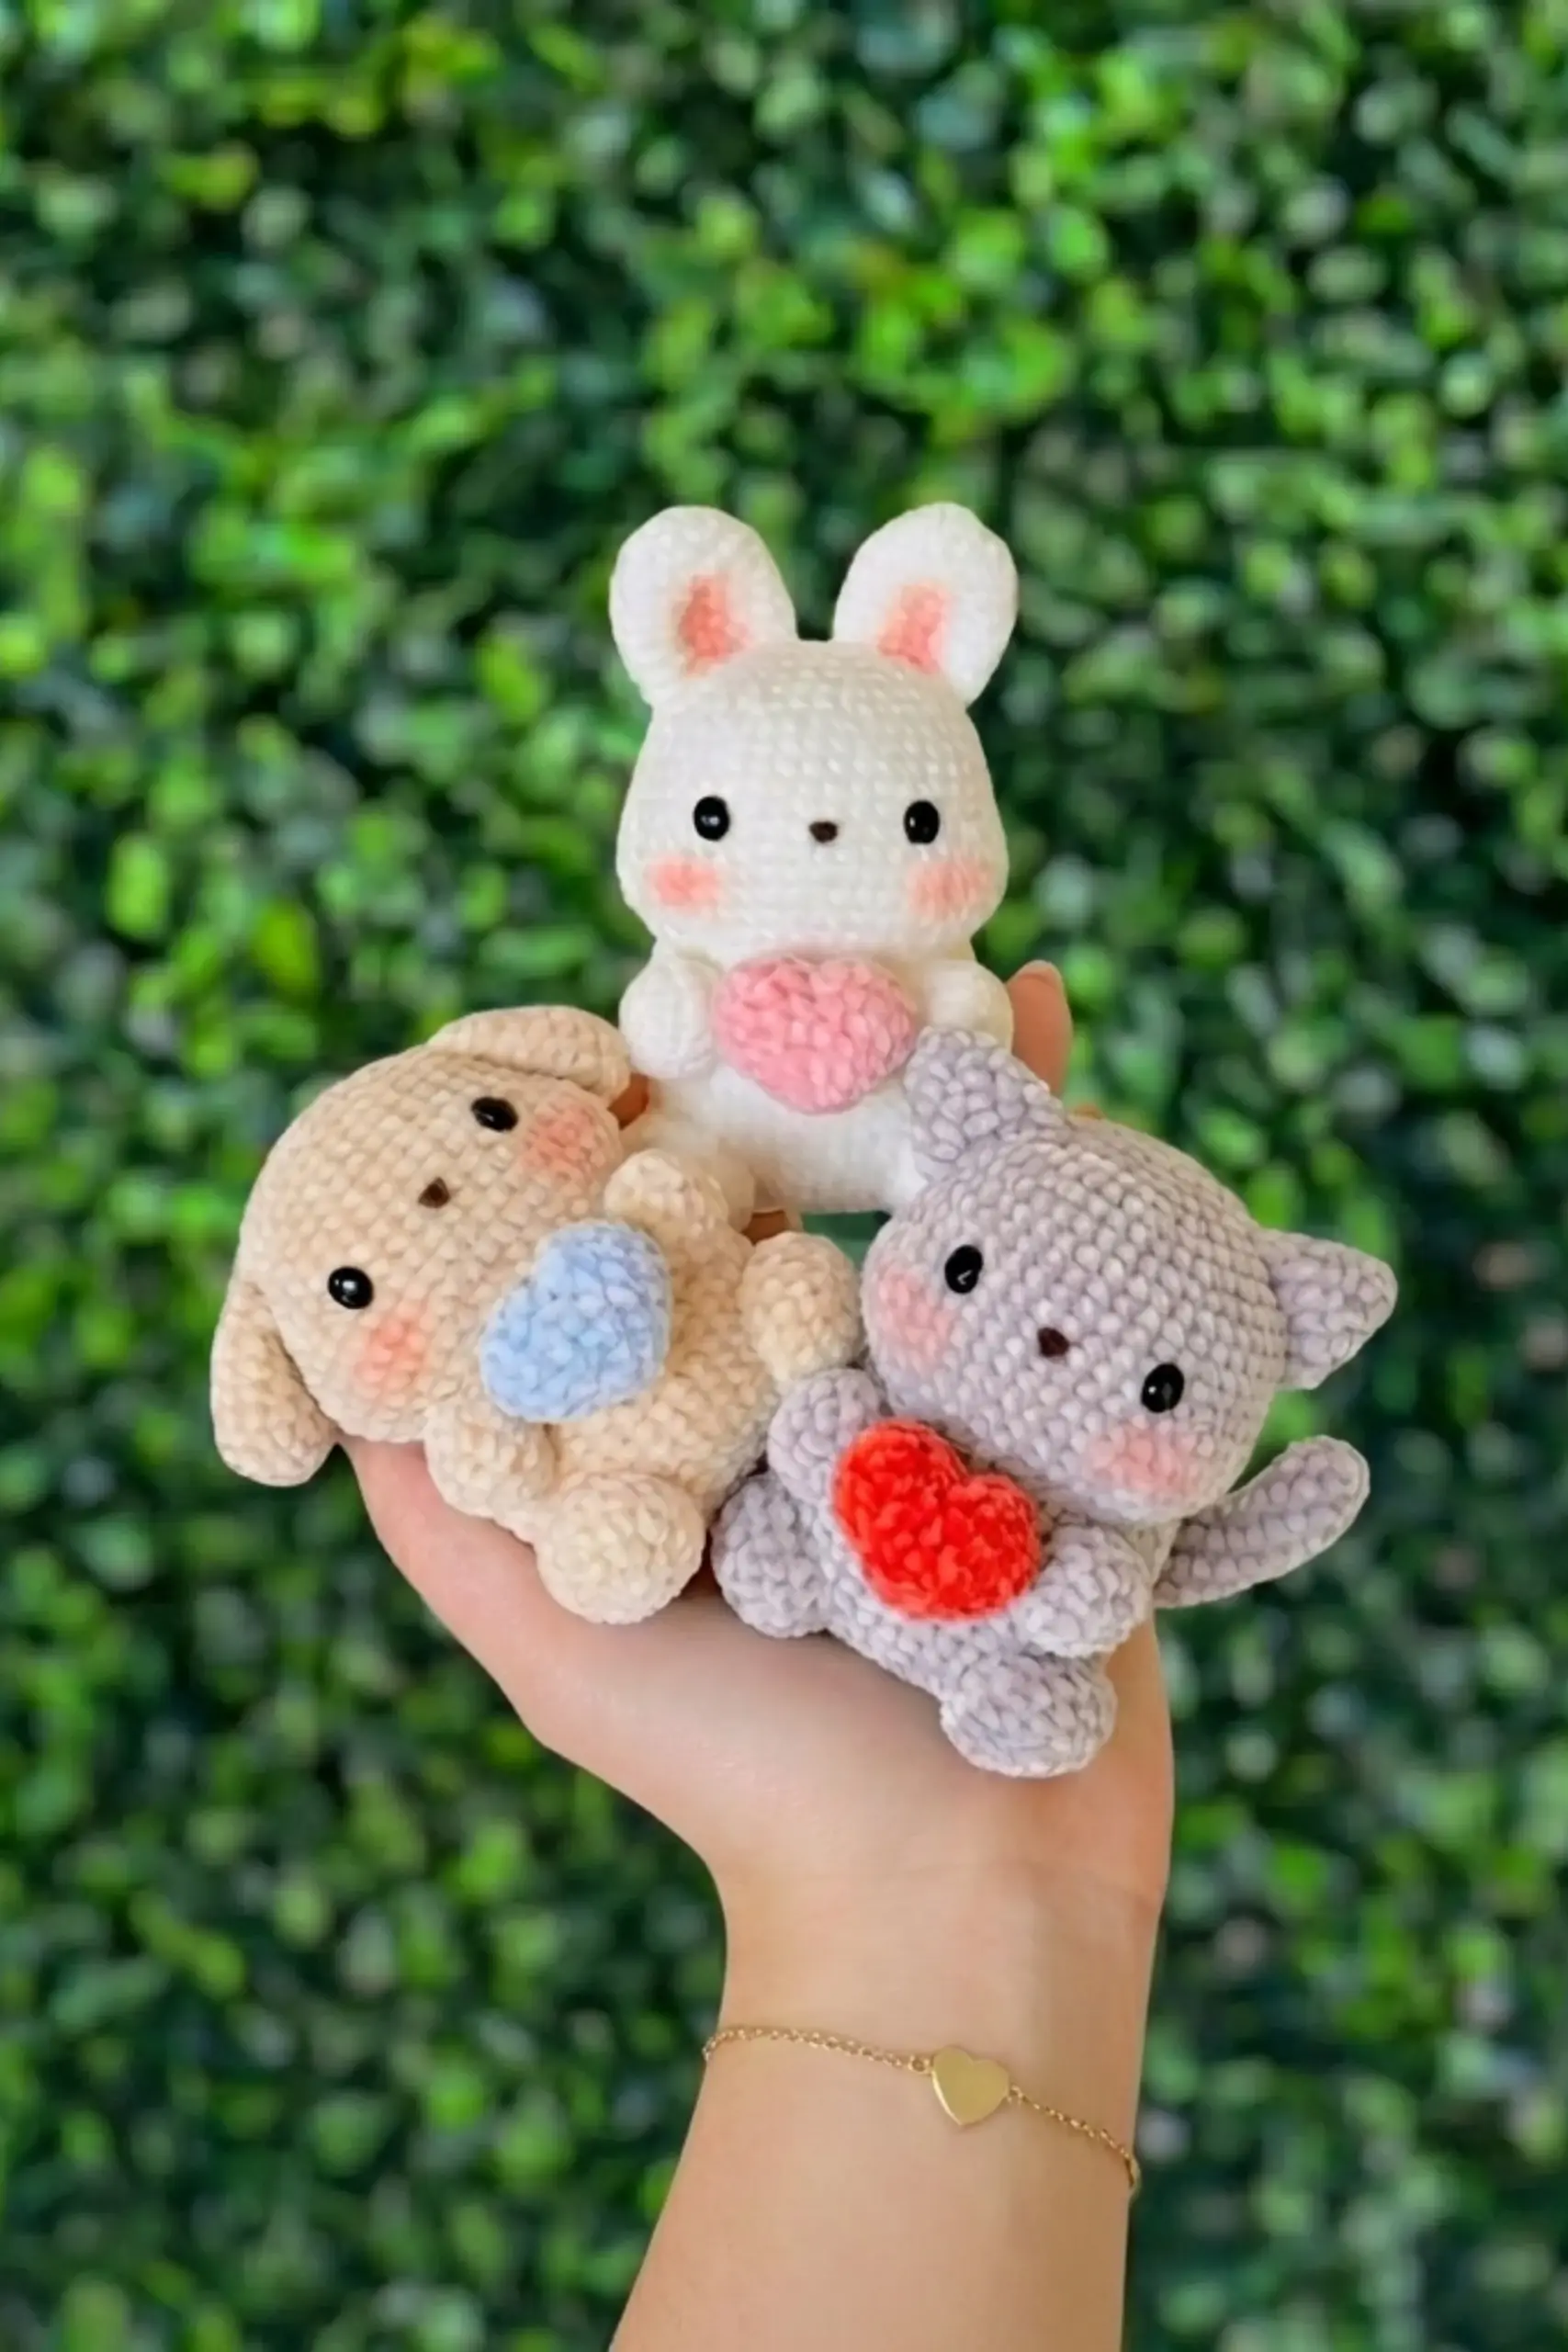
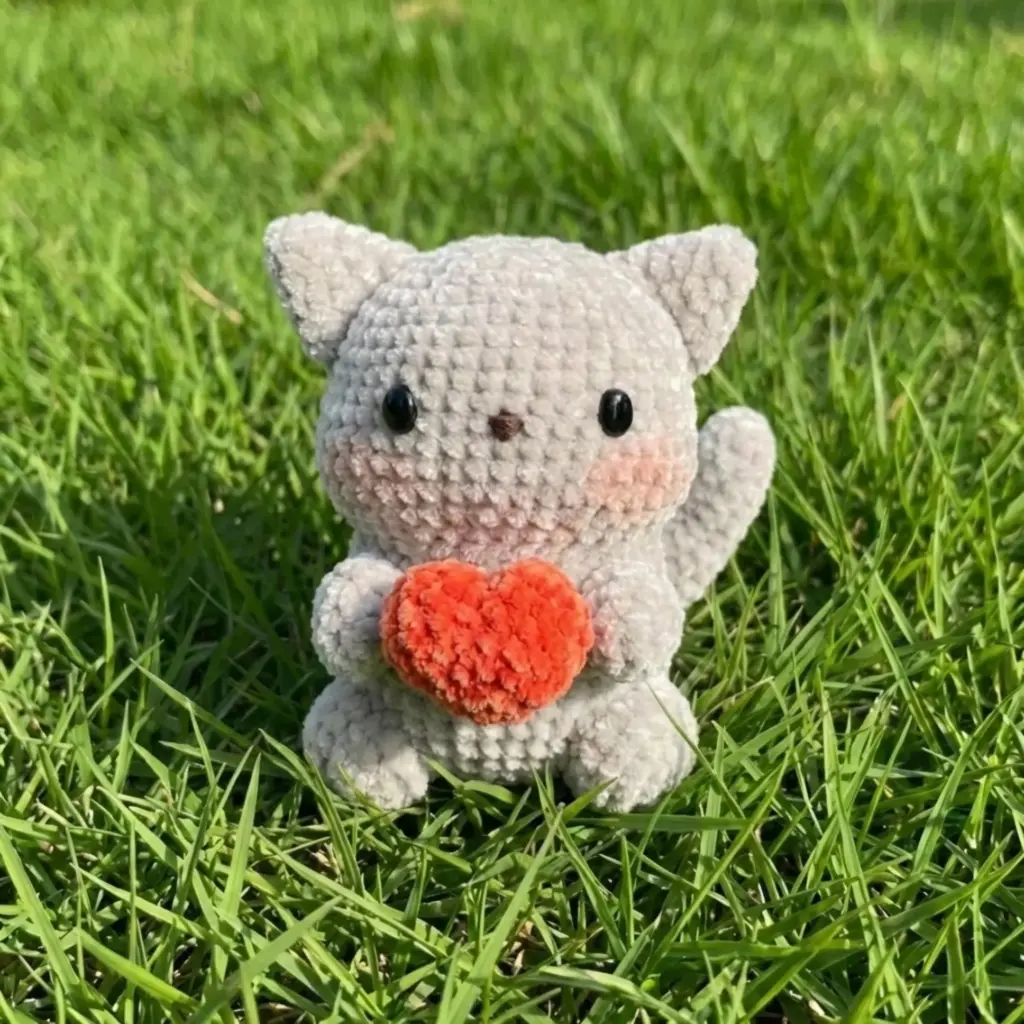
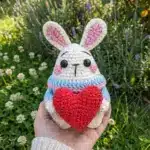
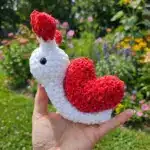
Looking for the perfect beginner-friendly amigurumi project that’s both versatile and heartwarming? This charming 3-in-1 animal pattern lets you create an adorable cat, dog, or rabbit—each holding a sweet little heart. Perfect for gifts, nursery decor, or simply adding to your growing amigurumi collection, these cuddly companions measure approximately 7.5-9 cm tall and 5.5 cm wide when made with the recommended materials.
What makes this pattern truly special is its versatility. By following the same basic body and head instructions, then customizing the ears and tail, you can create three completely different animals from one pattern. Whether you choose the playful rabbit, loyal dog, or curious cat, each little friend comes complete with a heart to hold—making them perfect for Valentine’s Day, baby showers, or just because!
Deisgned by depoteto.crochet
Pattern Overview
This pattern is written in US terminology and worked in continuous rounds (do not slip stitch and chain 1 at the end of each round) unless otherwise stated. I used the yarn under and yarn over method to crochet, as this will make your stitches tighter and neater.
Skill Level: Beginner – Intermediate
Finished Size: About 7.5 cm – 9 cm tall and 5.5 cm wide (when using recommended materials)

Materials Needed
- Velvet Yarn Size 3 (DK) in White/Cream/Grey (for main body)
- Velvet Yarn Size 3 (DK) in Pink/Blue/Red (for heart)
- 2.50 mm crochet hook
- Safety Eyes (6x5mm)
- Felt pieces (Dark Brown) for nose
- Eyeshadow/Blush (Pink) for cheeks
- Glue
- Yarn needle
- Stitch markers
- Stuffing
- Sewing Pins
Color Guide:
- Rabbit: White main color
- Dog: Cream main color
- Cat: Grey main color
Abbreviations
- MR – Magic Ring
- ch – Chain
- sc – Single Crochet
- inc – 2sc in the same stitch
- dec – Invisible Decrease
- sk – skip
- st(s) – Stitch(es)
- (…) – Stitch Count
- (…)x# – Repeat instruction within brackets # times
Important Notes
You can use the yarn and materials you are comfortable with and play with the colors too. You only need to make sure you use the corresponding hook size. Please note that different yarn types may have different outcomes with the plushies.
Head Instructions
Use main color (White for Rabbit, Cream for Dog, Grey for Cat)
Ch6, starting from the 2nd ch from the hook
R1: 4sc, inc, working on the other side of the ch, 4sc, inc (12)
R2: (sc, inc)x6 (18)
R3: (sc, inc, sc)x6 (24)
R4: (3sc, inc)x6 (30)
R5: (2sc, inc, 2sc)x6 (36)
R6: (5sc, inc)x6 (42)
R7-R11: 42sc (42) — 5 rounds
R12: 20sc, 4inc, 12sc, 4inc, 2sc (50)
R13-R15: 50sc (50) — 3 rounds
The increases will be the cheeks! Use stitch markers for your safety eyes guide!
Insert safety eyes between R11&R12, 2sts away from the increases, 8sts apart (7 visible stitches). Remove the stitch markers.
R16: (3sc, dec)x10 (40)
R17: (4sc, dec, 4sc)x4 (36)
Stuff the head and cheeks, leave a short tail and fasten off.

Body Instructions
Use main color
Ch8, starting from the 2nd ch from the hook
R1: 6sc, inc, working on the other side of the ch, 6sc, inc (16)
R2: (sc, inc)x8 (24)
R3: (sc, inc, sc)x8 (32)
R4: (3sc, inc)x8 (40)
R5-R15: 40sc (40) — 11 rounds
R16: (4sc, dec, 4sc)x4 (36)
Stuff the body, leave a long tail to sew and fasten off.
Arms (make 2)
Use main color
R1: 6sc in MR (6)
R2: 6inc (12)
R3-R4: 12sc (12) — 2 rounds
Stuff the arms, leave a long tail to sew and fasten off.
Legs (make 2)
Use main color
R1: 6sc in MR (6)
R2: 6inc (12)
R3: sc, 3inc, 3sc, 3inc, 2sc (18)
R4-R5: 18sc (18) — 2 rounds
Stuff the legs, leave a long tail to sew and fasten off.
Cat Ears (make 2)
Use Grey
R1: 4sc in MR (4)
R2: (sc, inc)x2 (6)
R3: (sc, inc, sc)x2 (8)
R4: (3sc, inc)x2 (10)
R5: (2sc, inc, 2sc)x2 (12)
R6: (5sc, inc)x2 (14)
DO NOT stuff the ears, leave a long tail to sew and fasten off. Fold the ears in half and sew them close.
Rabbit/Dog Ears (make 2)
Use White for Rabbit, Cream for Dog
R1: 5sc in MR (5)
R2: 5inc (10)
R3: (sc, inc)x5 (15)
R4-R9: 15sc (15) — 6 rounds
DO NOT stuff the ears, leave a long tail to sew and fasten off. Fold the ears in half and sew them close.
How to sew close:
- Thread in the long tail that you fastened off into your yarn needle
- Pinch/fold it flat
- Sew the single crochets across to close
Cat Tail
Use Grey
R1: 6sc in MR (6)
R2: (sc, inc)x3 (9)
R3-R20: 9sc (9) — 18 rounds
Lightly stuff the tail, leave a long tail to sew and fasten off. Fold the tail in half and sew it close.
(Optional) Insert wire if you want to shape the tail.

Rabbit Tail
Use White
R1: 6sc in MR (6)
R2: 6inc (12)
Lightly stuff the tail if needed, leave a long tail to sew and fasten off.
Dog Tail
Use Cream
R1: 3sc in MR (3)
R2: sc, inc, sc (4)
R3: (inc, sc)x2 (6)
R4: (sc, inc)x3 (9)
R5-R10: 9sc (9) — 6 rounds
Lightly stuff the tail, leave a long tail to sew and fasten off. Fold the tail in half and sew it close.
Heart Instructions
Use Pink/Blue/Red
We will be making 2 heart caps and connecting them to make a heart!
Heart Cap:
R1: 6sc in MR (6)
R2: 6inc (12)
R3: 12sc (12)

Leave a long tail to sew for the first cap, fasten off. Make the second one by repeating R1-R3 and DO NOT fasten off!
We will now connect the 2 caps. Insert your hook into the next st of the first cap where you left!
R4: 9sc, 3sk, continue to the second cap, 3sk, 9sc (18)
With the first cap tail, sew the skipped stitches close
R5: 3sc, dec, 7sc, dec, 4sc (16)
R6: (2sc, dec)x4 (12)
Stuff lightly.
R7: 6dec (6)
Leave a long tail to sew and fasten off. Weave through the front loops & pull tightly to close the hole.
Assembly Instructions
Step 1: Attach Head to Body
Sew the head to the body using the leftover yarn from the body. Make sure to sew them from the left side of the animal. The plush should be on the wider side so adjust it if yours doesn’t start from the left side. Make sure the head and body are straight and start sewing from the connection point.
Step 2: Attach Heart
Sew the heart around R11-R16 of the body. Make sure it is in the middle.
Step 3: Attach Arms
Sew the arms around R11-R16 of the body, beside the heart.
Step 4: Attach Legs
Sew the legs around R4-R8 of the body, parallel to the inner side of the arms. Legs should be sewn horizontally. Inner arms and legs are parallel horizontal to the side. Make sure to position the legs so the animal can sit on a flat surface.
Step 5: Attach Ears
Sew the ears on the head around 5sts away from the eyes!
- Cat: Around R4-R10 on both sides
- Dog: Around R6-R7 on both sides
- Rabbit: Around R1-R6 on both sides, slightly curve the ears and sew
Step 6: Attach Tail
Sew the tail on the back of the body!
- Cat: Around R5-R8 slightly slanted
- Dog: Around R5-R8 slightly slanted
- Rabbit: Around R5-R6
Step 7: Add Nose
Using dark brown felt cut a triangle shape for the nose around 1cm wide and 1cm tall. Glue them on R12 in the center of the eyes, 3sts away.
Step 8: Add Blush
Add blush with pink blush or eyeshadow under the eyes and in the middle of the rabbit’s ears.

Frequently Asked Questions
When using the recommended velvet yarn size 3 (DK) and a 2.50mm hook, your finished animal will measure approximately 7.5-9 cm tall and 5.5 cm wide. The size may vary slightly depending on your tension and the specific yarn brand you use.
Yes, you can use different yarn weights, but be sure to adjust your hook size accordingly. Using a heavier yarn will create a larger plush, while lighter yarn will make a smaller one. Always use a hook size smaller than recommended for your yarn to ensure tight stitches that keep stuffing from showing through.
The cheeks are formed by the increases in Round 12 of the head. When you reach Round 16 and start stuffing, make sure to add extra stuffing specifically in the cheek areas (where you made the 4 increases) to create that adorable puffy look.
Insert safety eyes between Rounds 11 and 12, positioning them 2 stitches away from the increases (cheeks) and 8 stitches apart, with 7 visible stitches between them. Using stitch markers before inserting the eyes helps ensure perfect placement and symmetry.
Congratulations!
Your loving and cuddly plush will always keep you company! Whether you chose to make the sweet rabbit, loyal dog, or curious cat, you now have an adorable handmade friend complete with its own little heart.
These charming amigurumi make wonderful gifts for Valentine’s Day, baby showers, birthdays, or any occasion when you want to show someone you care. They’re also perfect for building your crochet skills—the pattern teaches you foundation techniques while allowing you to create three different animals from the same base pattern.
Don’t forget to share your creations with the crochet community! Take photos of your finished animals from different angles to show off all the cute details. If you encountered any difficulties or have questions about the pattern, feel free to reach out. Happy crocheting, and enjoy making these heartwarming little companions!
Remember it later!
Planning to try this soon? Pin it for a quick find later!